London:
Nationwide:
25,000+
Floors Restored
27 Years Experience
Wood Flooring Association Certified
Easy Guide to Wood Floor Sanding & Polishing | DIY in 5 Steps
Posted on June 30, 2023
Blog
5 Simple Steps to a Beautiful Wood Floor Sanding and Polishing
Having beautiful, polished wood floors can do wonders for the aesthetics of your home. Yet, maintaining the gleam and shine of your wooden floors is not a walk in the park. It requires regular sanding and polishing to keep them looking their best. Fear not, as this blog post will guide you through five simple steps to achieve a beautiful wood floor after sanding and polishing.Introduction
In general, the purpose of sanding and polishing wood floors is to remove the top surface that might have been worn out or damaged and then polish it to have a shiny, like-new finish. It might sound daunting, but with the right tools and steps, you can rejuvenate your wooden floors and bring back their original luster.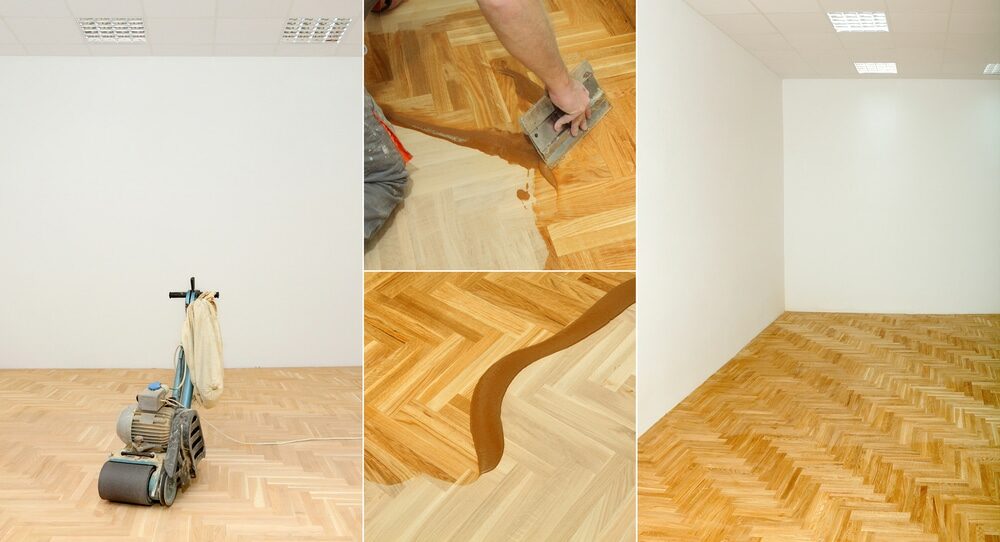
Step 1: Preparation: The Key to Successful Sanding and Polishing
Before you start, you need to prepare the area you’re working on. This includes removing all furniture and rugs, covering any items you can’t move, and thoroughly cleaning the floor to remove any dust or grime.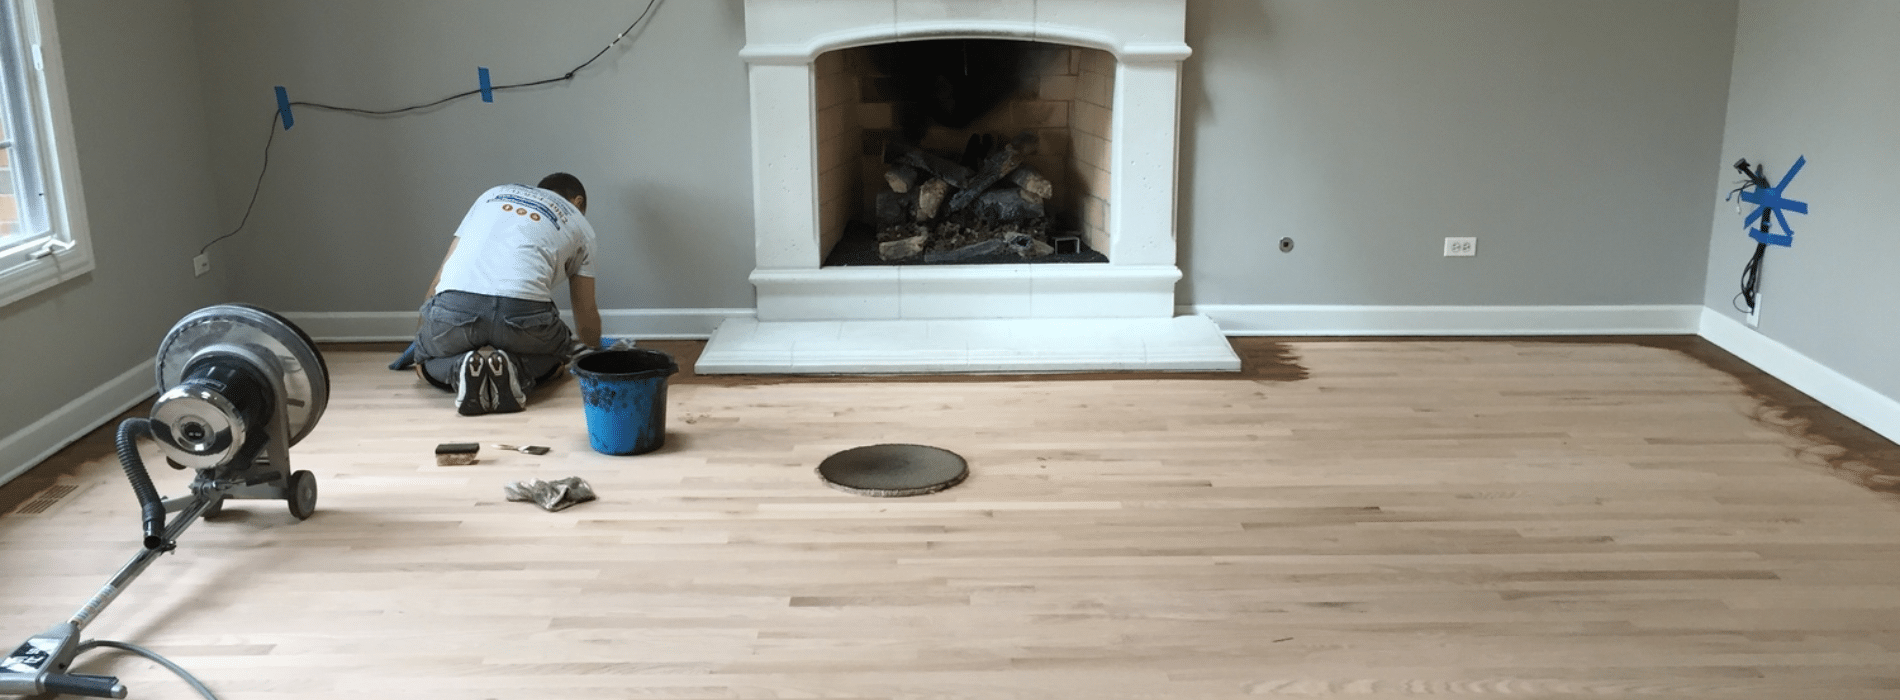
Clear the space.
Remove all the furniture from the room. This ensures that you have an open area to work in without any obstructions. If there are items that are too heavy to move, cover them with a drop cloth to protect them from dust.Clean the floor.
Use a soft broom or vacuum cleaner to remove any dust, dirt, or debris from the floor. Any particles left behind can cause scratches during the sanding process. Also, it’s crucial to check for any nails or screws that might be sticking out, as they can damage your sanding machine.Step 2: Choose the Right Sanding Equipment
The type of sanding machine you choose will depend on the size and condition of your floor. Drum sanders are powerful and excellent for large areas and floors in poor conditions. Orbital sanders are less aggressive and better suited for smaller spaces or floors in good condition.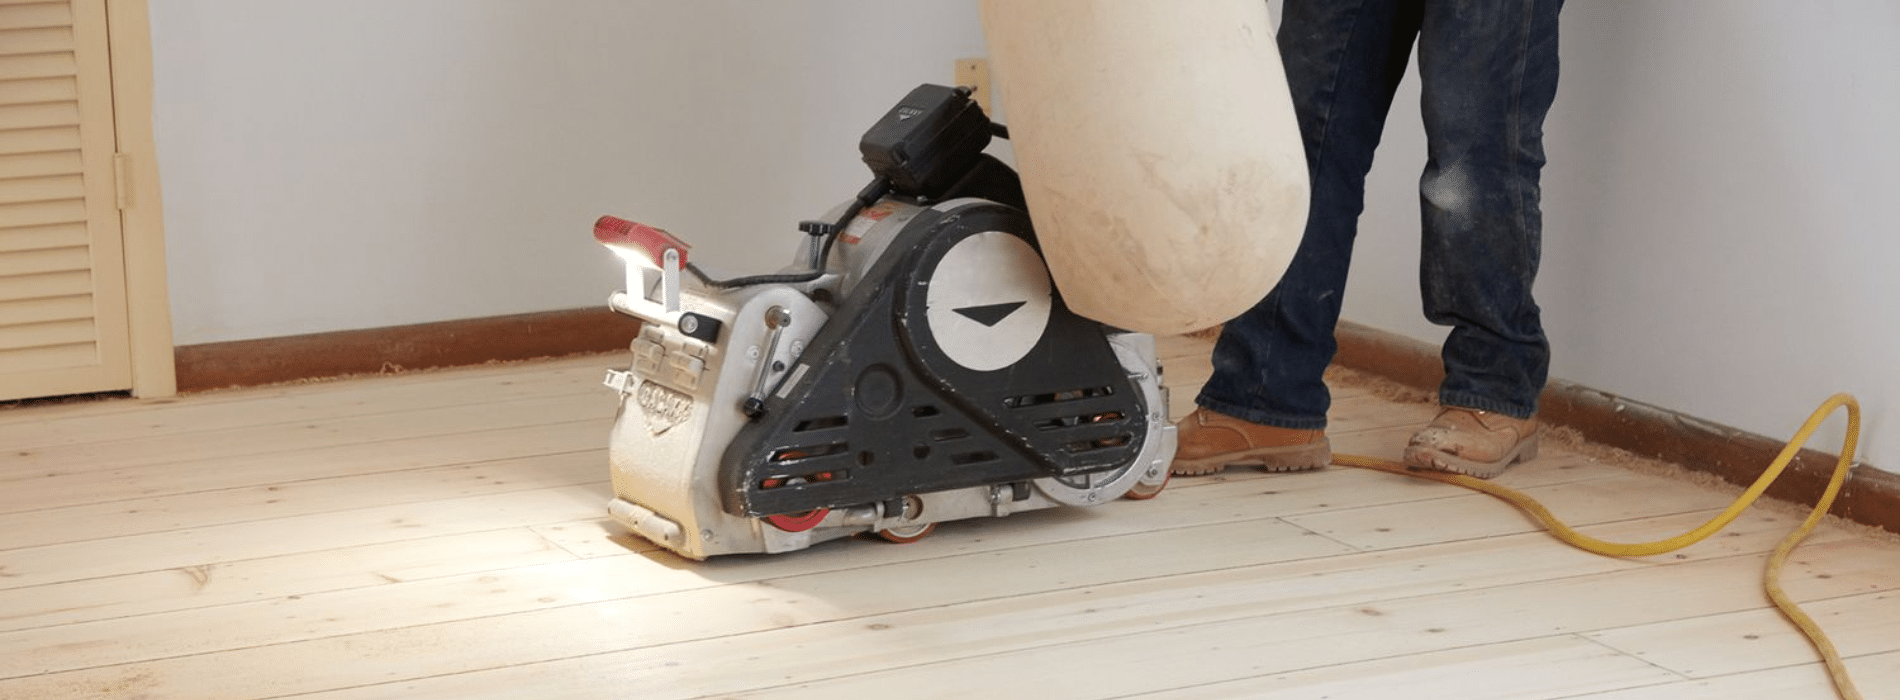
Rent or Buy?
Unless you plan to do frequent sanding, it’s more cost-effective to rent a sanding machine than to buy one. You can find rental options at most home improvement stores.Step 3: Sanding: It’s All About Technique
Sanding is a methodical process that takes time. Don’t rush it. Start with coarse-grit sandpaper to remove the old finish and scratches, then gradually work your way to a finer grit to smooth the surface.Sanding Direction
Always sand along the grain of the wood, not against it. This will reduce the risk of causing damage to your floors and will result in a smoother finish.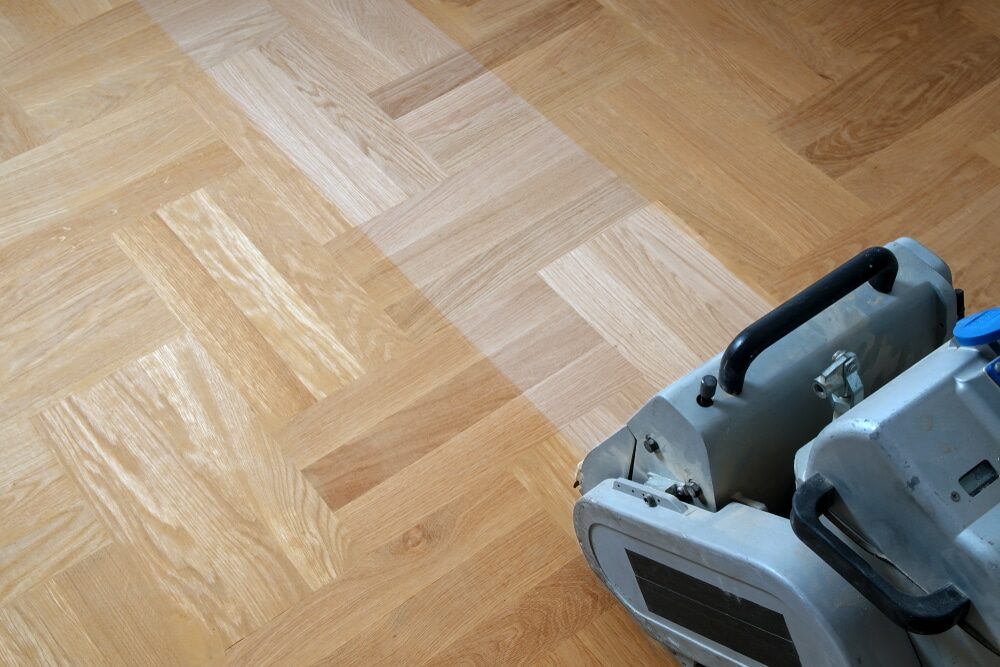
Multiple Sanding Passes
Remember to make multiple passes with the sanding machine. Start with a coarse grit, like 40-grit sandpaper, for the initial pass. Then, switch to a medium grit, like 80-grit, for the second pass. Finally, make a third pass with a fine grit, such as 120-grit sandpaper, to smooth out the floor.Step 4: Clean Up and Prepare for Polishing
After sanding, your floor will be covered in dust. It’s critical to clean this up before moving on to the polishing stage, as any remaining dust can ruin the finish.Vacuum Thoroughly
Use a vacuum cleaner to remove the majority of the dust. Then, wipe the floor with a damp cloth or mop to pick up any remaining particles.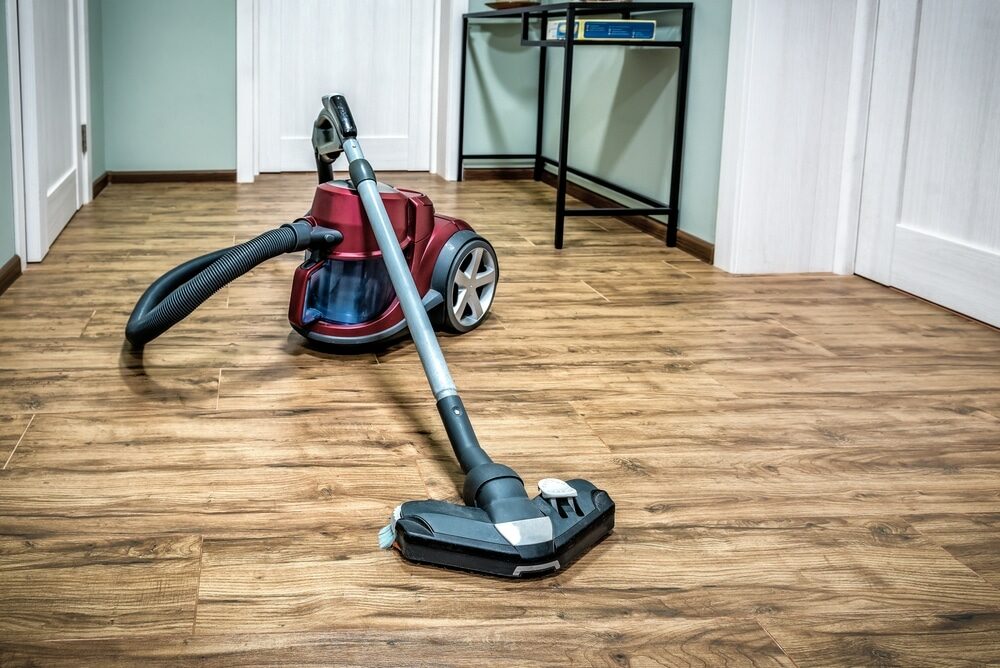
Allow the Floor to dry.
Before moving on to polishing, make sure the floor is completely dry. If the floor is damp, it can cause the polish to bubble and not adhere properly.Step 5: Polishing: Bring Out the Shine
Polishing your wood floor gives it a glossy, protective finish that enhances its natural beauty. It’s the final step in your wood floor restoration process, and it’s what gives your floors that ‘wow’ factor.Choose Your Polish
There are many types of floor polish available on the market. Some are specifically designed for certain types of wood, so make sure you choose the right one for your floors.Apply the polish.
Use a floor buffer or polish applicator to apply the polish in a thin, even layer. Start in one corner of the room and work your way towards the exit, so you don’t walk on the freshly polished floor.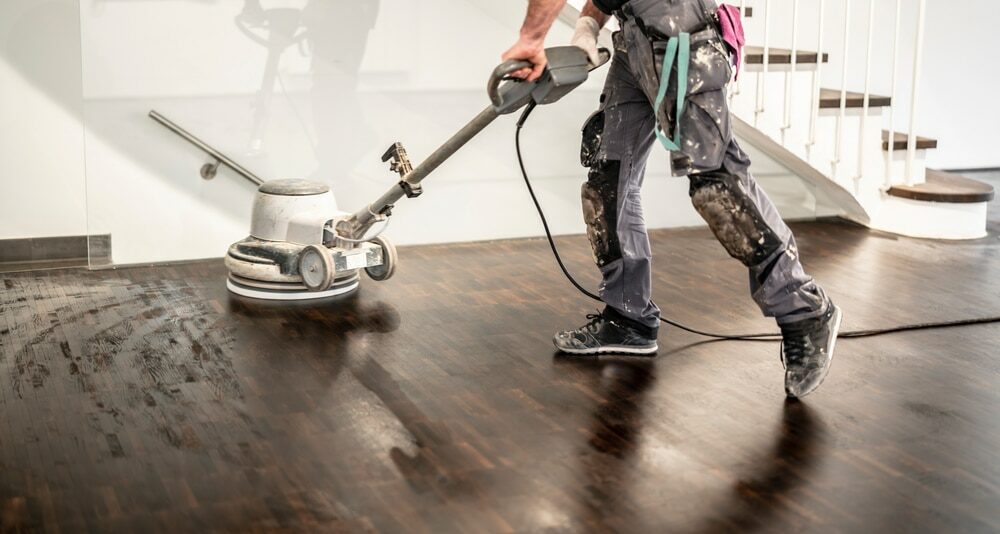
Let the Polish dry.
Allow the polish to dry for at least 24 hours before walking on the floor. This gives it time to harden and provide a durable finish.Conclusion
Sanding and polishing your wood floors might require some effort, but the results are worth it. Your floors will look shiny and new, adding beauty and value to your home. With the right equipment and these five simple steps, you can take your wood floors from dull and lifeless to stunning and vibrant. Remember that regular maintenance is key to keeping your wood floors in top condition. Keep them clean, avoid wearing shoes with sharp heels, and consider using rugs in high-traffic areas to protect the wood. With proper care, your polished wood floors can last a lifetime. You don’t have to be an expert to sand and polish your wooden floors; all you need is a little patience and the willingness to learn. Happy sanding and polishing!Some Useful Links:
- Floor Sanding Services
- School Floor Sanding
- Wood Floor Restorations
- Wood Floor Repairs
- Wood Floor Polishing
More from our Blog:
Understanding the Risks Involved in Sanding Floorboards Top Reasons to Use Bona Traffic for Your High-Traffic Wooden Floors Top 10 Questions About Wood Floor Sanding Answered Repair Parquet Flooring in Your London Home By Hiring Mr Sander® Company Successfully Renovate Any Type of Wood Flooring in the Home

Sanding
We provide virtually dust-free sanding with our continuous belt machinery with mobile extraction units, giving you a safer environment for your family.
Oiling
This organic finish not only adds beauty to your home but also has exceptional water-repellent characteristics, making it easier to clean and maintain.
Waxing
This natural floor finish offers the softest and most mellow appearance – and leaves your floor able to breath.
Buffing
Using soft buffing machines (and hand-polishing where required) will bring a wonderful sheen to your newly-finished floor.
Repairs
We offer a full assessment of your wooden floors to determine what repairs are needed to provide the perfect working surface for the later stages of sanding, staining and sealing.
Restoration
We offer a comprehensive restoration process designed to address floors that are improperly fitted or damaged over time through wear and tear.
Request a fixed price quote for your wood floor restoration now
Simply enter your postcode below to get started.
Services
Wood Floor Sanding Wood Floor Restoration Wood Floor Scratch Repair Squeaky Wood Floor Repair Parquet Floor Sanding Parquet Floor Restoration Commercial Floor Sanding Church Floor Sanding Community Centre Floor Sanding School Floor Sanding Gap Filling Gap Filling with ResinCopyright © Mr Sander®
Privacy & Cookies Terms & Conditions Complaints Procedure Cancellation Rights Sitemap

Get An Instant Price Estimate Before You Go…
Simply enter the rooms you need sanded and we’ll provide you with a price estimate instantly! Try our price calculator now.
Get a Price Estimate NowLocal Floor Sanding Experts
Over 500 5-Star Reviews
Safe, Dust Free Sanding
Operating Since 1994