London:
Nationwide:
25,000+
Floors Restored
27 Years Experience
Wood Flooring Association Certified
Helpful Floor Sanding Hints
Posted on April 12, 2023
Blog
Wooden floor sanding is an essential step in refinishing and restoring hardwood floors. Proper sanding techniques can make all the difference in achieving a smooth, even surface that’s ready for staining or sealing. In this comprehensive guide, we’ll explore helpful wooden floor sanding hints and best practices to help you achieve professional-quality results, whether you’re tackling a DIY project or simply seeking a better understanding of the process.
Floor sanding is a critical step in refinishing and restoring hardwood floors. By removing the existing finish, smoothing out imperfections, and creating a uniform surface, sanding prepares your floors for the application of stain or sealant. Proper sanding techniques can help prevent scratches, gouges, and uneven spots, ensuring a professional-quality result that lasts for years to come.
1. Tools and Equipment for Floor Sanding
Before you begin sanding your wooden floors, it’s essential to have the right tools and equipment on hand. Some of the most commonly used tools for floor sanding include:
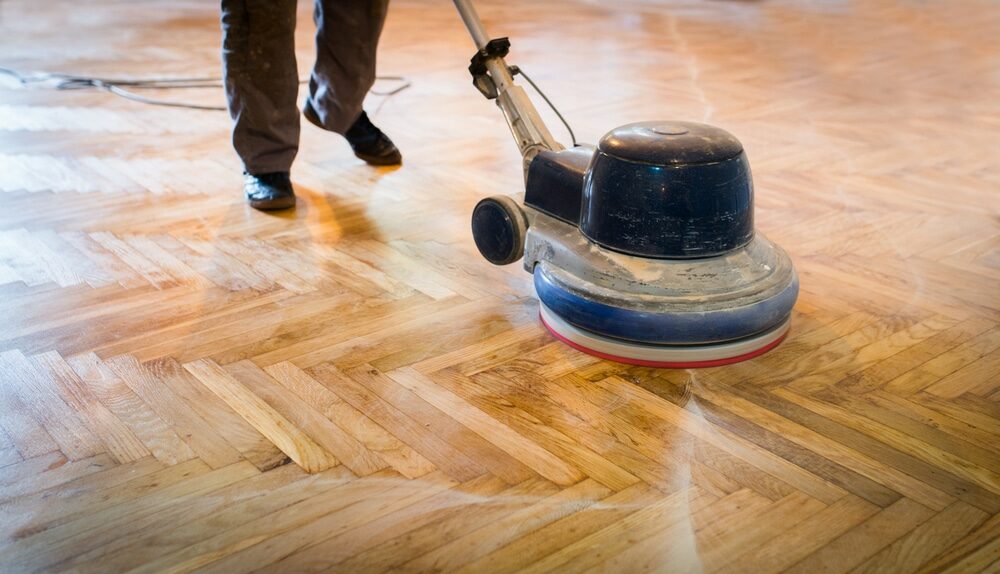
- Drum sander: A drum sander is a powerful machine that uses a large, rotating drum covered in sandpaper to remove the existing finish and smooth the wood’s surface. Drum sanders are ideal for large areas and are available for rent at most home improvement stores.
- Orbital sander: An orbital sander is a smaller, more manoeuvrable machine that uses a vibrating motion to sand the wood’s surface. Orbital sanders are less aggressive than drum sanders, making them suitable for detail work and smaller areas.
- Edge sander: An edge sander is a handheld tool designed for sanding the edges and corners of a room where larger machines can’t reach. These sanders are also useful for detail work and spot sanding.
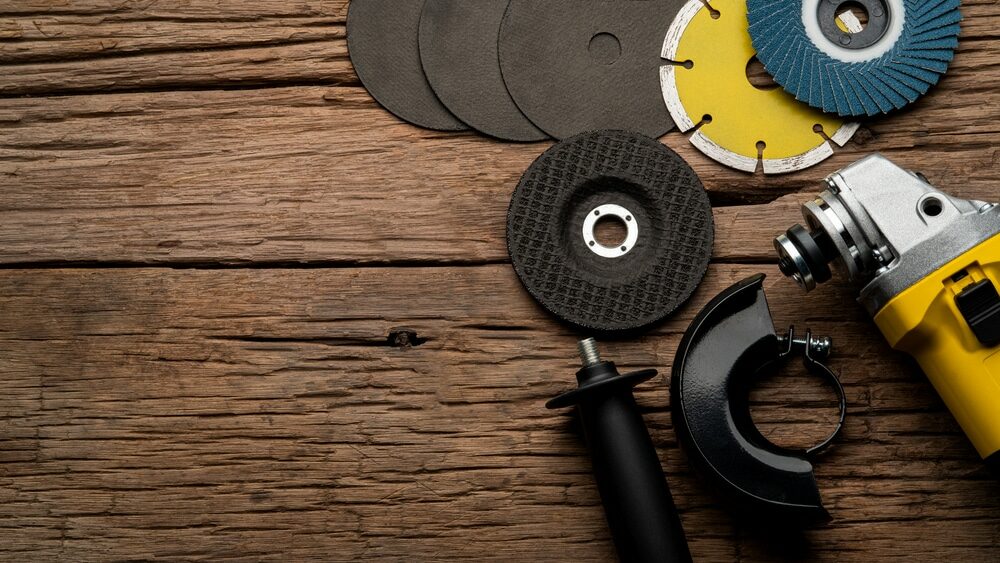
- Sandpaper: Sandpaper is available in various grits, with lower numbers indicating a coarser grit and higher numbers representing finer grits. You’ll need multiple grits of sandpaper for a floor sanding project, starting with a coarse grit to remove the existing finish and working your way up to a finer grit for a smooth, even surface.
2. Preparing Your Floors for Sanding
Before you begin sanding your wooden floors, it’s crucial to prepare the space to ensure a successful outcome. Follow these steps to get your floors ready for sanding:
- Remove all furniture and personal items from the room.
- Clean the floor thoroughly, using a vacuum or broom to remove any dust, dirt, and debris.
- Inspect the floor for any damage, such as loose or damaged boards, and make necessary repairs.
- Secure any loose floorboards, and countersink any protruding nails or screws.
3. Understanding the Sanding Process
Floor sanding is a multi-step process that involves gradually removing the existing finish and smoothing the wood’s surface. The general process consists of the following steps:
- Begin with a coarse grit sandpaper to remove the existing finish and level the floor.
- Progress to a medium grit sandpaper to further smooth the surface and remove any remaining imperfections.
- Finish with a fine grit sandpaper to create a smooth, even surface that’s ready for staining orsealing.If necessary, use an edge sander or orbital sander for detail work and hard-to-reach areas.
By following this progression and paying close attention to detail, you can achieve professional-quality results that will leave your floors looking beautiful and revitalised.
4. Selecting the Right Sandpaper Grit
Choosing the right sandpaper grit is essential for achieving a smooth, even finish. As a general guideline, follow this progression of sandpaper grits for a typical floor sanding project:
- Start with a coarse grit (36 or 40 grit) to remove the existing finish and level the floor.
- Move on to a medium grit (60 or 80 grit) to further smooth the surface and remove any remaining imperfections.
- Finish with a fine grit (100 or 120 grit) to create a smooth, even surface that’s ready for staining or sealing.
Remember that the specific grits required may vary depending on the type and condition of your wood floors, so be prepared to make adjustments as needed.
5. Sanding Techniques for Different Types of Wood Floors
Different types of wood floors may require slightly different sanding techniques. Here are some helpful hints for sanding various wood floor types:
- Solid hardwood floors: For solid hardwood floors, sand with the grain, starting with a coarse grit and working your way up to a fine grit. Be sure to overlap your passes slightly to ensure an even finish.
- Engineered wood floors: Because engineered wood floors have a thin veneer of real wood over a plywood base, it’s crucial to use a light touch when sanding to avoid sanding through the veneer. Use a finer-grit sandpaper and avoid using a drum sander if possible, opting for an orbital sander instead.
- Parquet floors: Parquet floors consist of wood pieces arranged in a geometric pattern, which means the wood grain runs in multiple directions. When sanding parquet floors, use an orbital sander and sand at a 45-degree angle to the grain to prevent cross-grain scratches.
6. Managing Dust and Debris
Sanding wood floors can generate a significant amount of dust and debris. To protect your home and maintain a clean work environment, follow these tips for managing dust during the sanding process:
- Seal off the work area by closing doors and using plastic sheeting and tape to cover any openings, such as vents or doorways.
- Wear a dust mask and protective eyewear to protect yourself from airborne particles.
- Use a vacuum or dust-collection system to remove dust from the work area as you sand.
- Clean up dust and debris regularly to maintain a clean work environment and prevent any particles from being ground into the wood’s surface.
7. Addressing Common Sanding Challenges
During the sanding process, you may encounter some common challenges. Here are some helpful hints for addressing these issues:
- Uneven sanding: If your floors are not sanded evenly, you may need to adjust your technique or equipment. Make sure to overlap your passes slightly and maintain a steady, even pressure when using the sander.
- Scratches and gouges: If you notice scratches or gouges in your floors, you may need to use a finer grit sandpaper or switch to an orbital sander for a smoother finish.
- Inaccessible areas: For corners and other hard-to-reach areas, use an edge sander or orbital sander to ensure a consistent finish throughout the room.
8. Post-sanding cleanup and inspection
Once you’ve completed the sanding process, it’s essential to thoroughly clean your floors and inspect your work. Vacuum or sweep up any remaining dust and debris, and use a tack cloth or damp cloth to remove any fine dust particles from the wood’s surface. Inspect the floors for any missed .
or other imperfections that may require additional sanding or touch-ups. During your inspection, pay close attention to the following:
- Ensure that the floor’s surface is smooth and even, with no visible scratches or gouges.
- Check for any missed spots where the old finish remains or where the wood has not been sanded evenly.
- Inspect the edges and corners of the room for consistency with the rest of the floor.
If you find any issues, address them before moving on to the next step in the refinishing process, such as staining or sealing your floors.
Some Useful Links:
Final Thoughts
Wooden floor sanding is a crucial step in refinishing and restoring hardwood floors. By following these helpful hints and best practises, you can achieve professional-quality results that will leave your floors looking beautiful and revitalised. Whether you’re a DIY enthusiast or simply seeking a better understanding of the process, investing time and effort in proper floor sanding techniques will pay off in the long run by extending the life of your wood floors and enhancing the overall appearance of your home. With patience, attention to detail, and the right tools and equipment, you can master the art of wooden floor sanding and enjoy the satisfaction of a job well done.
More from our Blog:
Enhance Your Floor’s Shine: Expert Tips
How to Remove Stains and Marks from Wooden Floors ?
Prep for Wooden Floor Sanding: Envision Your Ideal Floor & Its Role in Your Home


Sanding
We provide virtually dust-free sanding with our continuous belt machinery with mobile extraction units, giving you a safer environment for your family.
Oiling
This organic finish not only adds beauty to your home but also has exceptional water-repellent characteristics, making it easier to clean and maintain.
Waxing
This natural floor finish offers the softest and most mellow appearance – and leaves your floor able to breath.
Buffing
Using soft buffing machines (and hand-polishing where required) will bring a wonderful sheen to your newly-finished floor.
Repairs
We offer a full assessment of your wooden floors to determine what repairs are needed to provide the perfect working surface for the later stages of sanding, staining and sealing.
Restoration
We offer a comprehensive restoration process designed to address floors that are improperly fitted or damaged over time through wear and tear.
Request a fixed price quote for your wood floor restoration now
Simply enter your postcode below to get started.
Services
Wood Floor Sanding Wood Floor Restoration Wood Floor Scratch Repair Squeaky Wood Floor Repair Parquet Floor Sanding Parquet Floor Restoration Commercial Floor Sanding Church Floor Sanding Community Centre Floor Sanding School Floor Sanding Gap Filling Gap Filling with ResinCopyright © Mr Sander®
Privacy & Cookies Terms & Conditions Complaints Procedure Cancellation Rights Sitemap

Get An Instant Price Estimate Before You Go…
Simply enter the rooms you need sanded and we’ll provide you with a price estimate instantly! Try our price calculator now.
Get a Price Estimate NowLocal Floor Sanding Experts
Over 500 5-Star Reviews
Safe, Dust Free Sanding
Operating Since 1994