London:
Nationwide:
25,000+
Floors Restored
27 Years Experience
Wood Flooring Association Certified
How Easy Is To Repair A Hardwood Floor? The Experts Guide
Posted on May 7, 2023
Blog
The Ultimate Guide to DIY Hardwood Floor Repair: Techniques, Tools, and Tips
Hardwood floors are a popular choice for homeowners due to their durability, timeless beauty, and the value they add to a property. However, like any other flooring material, hardwood floors can suffer from wear and tear, scratches, dents, and water damage over time. As a homeowner or DIY enthusiast, you may be wondering how easy it is to repair a hardwood floor yourself. In this comprehensive 3000-word guide, we will explore the process of repairing hardwood floors, the tools required, and various techniques to restore your floor to its former glory.
-
Assessing the damage
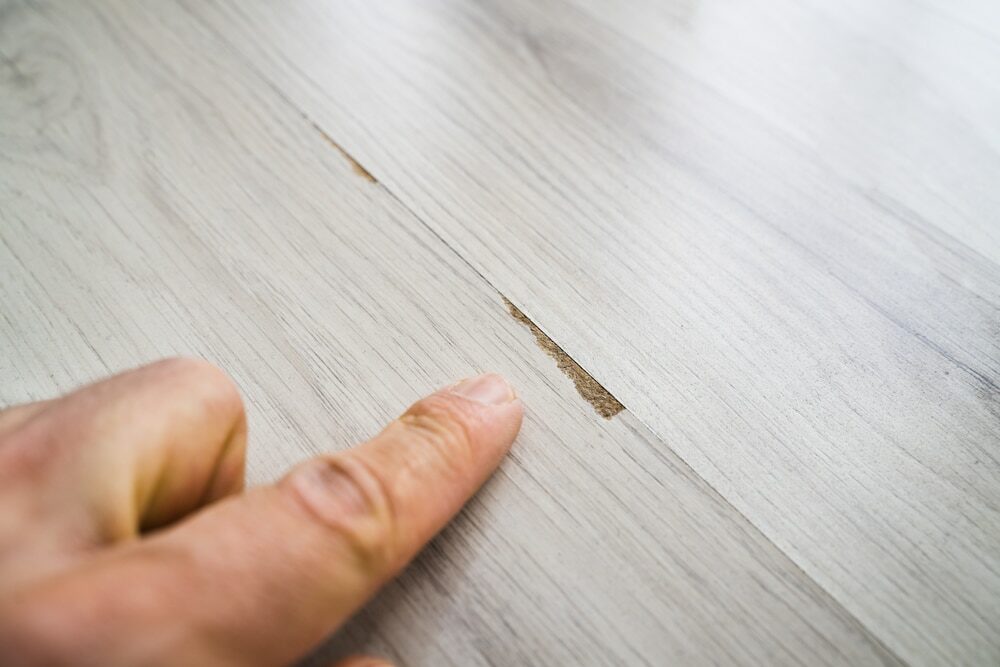
Before you begin, it’s essential to assess the extent of the damage to your hardwood floor. This will determine the best repair method and the tools you’ll need. Here are some common types of hardwood floor damage and their respective repair methods:
- Scratches and scuffs: Minor scratches can often be fixed using simple techniques like buffing, sanding, and refinishing.
- Dents and gouges: These may require more advanced methods, such as wood filler, patching, or even replacing individual boards.
- Warping and buckling: This can be caused by water damage or changes in humidity and may necessitate professional help for proper repair.
- Discoloration and fading: Refinishing and re-staining the floor can help restore the original colour and lustre.
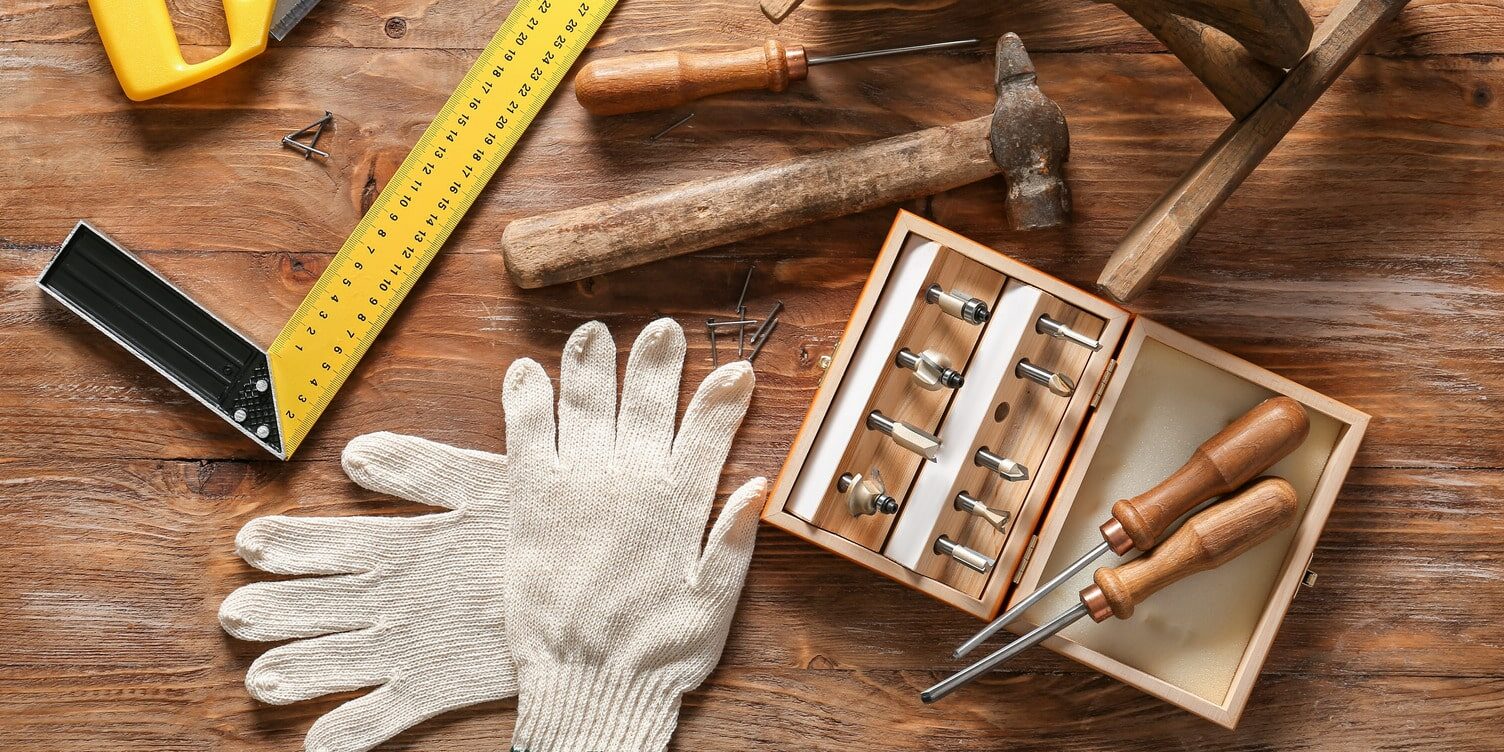
- Tools and Materials
To repair your hardwood floor, you’ll need some essential tools and materials. Here’s a list of the most common items you’ll need for various repair methods:
- Sandpaper (various grits)
- Orbital sander or hand sander
- Wood filler or wood putty
- Putty knife
- Wood stain or paint (to match the existing floor colour)
- Paintbrush or foam applicator
- Polyurethane finish
- Clean, lint-free cloths
- Safety goggles and a dust mask
- Pry bar (for board replacement)
- Hammer and nails (for board replacement)
- Utility knife (for board replacement)
- Wood glue (for board replacement)
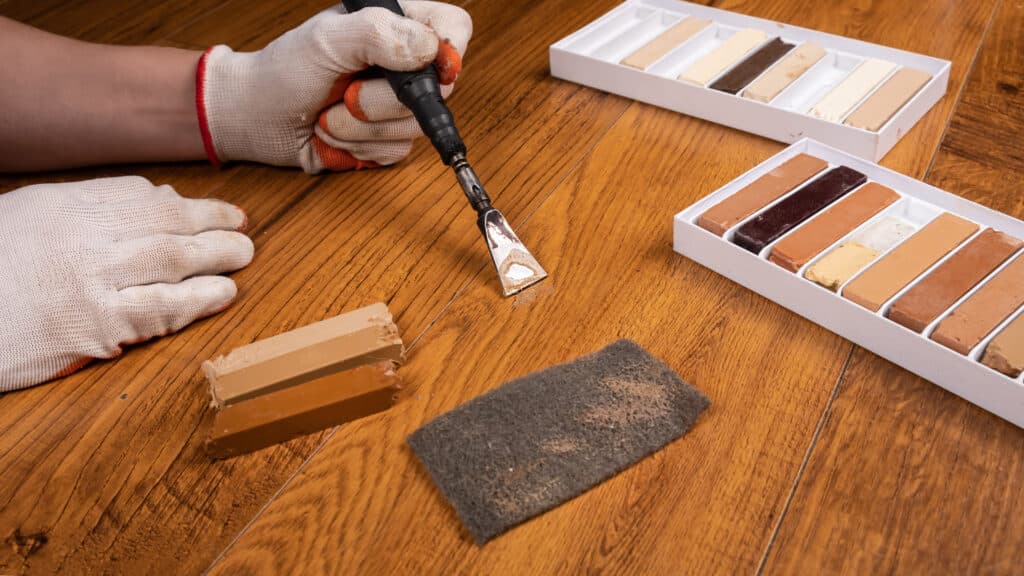
- Repairing scratches and scuffs
Minor scratches and scuffs can be fixed using a few simple techniques. Here’s a step-by-step guide on how to repair these blemishes:
Step 1: Clean the area. Ensure the area is free from dust and debris by vacuuming or sweeping.
Step 2: Sand the scratch. Using a fine-grit sandpaper (180–220 grit), sand the area gently to remove the scratch. Be sure to sand in the direction of the wood grain.
Step 3: Clean the sanded area. Wipe the area with a damp cloth to remove any dust.
Step 4: Apply wood stain. Using a small paintbrush or foam applicator, apply the wood stain that matches the existing floor colour. Allow the stain to dry according to the manufacturer’s instructions.
Step 5: Apply polyurethane finish. Apply a thin layer of polyurethane finish over the stained area using a clean, lint-free cloth. Allow the finish to dry, then apply additional coats as needed.
- Repairing Dents and Gouges
Dents and gouges in hardwood floors can be fixed using wood filler or wood putty. Follow these steps to repair deeper blemishes:
Step 1: Clean the area. Ensure the area is free from dust and debris by vacuuming or sweeping.
Step 2: Apply wood filler. Using a putty knife, apply wood filler or putty to the dent or gouge. Press the filler firmly into the damaged area, and then smooth the surface using the putty knife. Allow the filler to dry according to the manufacturer’s instructions.
Step 3: Sand the area. Once the filler has dried, sand the area with fine-grit sandpaper (180–220 grit) to achieve a smooth, level surface. Be sure to sand in the direction of the wood grain.
Step 4: Clean the sanded area. Wipe the area with a damp cloth to remove any dust.
Step 5: Apply wood stain. Using a small paintbrush or foam applicator, apply the wood stain that matches the existing floor colour. Allow the stain to dry according to the manufacturer’s instructions.
Step 6: Apply polyurethane finish. Apply a thin layer of polyurethane finish over the stained area using a clean, lint-free cloth. Allow the finish to dry, then apply additional coats as needed.
-
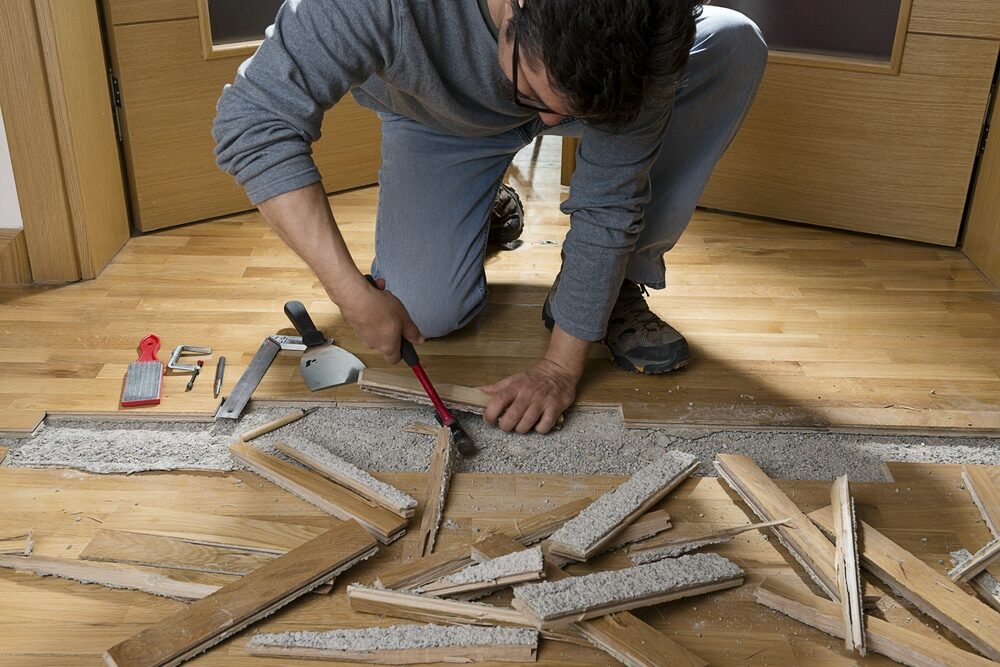
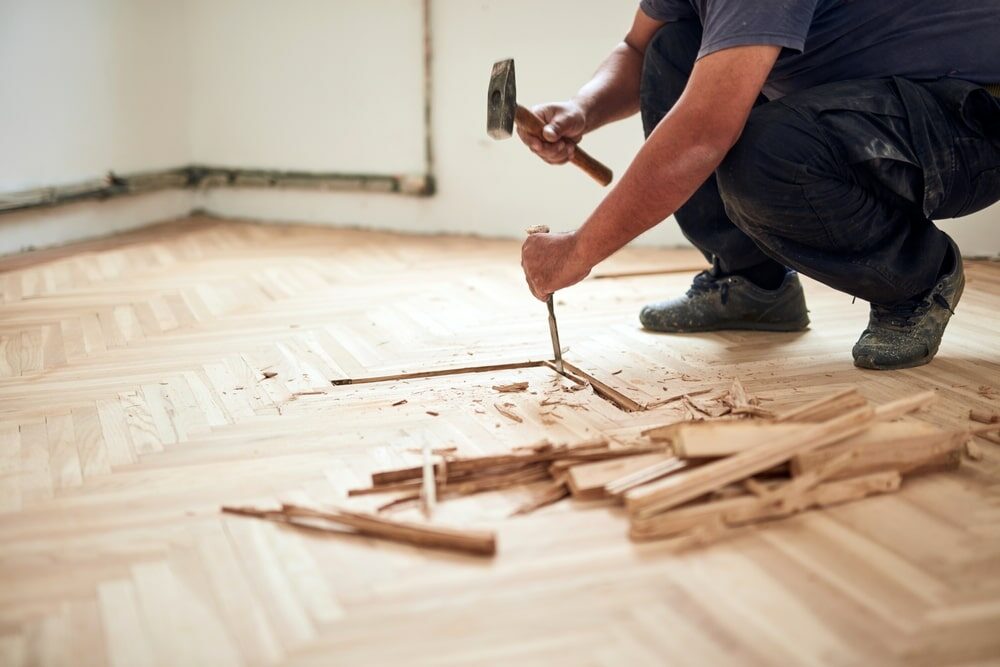
Replacing damaged boards
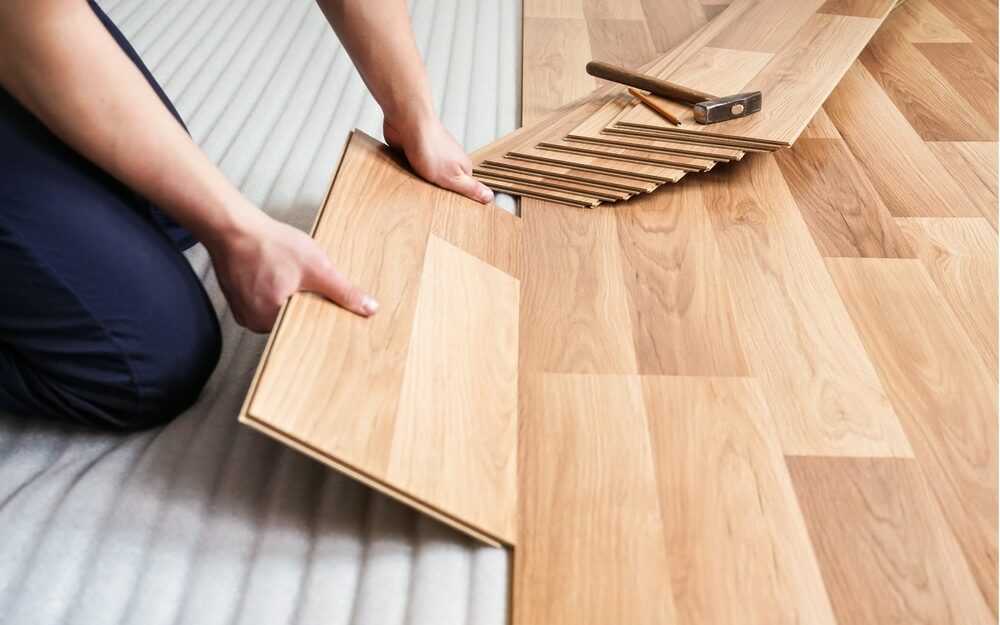
In some cases, damage to your hardwood floor may be too severe for simple repairs, necessitating the replacement of individual boards. This process can be more complex and time-consuming, but it’s still manageable for most DIY enthusiasts. Here’s a step-by-step guide for replacing damaged hardwood floorboards:
Step 1: Remove the damaged board. Using a pry bar, carefully remove the damaged board. Be cautious not to damage the surrounding boards.
Step 2: Measure and cut the replacement board. Measure the length and width of the damaged board, and then cut the replacement board to the exact dimensions using a saw or utility knife.
Step 3: Test the fit: Before securing the new board, test its fit by placing it in the empty space. If necessary, trim the board slightly to ensure a snug fit.
Step 4: Apply wood glue. Apply wood glue to the tongue and groove edges of the new board and the surrounding boards. This will help secure the board in place.
Step 5: Install the replacement board. Carefully place the new board into position, making sure the tongue and groove edges align with the surrounding boards. Use a rubber mallet to tap the board gently into place.
Step 6: Secure the board. Using a hammer and finishing nails, secure the board to the subfloor. Make sure to nail through the tongue of the board at a 45-degree angle to hide the nail head.
Step 7: Fill nail holes. Using wood filler or putty, fill the nail holes and any gaps around the edges of the board. Allow the filler to dry, then sand the area smooth.
Step 8: Stain and finish: Apply wood stain to the replacement board, allowing it to dry according to the manufacturer’s instructions. Then, apply a polyurethane finish to match the surrounding boards.
Preventing future damage
To keep your hardwood floors looking their best, it’s essential to take steps to prevent damage in the future. Here are some tips for maintaining and protecting your hardwood floors:
- Use furniture pads: Place felt or rubber pads under furniture legs to prevent scratches and dents.
- Clean regularly: Sweep or vacuum your hardwood floors regularly to remove dirt and debris that can cause scratches.
- Use area rugs: Place area rugs in high-traffic areas to protect your floors from wear and tear.
- Control humidity: Use a humidifier or dehumidifier to maintain consistent humidity levels in your home, which can prevent warping and buckling.
- Refinish periodically: Refinishing your hardwood floors every few years can help maintain their appearance and protect them from damage.
Conclusion
Repairing a hardwood floor can range from simple tasks like fixing scratches and scuffs to more complex projects like replacing damaged boards. By assessing the damage, gathering the necessary tools and materials, and following the appropriate repair methods, you can restore your hardwood floor to its original beauty. With proper care and maintenance, your hardwood floor repair can be an easy and rewarding DIY project, ensuring your floors remain beautiful and durable for years to come.

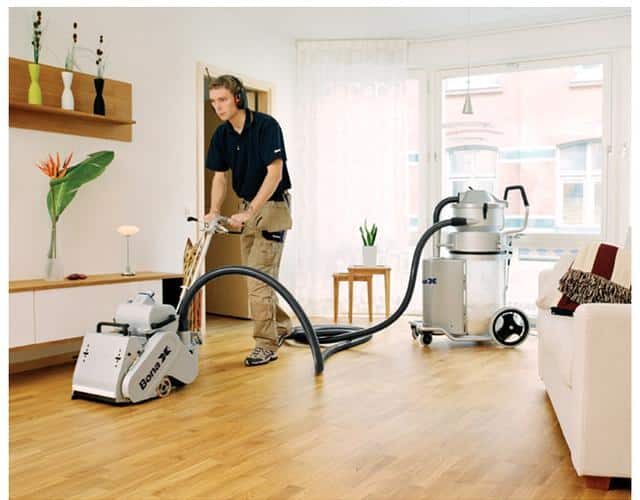
Sanding
We provide virtually dust-free sanding with our continuous belt machinery with mobile extraction units, giving you a safer environment for your family.
Oiling
This organic finish not only adds beauty to your home but also has exceptional water-repellent characteristics, making it easier to clean and maintain.
Waxing
This natural floor finish offers the softest and most mellow appearance – and leaves your floor able to breath.
Buffing
Using soft buffing machines (and hand-polishing where required) will bring a wonderful sheen to your newly-finished floor.
Repairs
We offer a full assessment of your wooden floors to determine what repairs are needed to provide the perfect working surface for the later stages of sanding, staining and sealing.
Restoration
We offer a comprehensive restoration process designed to address floors that are improperly fitted or damaged over time through wear and tear.
Request a fixed price quote for your wood floor restoration now
Simply enter your postcode below to get started.
Services
Wood Floor Sanding Wood Floor Restoration Wood Floor Scratch Repair Squeaky Wood Floor Repair Parquet Floor Sanding Parquet Floor Restoration Commercial Floor Sanding Church Floor Sanding Community Centre Floor Sanding School Floor Sanding Gap Filling Gap Filling with ResinCopyright © Mr Sander®
Privacy & Cookies Terms & Conditions Complaints Procedure Cancellation Rights Sitemap

Get An Instant Price Estimate Before You Go…
Simply enter the rooms you need sanded and we’ll provide you with a price estimate instantly! Try our price calculator now.
Get a Price Estimate NowLocal Floor Sanding Experts
Over 500 5-Star Reviews
Safe, Dust Free Sanding
Operating Since 1994