London:
Nationwide:
25,000+
Floors Restored
27 Years Experience
Wood Flooring Association Certified
Essential Tips for Wood Stripping and Wood Floor Sanding
Posted on June 19, 2023
Floor Sanding News
Uncover the Beauty of Wood: A Comprehensive Guide to Stripping and Sanding
Restoring your wood floors or furniture to their original glory can be a satisfying experience. It can rejuvenate your home and provide an excellent sense of accomplishment. If you’re considering a DIY project involving stripping and sanding wood, you’re in the right place. In this detailed 4000-word guide, we’ll provide essential tips and tricks to help you achieve the best results.
Understanding the Importance of Stripping and Sanding
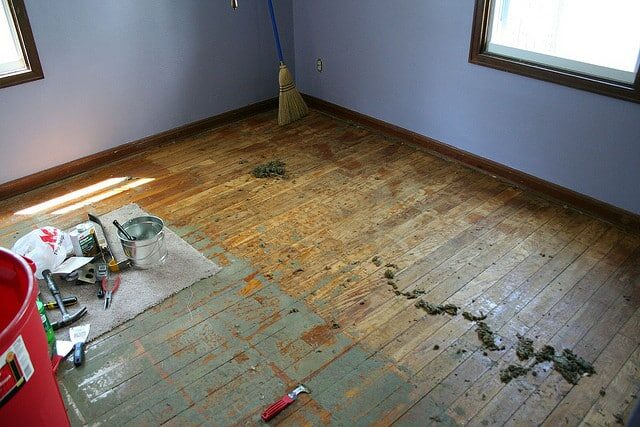
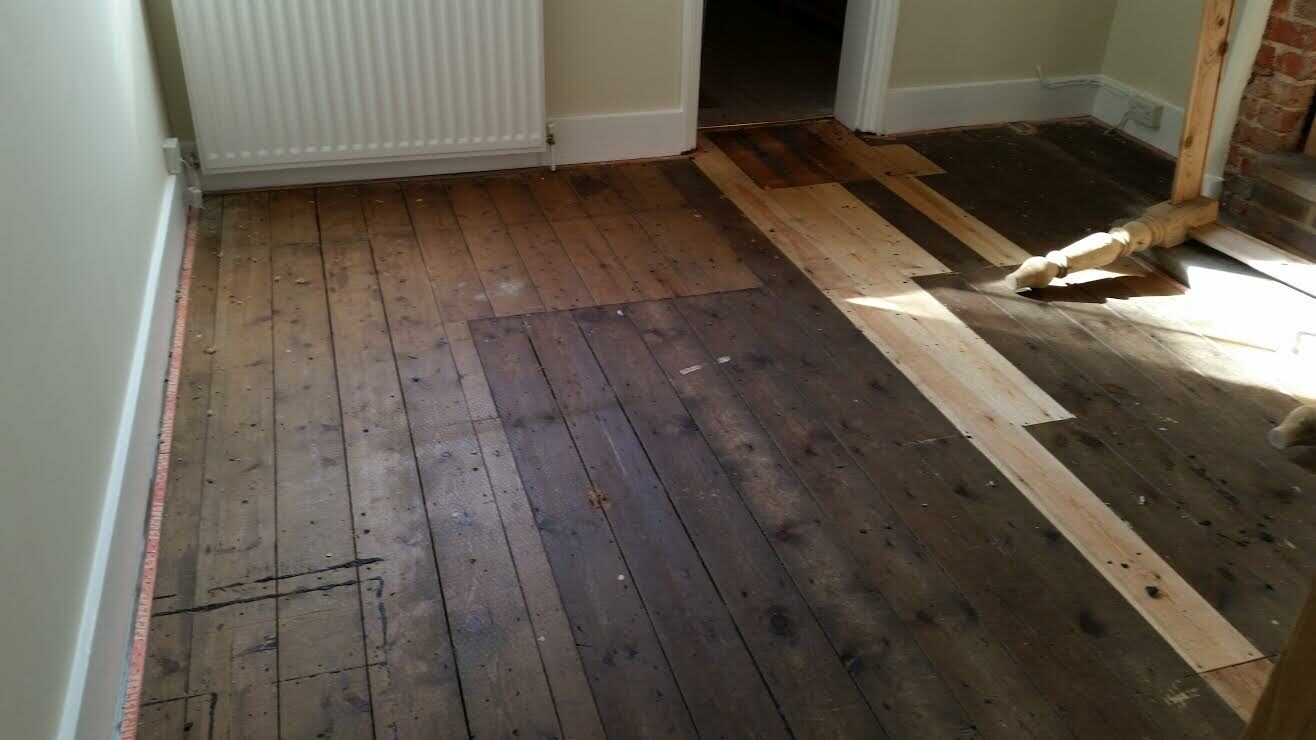
Whether it’s an old wooden chair that’s lost its lustre or a hardwood floor covered in decades of wear and tear, wood stripping and sanding are often the first steps in restoration. Stripping removes old paint, varnish, or stains, while sanding smooths out the wood’s surface, preparing it for a new finish.Part 1: Wood Stripping: The Basics
Choosing the Right Stripper
The type of stripper you need depends on the finish you’re removing. There are strippers designed for paint, varnish, or polyurethane. Some are more potent, while others are more eco-friendly.Protect yourself and your workspace.
Ensure your workspace is well-ventilated and that you’re wearing protective gloves and safety glasses. Cover your floors and furniture to protect them from any splashes.Test on a Small Area
Before you start stripping, it’s advisable to test the product in a small, inconspicuous area. This will give you an idea of how long you need to leave the stripper on and how well it works on the particular finish you’re removing.Part 2: Stripping Techniques
Applying the stripper
Apply a generous amount of stripper using a natural-bristle brush, working in one direction. It’s best to work on one small section at a time to keep control over the process.Waiting and scraping
The waiting game begins once you’ve applied the stripper. It needs time to work its magic and break down the finish. Once the finish begins to bubble up or look wrinkled, it’s time to scrape it off with a putty knife. Remember to scrape in the direction of the wood grain to prevent scratches.Neutralising the Stripper
Most chemical strippers need to be neutralised after use. This step stops the chemical reaction and prepares the wood for sanding. Use the neutralizing solution recommended by the stripper manufacturer.Cleaning Up
Once you’ve stripped and neutralised the wood, clean it thoroughly using coarse steel wool dipped in mineral spirits. This step will remove any remaining stripper or finish.Part 3: Sanding: The Basics
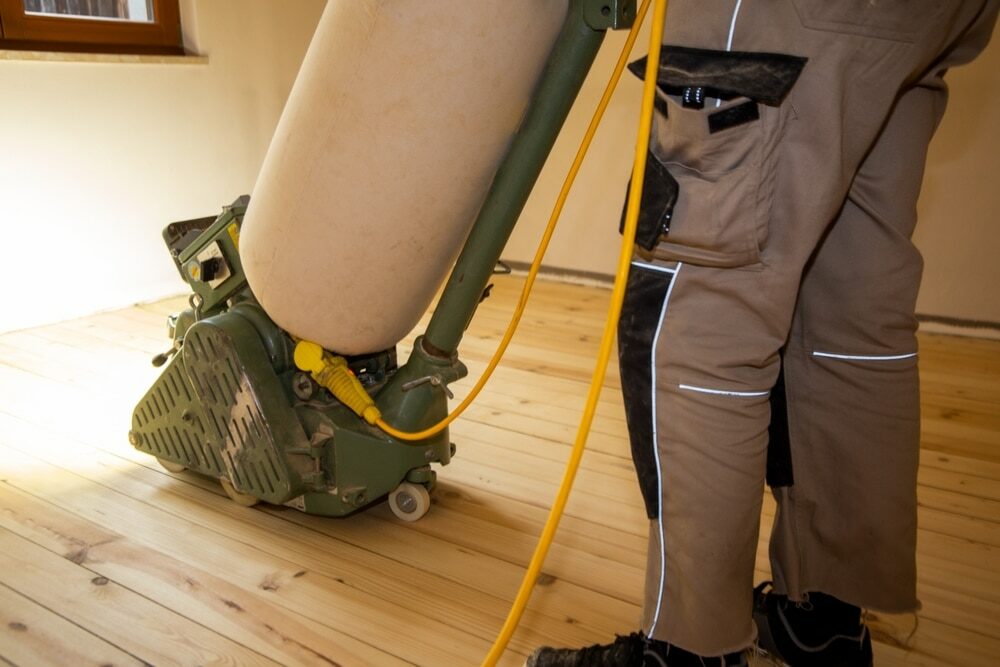
Choosing the right sandpaper
Sandpaper comes in different grits, with lower numbers indicating a coarser grit. For initial sanding, you’ll likely need coarse (60 or 80 grit) or medium (100 or 120 grit) sandpaper. Finer grits (180 or 220) are used for the final sanding before applying a finish.Using the Right Technique
Always sand in the direction of the wood grain to avoid scratches. Apply steady pressure, but don’t push too hard, as it could damage the wood.Part 4: Sanding Techniques
The initial sanding
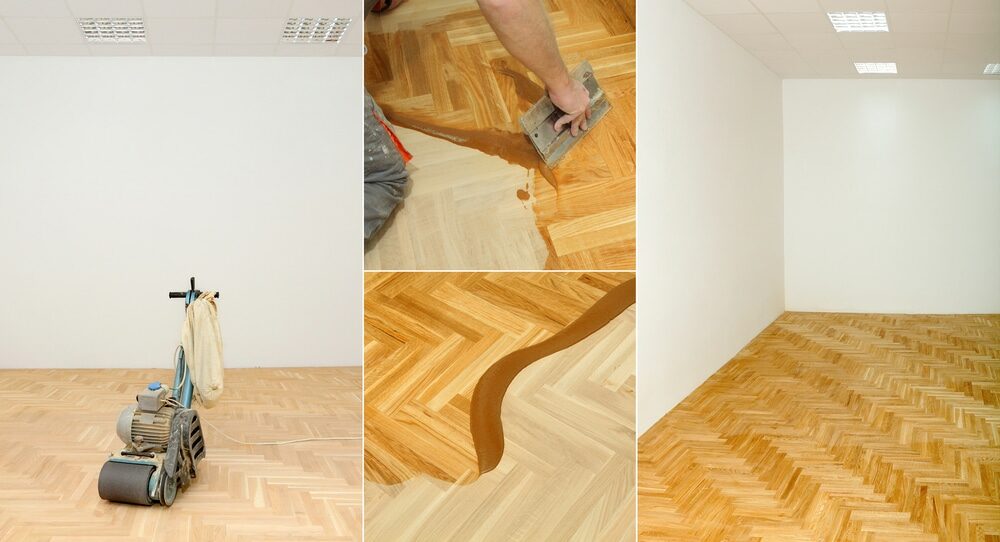
The initial sanding removes any remaining finish and smooths out any surface irregularities. This stage is usually done with coarser-grit sandpaper.Progressing to Finer Grits
After the initial sanding, move on to medium and then fine-grit sandpaper. Each subsequent sanding removes the scratches left by the previous grit and smooths the wood further.The final sanding
The final sanding should be done with very fine-grit sandpaper. This step ensures the smoothest possible surface and prepares the wood for finishing.Cleaning Up
After sanding, it’s essential to remove all dust before applying a finish. Use a vacuum or a tack cloth to thoroughly clean the wood surface.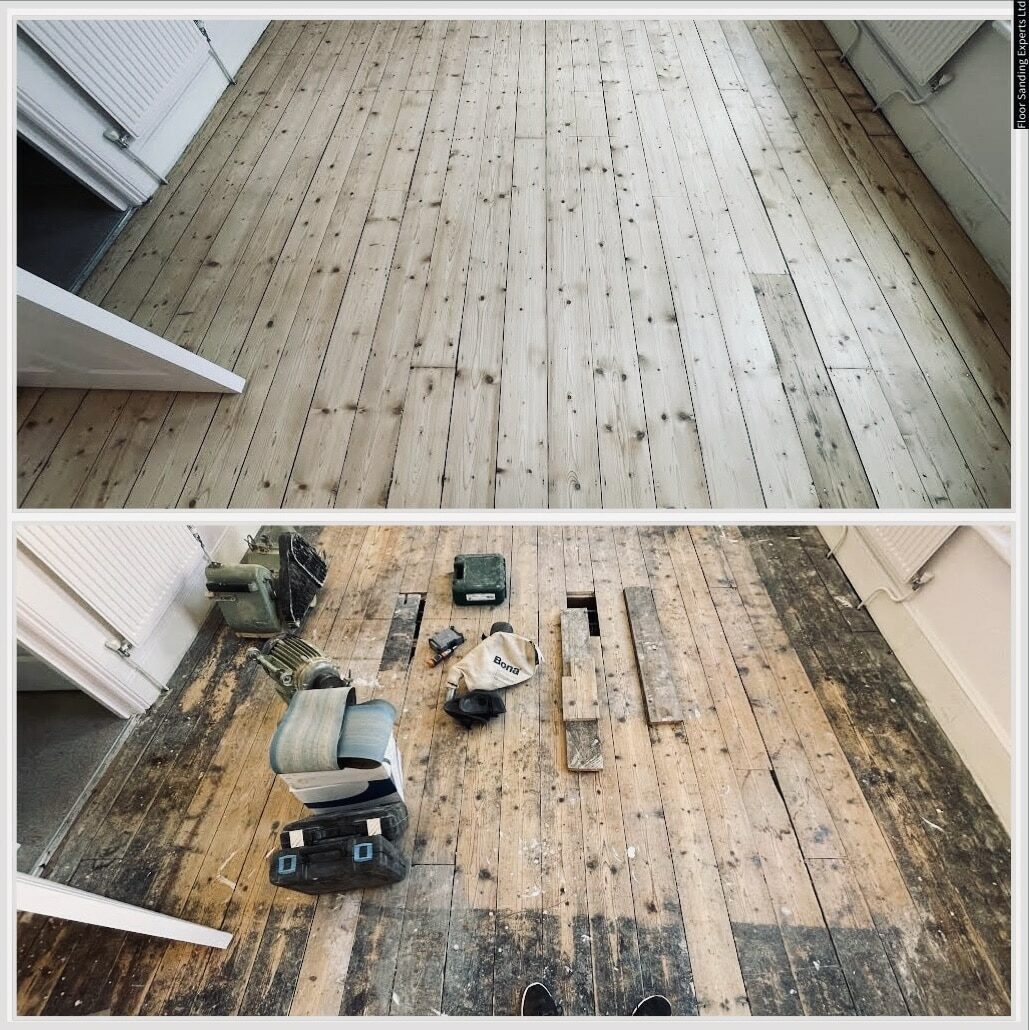
Conclusion: Stripping and Sanding for Success
Stripping and sanding are the foundations of any successful wood floor restoration project. By understanding and mastering these processes, you can breathe new life into your old furniture or floors. While it requires patience and effort, the resulting transformation is well worth the time investment. Remember that every piece of wood is unique, so it’s crucial to be attentive and flexible throughout the process. Happy restoring!Some Useful Links:
- Floor Sanding Services
- School Floor Sanding
- Wood Floor Restorations
- Wood Floor Repairs
- Wood Floor Polishing
More from our Blog:
How We Sanded Our Wood Floor: A DIY Story Repair Your Damage Wood Floor with Mr Sander® Company Restore Your Wood Flooring with Mr Sander® Company Hardwood Flooring: Enhancing Small Home Trends Achieving the Classic Waxed Look for Your Hardwood Floors
Sanding
We provide virtually dust-free sanding with our continuous belt machinery with mobile extraction units, giving you a safer environment for your family.
Oiling
This organic finish not only adds beauty to your home but also has exceptional water-repellent characteristics, making it easier to clean and maintain.
Waxing
This natural floor finish offers the softest and most mellow appearance – and leaves your floor able to breath.
Buffing
Using soft buffing machines (and hand-polishing where required) will bring a wonderful sheen to your newly-finished floor.
Repairs
We offer a full assessment of your wooden floors to determine what repairs are needed to provide the perfect working surface for the later stages of sanding, staining and sealing.
Restoration
We offer a comprehensive restoration process designed to address floors that are improperly fitted or damaged over time through wear and tear.
Request a fixed price quote for your wood floor restoration now
Simply enter your postcode below to get started.
Services
Wood Floor Sanding Wood Floor Restoration Wood Floor Scratch Repair Squeaky Wood Floor Repair Parquet Floor Sanding Parquet Floor Restoration Commercial Floor Sanding Church Floor Sanding Community Centre Floor Sanding School Floor Sanding Gap Filling Gap Filling with ResinCopyright © Mr Sander®
Privacy & Cookies Terms & Conditions Complaints Procedure Cancellation Rights Sitemap

Get An Instant Price Estimate Before You Go…
Simply enter the rooms you need sanded and we’ll provide you with a price estimate instantly! Try our price calculator now.
Get a Price Estimate NowLocal Floor Sanding Experts
Over 500 5-Star Reviews
Safe, Dust Free Sanding
Operating Since 1994