London:
Nationwide:
25,000+
Floors Restored
27 Years Experience
Wood Flooring Association Certified
Hardwood Floor Installation: Nailing and Stapling
Posted on June 19, 2023
Articles
A Comprehensive Guide to Hardwood Floor Installation: Nailing and Stapling
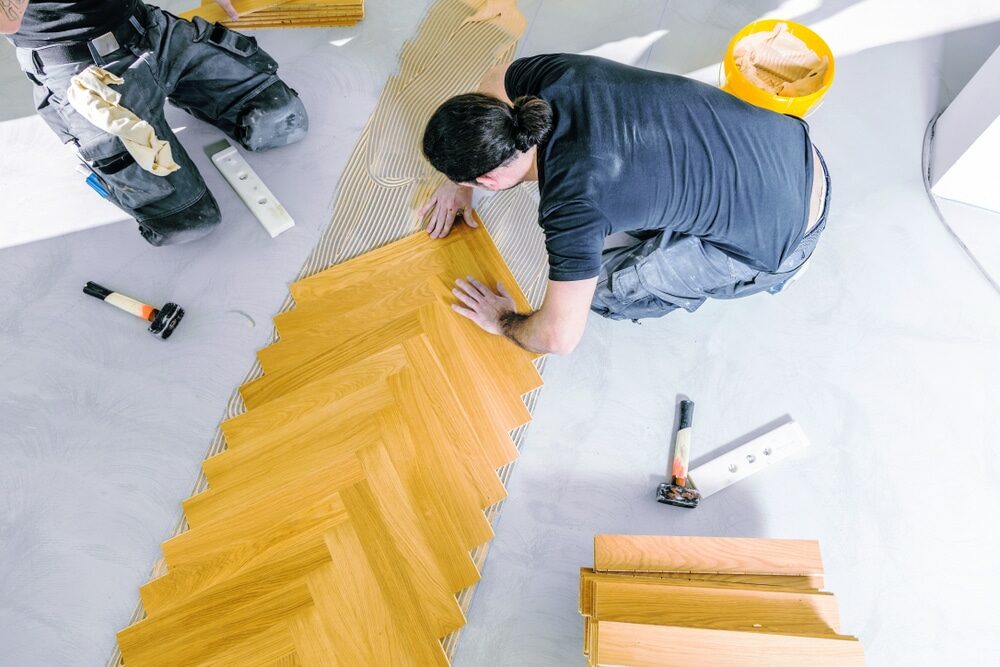
Hardwood flooring remains a popular choice for homeowners due to its timeless appeal and durability. However, to ensure the longevity and aesthetics of the wood, correct installation is essential. Two common methods for installing hardwood flooring are nailing and stapling. This guide will walk you through these methods, explaining their advantages, disadvantages, and steps involved in each process.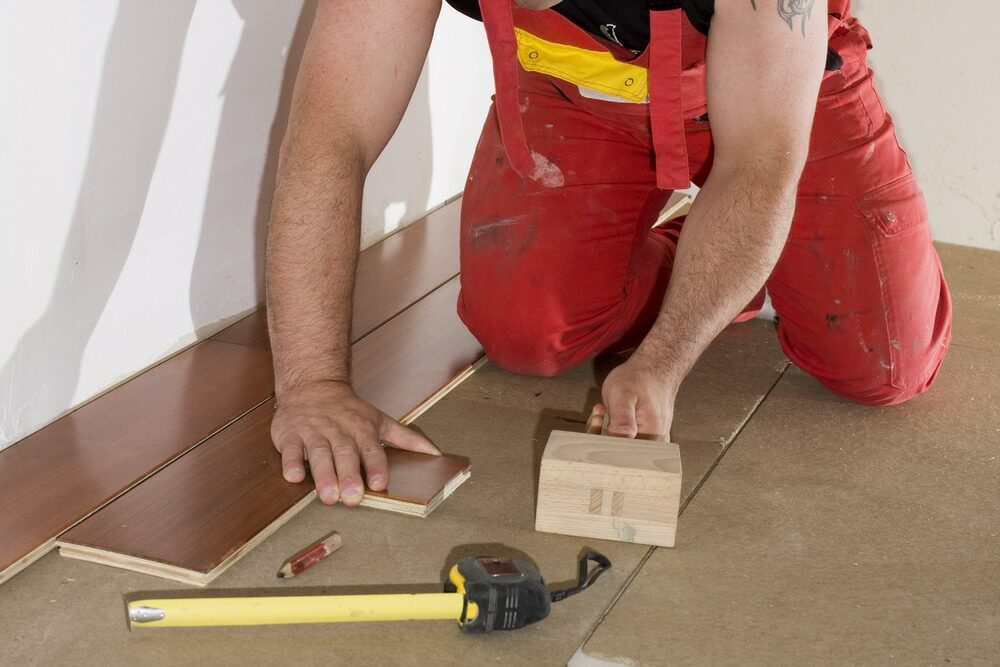
Understanding Hardwood Floor Installation
Before delving into the specifics of nailing and stapling, let’s briefly discuss the importance of proper hardwood floor installation. It impacts not only the appearance and performance of your floors but also their lifespan. Incorrect installation can lead to problems such as creaking, warping, and gapping.Nailing Hardwood Floors: The Basics
What is Nailing?
Nailing involves using specially designed flooring nails, often referred to as “cleats,” to secure the hardwood planks to the subfloor. The nails are typically driven through the tongue of each plank, allowing the subsequent plank to hide the nail.Pros and Cons of Nailing
Nailing is the most traditional method of hardwood floor installation and is particularly suitable for solid wood floors. It provides a tight fit and is known for its long-term reliability. However, it can be a more labour-intensive and time-consuming process compared to stapling. It may also not be suitable for thinner planks or engineered wood floors, as the nails can potentially split the wood.How to Nail Hardwood Floors
Step 1: Preparation
Measure the room to determine the quantity of wood needed. Acclimatise the wood to the room’s humidity levels for a few days before installation. Prepare the subfloor by ensuring it’s clean, flat, and dry.Step 2: Layout
Start by choosing the direction of the wood planks. Typically, planks are installed perpendicular to the floor joists. Mark a starting line where the first row of planks will be laid.Step 3: Installation
Begin installing the wood on the longest wall. Place the first plank with its tongue facing the room and secure it using a nail gun, driving nails through the plank’s face into the subfloor and joist. Fill the rest of the row with planks, cutting the last one to fit if necessary.Step 4: Continue Installation
For the next rows, use the nail gun to drive nails through the tongues of the planks at an angle. Stagger the end joints from row to row for a natural appearance.Step 5: Finishing Up
Once all planks have been installed, fill any gaps with wood putty. You can now finish your floor with a sealant, stain, or paint of your choice.Stapling Hardwood Floors: The Basics
What is Stapling?
Stapling involves using a pneumatic stapler to secure the planks to the subfloor. Staples are driven through the tongue of the planks, similar to nailing.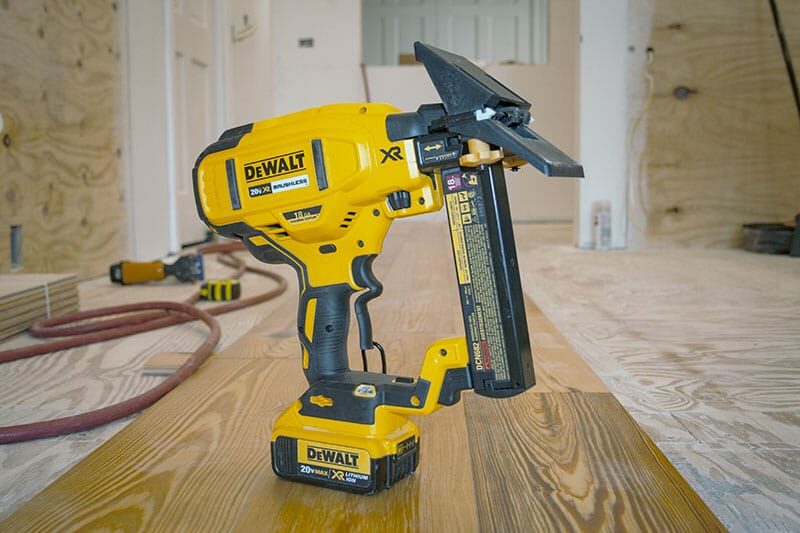
Pros and Cons of Stapling
Stapling is often faster and easier than nailing, making it a popular choice for DIYers and professionals alike. It’s also less likely to split thinner or engineered wood planks. However, it may not hold as securely as nails over time, particularly in regions with significant humidity and temperature fluctuations.How to Staple Hardwood Floors
The steps for stapling hardwood floors are very similar to nailing, with the primary difference being the tool and fastener used. Rather than a nail gun, you’ll use a pneumatic stapler and staples.Choosing Between Nailing and Stapling
Your choice between nailing and stapling will depend on several factors, including the type of wood you’re installing, the condition and type of your subfloor, your geographic location, and your comfort level with the tools.Conclusion
Whether you choose to nail or staple your hardwood floors, the key to a successful installation lies in careful preparation, accurate measurements, and patience. If you’re uncertain about which method is best for your flooring project or if you’re uncomfortable using power tools, it may be worth hiring a professional. A well-installed hardwood floor can enhance the beauty of your home for many years, making it a worthwhile investment of time and effort.Some Useful Links:
- Floor Sanding Services
- School Floor Sanding
- Wood Floor Restorations
- Wood Floor Repairs
- Wood Floor Polishing
More from our Blog:
Solving Hardwood Floor Problems: A Guide to Deciding Between Replacement and Salvage Avoiding Pitfalls in Hardwood Floor Maintenance – Essential Tips for Homeowners DIY Wood Floor Installation – A Comprehensive Beginner’s Guide A DIY Guide to Refinishing Hardwood Floors DIY Guide: How to Sand and Varnish a Wooden Floor


Sanding
We provide virtually dust-free sanding with our continuous belt machinery with mobile extraction units, giving you a safer environment for your family.
Oiling
This organic finish not only adds beauty to your home but also has exceptional water-repellent characteristics, making it easier to clean and maintain.
Waxing
This natural floor finish offers the softest and most mellow appearance – and leaves your floor able to breath.
Buffing
Using soft buffing machines (and hand-polishing where required) will bring a wonderful sheen to your newly-finished floor.
Repairs
We offer a full assessment of your wooden floors to determine what repairs are needed to provide the perfect working surface for the later stages of sanding, staining and sealing.
Restoration
We offer a comprehensive restoration process designed to address floors that are improperly fitted or damaged over time through wear and tear.
Request a fixed price quote for your wood floor restoration now
Simply enter your postcode below to get started.
Services
Wood Floor Sanding Wood Floor Restoration Wood Floor Scratch Repair Squeaky Wood Floor Repair Parquet Floor Sanding Parquet Floor Restoration Commercial Floor Sanding Church Floor Sanding Community Centre Floor Sanding School Floor Sanding Gap Filling Gap Filling with ResinCopyright © Mr Sander®
Privacy & Cookies Terms & Conditions Complaints Procedure Cancellation Rights Sitemap

Get An Instant Price Estimate Before You Go…
Simply enter the rooms you need sanded and we’ll provide you with a price estimate instantly! Try our price calculator now.
Get a Price Estimate NowLocal Floor Sanding Experts
Over 500 5-Star Reviews
Safe, Dust Free Sanding
Operating Since 1994