London:
Nationwide:
25,000+
Floors Restored
27 Years Experience
Wood Flooring Association Certified
How to Avoid Swirl Marks After Hardwood Floor Polishing?
Posted on April 21, 2023
Articles
The Ultimate Guide to Preventing Swirl Marks After Hardwood Floor Polishing
Hardwood floors are a popular choice for homeowners due to their timeless beauty and durability. However, when it comes to refinishing and polishing these floors, swirl marks can be a frustrating issue. Swirl marks, also known as buffer trails, are circular patterns left behind by the buffer machines used during the polishing process. These marks can make your floors appear dull and uneven, detracting from their natural beauty.
In this article, we will discuss the causes of swirl marks, as well as provide a step-by-step guide on how to avoid them during hardwood floor polishing. By following these tips and best practices, you can achieve a flawless finish and maintain the stunning appearance of your hardwood floors.
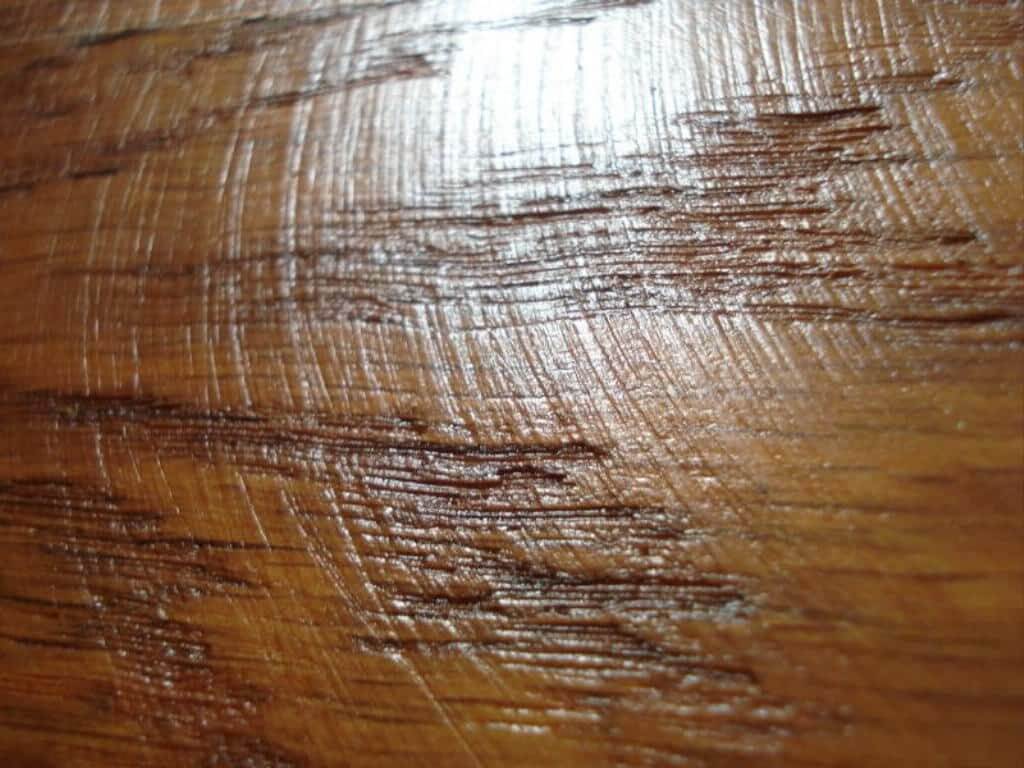
1. Causes of Swirl Marks:
Understanding the causes of swirl marks is the first step in preventing them. There are three primary factors that contribute to the formation of swirl marks:
- Improper sanding techniques: Using incorrect grit sandpaper, moving the sander too quickly, or not sanding evenly can all lead to swirl marks.
- Inadequate cleaning: Dust and debris left on the floor can cause swirl marks when the buffer machine runs over them.
- Incorrect buffing technique: Using the wrong buffing pad, applying too much pressure, or moving the buffer too quickly can create swirl marks.
Now that we’ve identified the causes of swirl marks, let’s discuss how to avoid them during hardwood floor polishing.
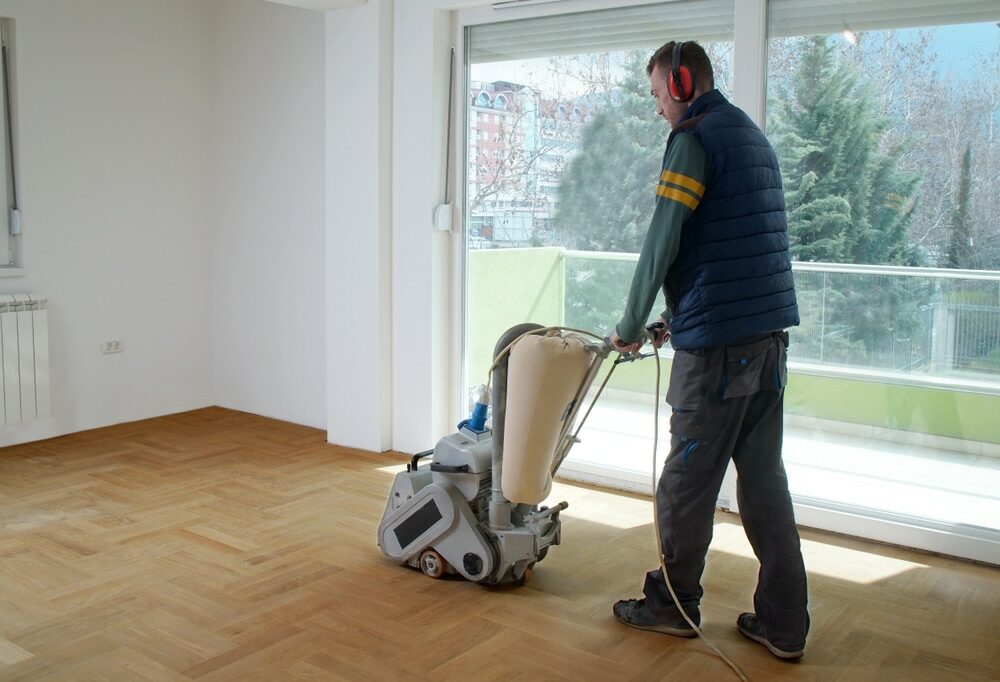
1: Proper Sanding Technique
The first step in avoiding swirl marks is proper sanding. Sanding not only removes the old finish but also prepares the surface for new stain and polish. Follow these steps to ensure effective sanding:
- Start with a coarse-grit sandpaper (36-40 grit) to remove the old finish.
- Move to a medium-grit sandpaper (60-80 grit) to remove any scratches left by the coarse-grit sandpaper.
- Finish with a fine-grit sandpaper (100-120 grit) to smooth the surface and remove any remaining imperfections.
- Always sand in the direction of the wood grain to avoid cross-grain scratches.
- Take your time and maintain even pressure across the entire floor.

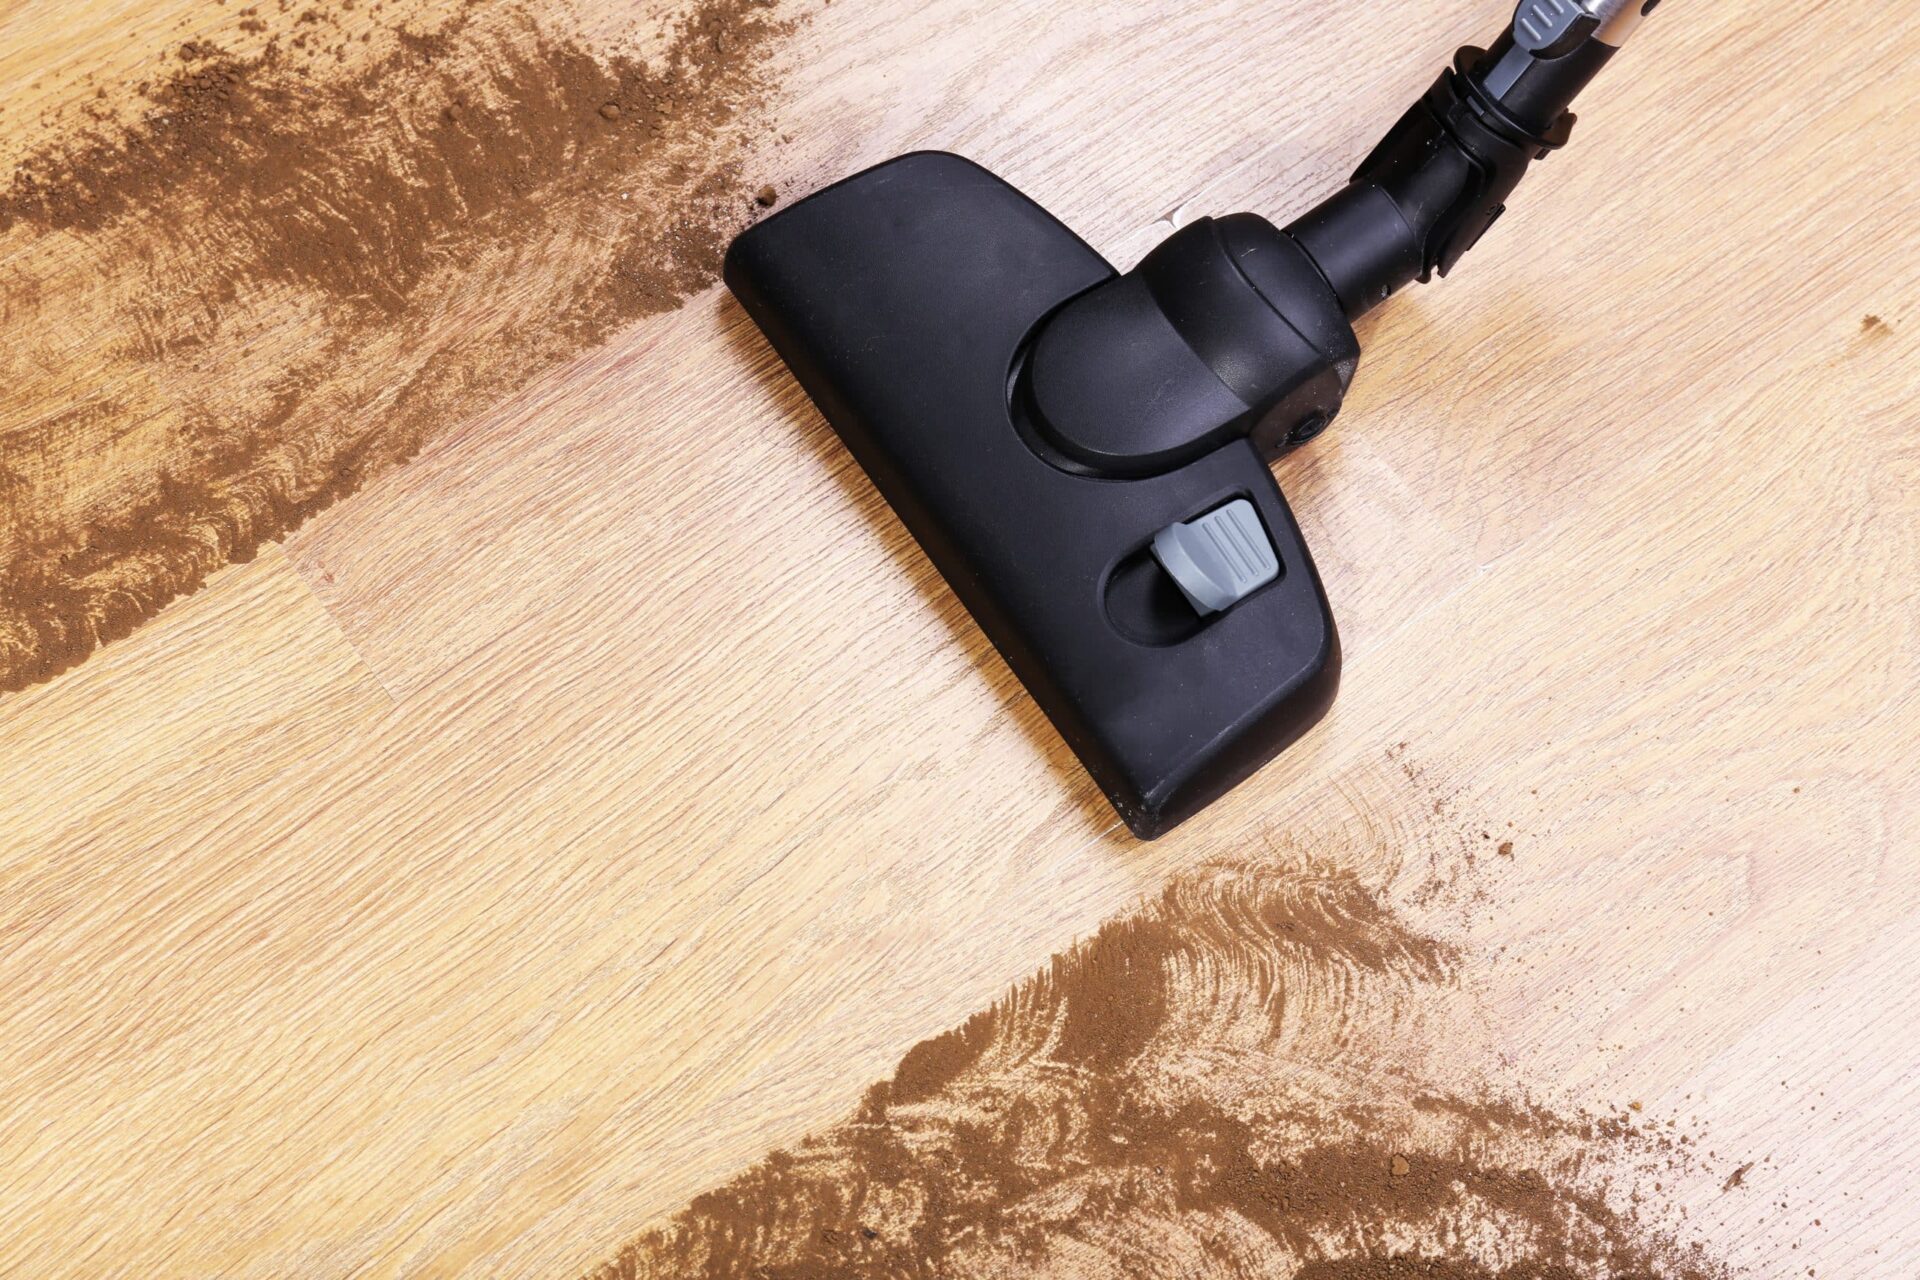
2: Thorough Cleaning
After sanding, it’s essential to thoroughly clean the floor to remove any dust and debris. Any particles left behind can become trapped under the buffer pad, causing swirl marks. Follow these cleaning tips:
- Vacuum the floor using a soft-bristle attachment to remove the majority of dust and debris.
- Wipe the floor with a microfiber cloth to remove any remaining fine particles.
- Use a tack cloth to pick up any lingering dust.
- Consider using an air compressor to blow away dust from corners and tight spaces.
- Always allow the floor to dry completely before proceeding with the polishing process.
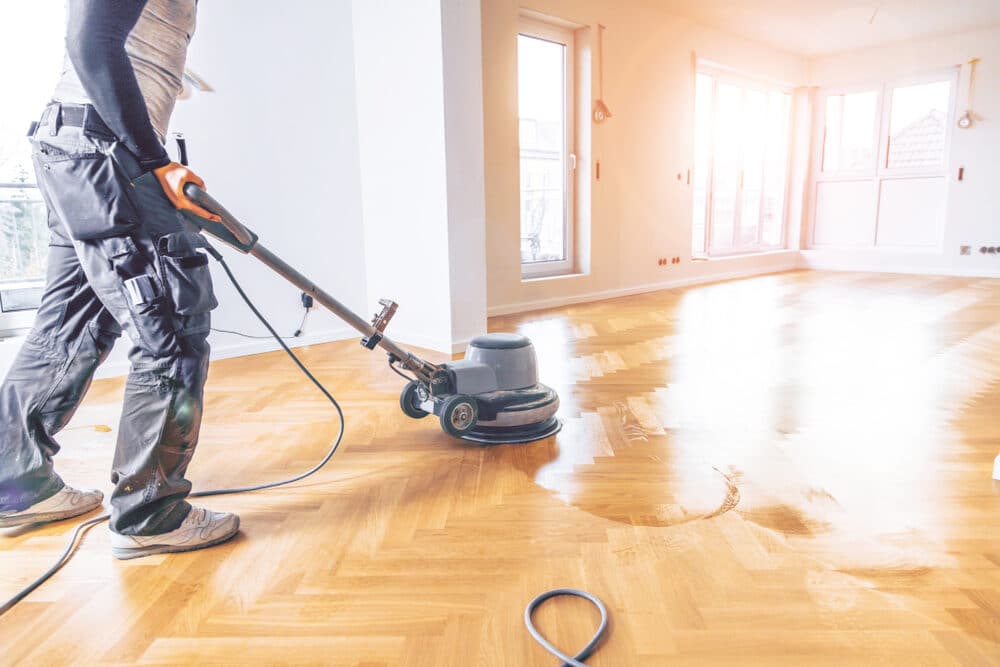
3: Choosing the Right Buffer and Pad
Selecting the appropriate buffer and pad is crucial in preventing swirl marks. Here are some tips to help you make the right choice:
- Choose a high-quality buffer with variable speed settings. This allows you to control the speed and pressure applied during the polishing process.
- Select a pad specifically designed for hardwood floors. Avoid pads with aggressive abrasives, as these can cause swirl marks.
- Use a white or beige pad for polishing, as these are typically less aggressive and better suited for hardwood floors.
- Regularly check and replace worn pads to ensure consistent performance.
4: Proper Buffing Technique
The final step in avoiding swirl marks is employing the correct buffing technique. Follow these guidelines to ensure a smooth and even finish:
- Start with a slow buffer speed and gradually increase as needed. High speeds can cause the buffer to jump and create swirl marks.
- Keep the buffer moving in a consistent, side-to-side motion while overlapping each pass slightly. This ensures that you cover the entire floor evenly and prevents streaks.
- Always buff in the direction of the wood grain to avoid cross-grain scratches.
- Apply even pressure on the buffer, letting the weight of the machine do most of the work. Pressing down too hard can cause swirl marks.
- Frequently check the floor for swirl marks as you work. If you notice any, adjust your technique or buffer speed accordingly.
- If using a stain or finish, apply it evenly with a clean applicator and allow it to dry according to the manufacturer’s instructions before buffing.

5: Inspect and Touch-up
After buffing, thoroughly inspect your hardwood floor for any remaining swirl marks or imperfections. If you find any, follow these steps:
- Lightly sand the affected area using fine-grit sandpaper (150-180 grit) in the direction of the wood grain.
- Thoroughly clean the area, removing any dust or debris.
- Apply a small amount of stain or finish to the sanded area, if necessary, and allow it to dry.
- Buff the area again using the proper buffing technique and pad, blending the touch-up with the surrounding floor.

Some Useful Links:
Conclusion:
By following the steps outlined in this comprehensive guide, you can effectively avoid swirl marks after hardwood floor polishing. Proper sanding, cleaning, choosing the right buffer and pad, and employing the correct buffing technique are all essential to achieving a flawless finish. With patience and attention to detail, you can maintain the natural beauty and longevity of your hardwood floors for years to come.More from our Blog:
Recoat Wooden Floors Timely to Prevent Expensive Re-Sanding How to Maintain Your Freshly Sanded and Lacquered Wooden Floors? Why You Don’t Have To be millionaire to have Amazing Wooden flooring?
Sanding
We provide virtually dust-free sanding with our continuous belt machinery with mobile extraction units, giving you a safer environment for your family.
Oiling
This organic finish not only adds beauty to your home but also has exceptional water-repellent characteristics, making it easier to clean and maintain.
Waxing
This natural floor finish offers the softest and most mellow appearance – and leaves your floor able to breath.
Buffing
Using soft buffing machines (and hand-polishing where required) will bring a wonderful sheen to your newly-finished floor.
Repairs
We offer a full assessment of your wooden floors to determine what repairs are needed to provide the perfect working surface for the later stages of sanding, staining and sealing.
Restoration
We offer a comprehensive restoration process designed to address floors that are improperly fitted or damaged over time through wear and tear.
Request a fixed price quote for your wood floor restoration now
Simply enter your postcode below to get started.
Services
Wood Floor Sanding Wood Floor Restoration Wood Floor Scratch Repair Squeaky Wood Floor Repair Parquet Floor Sanding Parquet Floor Restoration Commercial Floor Sanding Church Floor Sanding Community Centre Floor Sanding School Floor Sanding Gap Filling Gap Filling with ResinCopyright © Mr Sander®
Privacy & Cookies Terms & Conditions Complaints Procedure Cancellation Rights Sitemap

Get An Instant Price Estimate Before You Go…
Simply enter the rooms you need sanded and we’ll provide you with a price estimate instantly! Try our price calculator now.
Get a Price Estimate NowLocal Floor Sanding Experts
Over 500 5-Star Reviews
Safe, Dust Free Sanding
Operating Since 1994