London:
Nationwide:
25,000+
Floors Restored
27 Years Experience
Wood Flooring Association Certified
Step By Step Guide to Dustless Floor Sanding | Revive Your Floors
Posted on April 24, 2023
Blog
The Ultimate Step-by-Step Guide to Dustless Wood Floor Sanding: Revive Your Floors with a Cleaner, Healthier Approach
Wooden floors have long been prized for their beauty, warmth, and durability, adding a touch of elegance and timeless charm to homes around the world. However, despite their many advantages, even the most well-maintained wooden floors can eventually succumb to daily wear and tear, resulting in a dull and lacklustre appearance. But fear not, because there is a solution that can breathe new life into your tired, old floors: dustless wood floor sanding.
What is dustless wood floor sanding?
Definition: Dustless wood floor sanding is a modern and innovative technique used to refinish wooden floors by removing the top layer of the wood, eliminating scratches, dents, and signs of ageing. This process involves using specialised sanding equipment fitted with a vacuum system that extracts dust particles as the sanding process takes place. Unlike traditional sanding methods, dustless sanding significantly reduces the amount of airborne dust and debris, making it a more environmentally friendly and health-conscious option. Benefits over traditional sanding methods:- Healthier environment: One of the primary advantages of dustless wood floor sanding over traditional methods is its ability to reduce airborne dust particles. This minimises the risk of respiratory issues, allergies, and other health problems often associated with the inhalation of wood dust.
- Cleaner workspace: Dustless sanding keeps the work area significantly cleaner, reducing the need for extensive clean-up after the project is completed. This not only saves time but also prevents potential damage to surrounding surfaces caused by dust accumulation.
- Improved air quality: The efficient Bona dust extraction system used in dustless sanding improves indoor air quality during the refinishing process, making it a more comfortable experience for homeowners and workers alike.
- Better final results: The absence of dust on the floor surface during the sanding process allows for better visibility and precision, leading to a smoother and more even finish.
- Eco-friendly: The dustless sanding process is more environmentally friendly as it minimises the amount of dust and debris that can contaminate indoor air and, ultimately, the outdoor environment.
A Step-by-Step Guide to Dustless Wood Floor Sanding
Step 1: Choosing the Right Grit Sandpaper
The first step in the dustless wood floor sanding process is selecting the appropriate grit of sandpaper for your project. The grit refers to the number of abrasive particles per square inch on the sandpaper surface. Lower grit numbers indicate coarser sandpaper, while higher grit numbers represent finer sandpaper. Start by assessing the condition of your wooden floor. If it has deep scratches, dents, or significant wear, begin with coarser grit sandpaper, such as 16, 24 or 36 grit. For floors in relatively good condition with only minor imperfections, start with medium-grit sandpaper, such as 60 or 80 grit. Remember, you’ll need to gradually progress to finer-grit sandpapers throughout the sanding process to achieve a smooth, even finish.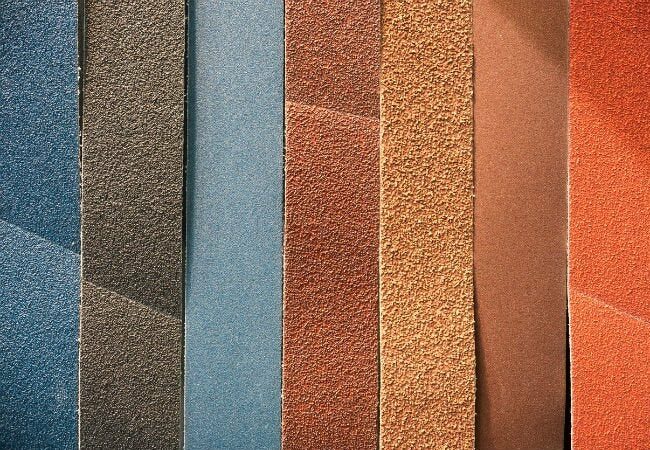
Step 2: Attaching the sanding disc to the dustless sander
Once you’ve selected the right grit of sandpaper, it’s time to attach the sanding disc to your dustless sander. Dustless sanders typically have a hook-and-loop (Velcro) system for easy attachment and removal of sanding discs. Make sure the sander is unplugged before attaching the sanding disc. Align the sanding disc with the sander’s backing pad and press it firmly into place. Ensure that the disc is properly centred and securely attached before proceeding.
Step 3: Connecting the vacuum cleaner to the dustless sander
To effectively capture dust and debris during the sanding process, connect your vacuum cleaner to the dustless sander. Most dustless sanders come with a vacuum hose adapter that fits a variety of vacuum cleaner hoses. Attach the vacuum hose to the sander’s dust port, ensuring a snug fit. Turn on the vacuum cleaner before starting the sanding process to create a continuous airflow that will extract dust as you work.
Step 4: Sanding the floor
With your dustless sander and vacuum cleaner ready, it’s time to begin sanding the floor. Start at one end of the room and work your way towards the other end, moving in a straight line with the wood grain. Hold the sander with both hands and apply even pressure as you move it back and forth. Avoid pressing down too hard or tilting the sander, as this can create uneven surfaces or gouges in the wood. Keep the sander moving at all times while in contact with the floor to prevent over-sanding in one spot. Overlap each pass by about 1-2 inches to ensure even coverage. As you sand, monitor the progress of your work and adjust your technique as needed to achieve a consistent, smooth finish.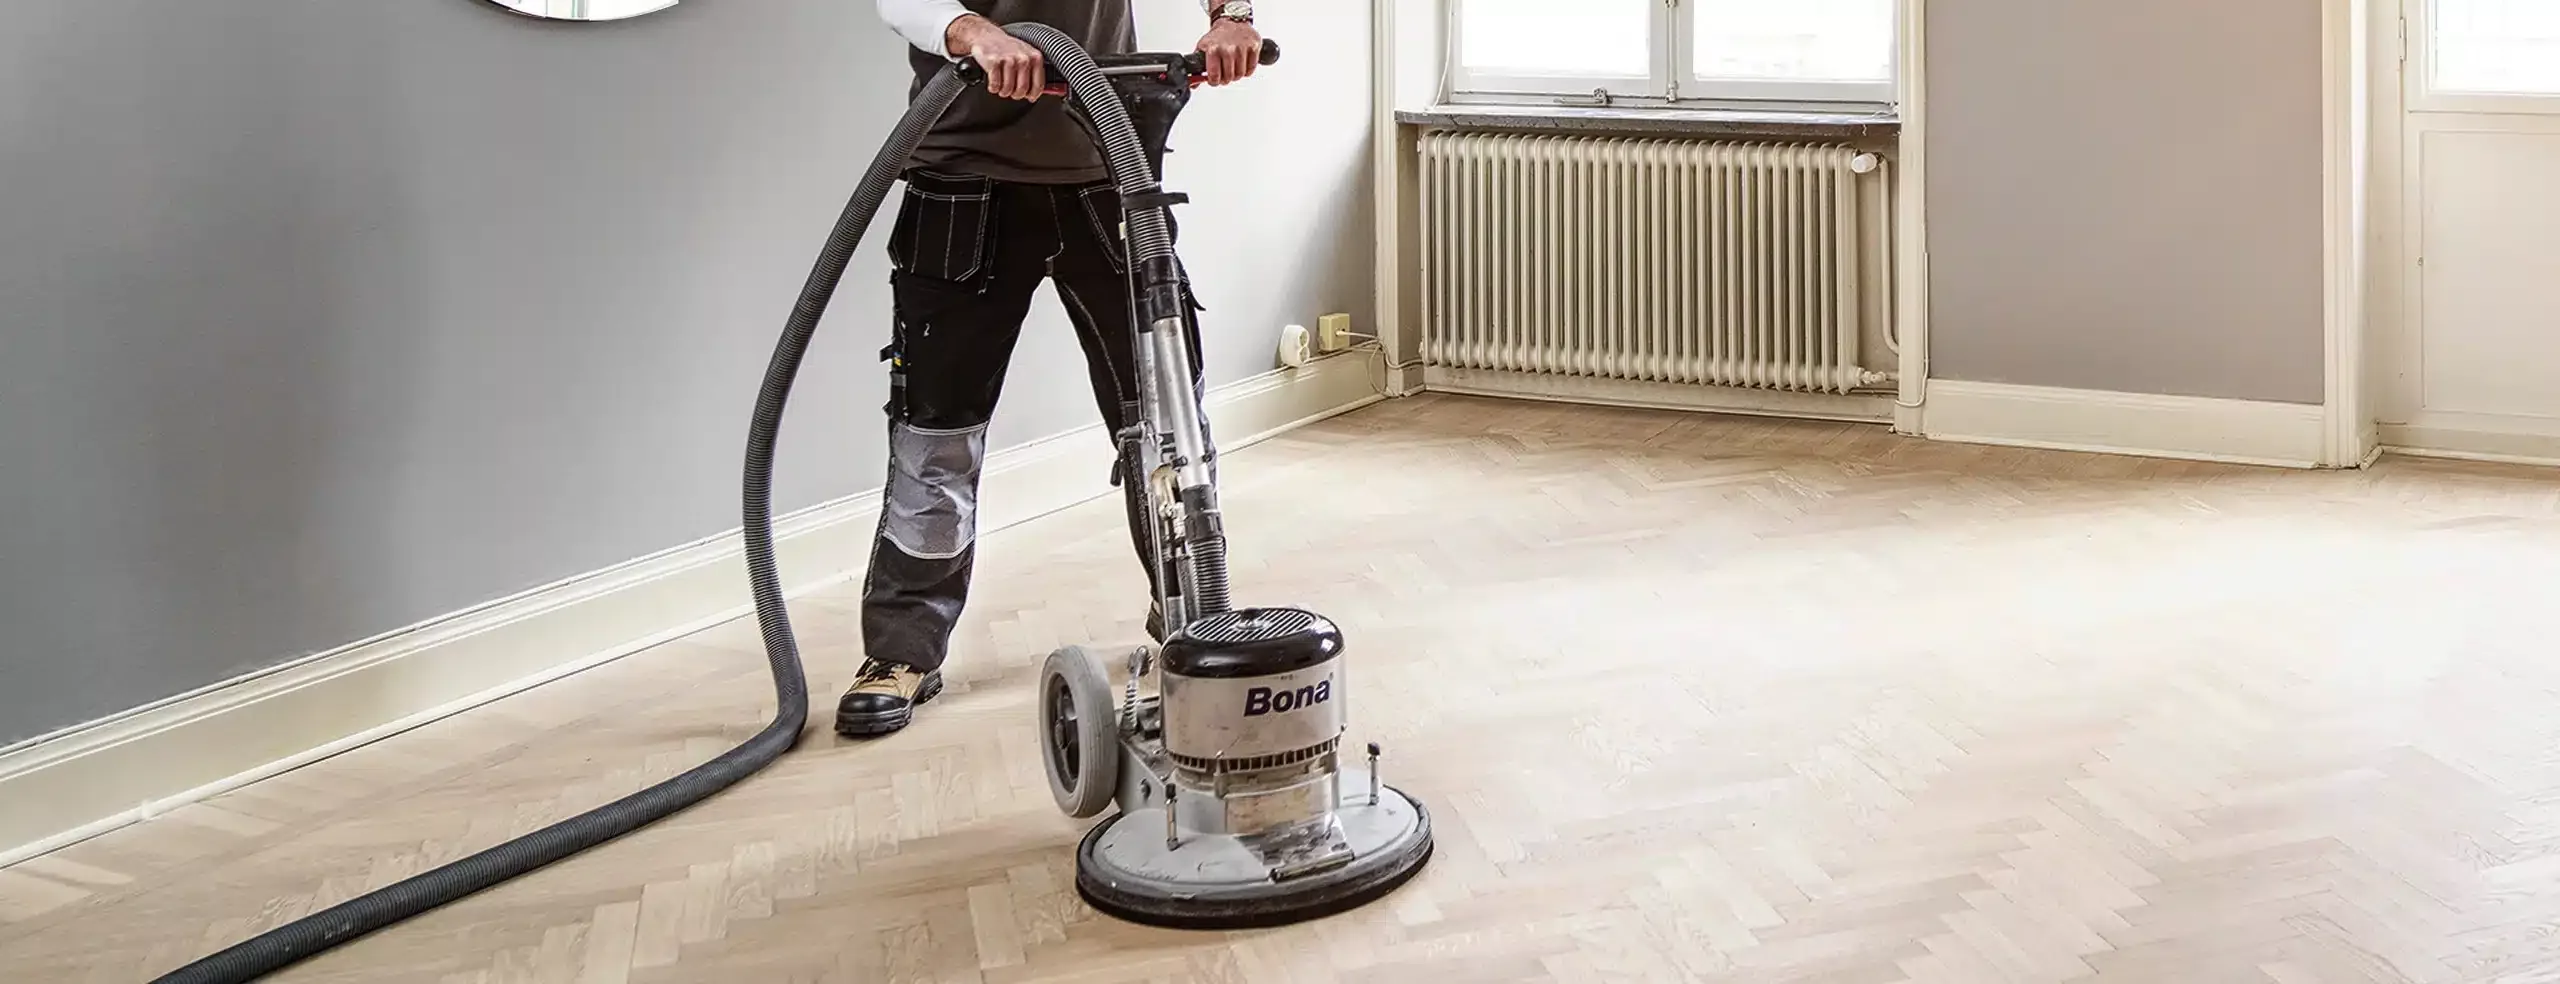
Step 5: Sanding the edges and corners
Once you’ve sanded the main area of the floor, you’ll need to address the edges and corners. Use an edge sander or a smaller handheld orbital sander to sand these areas, making sure to maintain the same grit progression as with the main floor. Be cautious when sanding near baseboards and walls to avoid causing damage.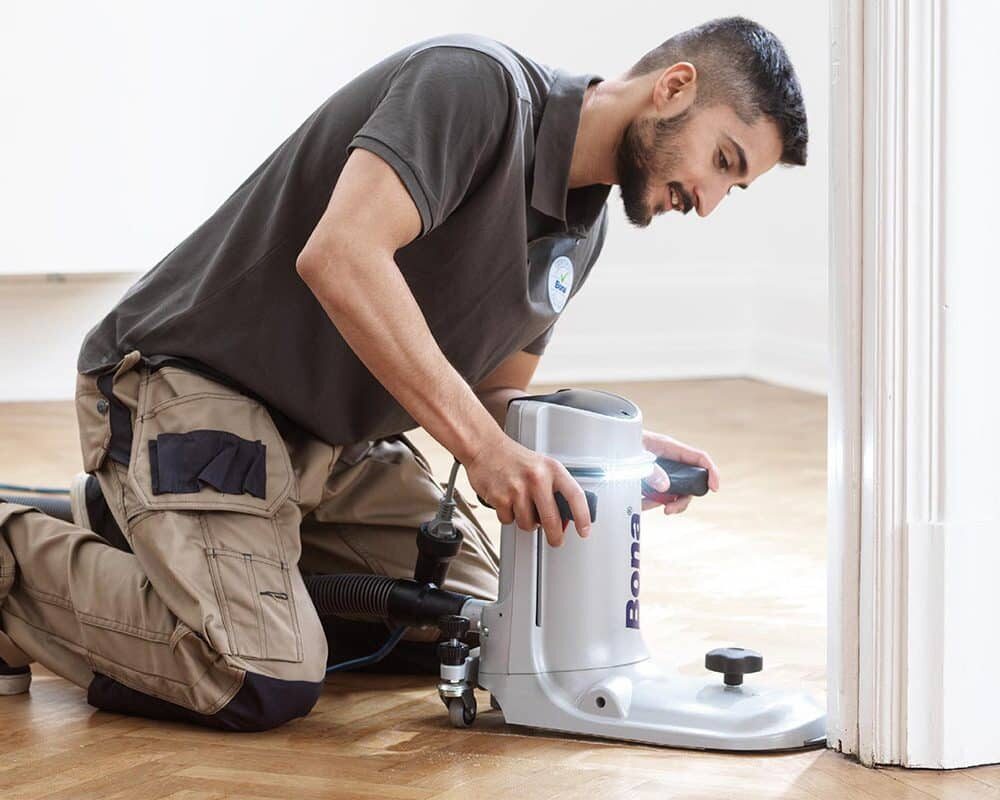
Step 6: Repeating the sanding process with finer-grit sandpaper
After completing the initial sanding with your chosen starting grit, it’s time to progress to finer grit sandpapers. This step is essential for creating a smooth, even surface that’s ready for the finishing touches. Remove the coarser-grit sanding disc from your dustless sander and replace it with the next grit in the progression (for example, moving from 36 grit to 60 grit). Repeat the sanding process as described in Step 4, and then move on to the edges and corners with the appropriate tool, as described. Continue this process, working your way through progressively finer grit sandpapers (e.g., from 60 to 80 grit, 80 to 100 grit, and so on) until you reach the desired level of smoothness. Most hardwood floors require sanding with grits up to 120 or 150, while softer woods may require finer grits for a smooth finish.Step 7: Vacuuming the floor and inspecting for imperfections
Once you’ve completed the sanding process with the final grit of sandpaper, it’s time to thoroughly vacuum the floor to remove any remaining dust and debris. Use your vacuum cleaner with a soft brush attachment to ensure that all traces of dust are removed from the floor’s surface, paying special attention to corners, edges, and any gaps between floorboards. After vacuuming, carefully inspect the floor for any imperfections, such as missed spots, uneven areas, or visible scratches. If necessary, address these issues with spot sanding using the appropriate grit of sandpaper. Once you’re satisfied with the overall appearance and smoothness of the floor, you’re ready to move on to applying the finish, which will protect and enhance the natural beauty of your newly refinished wood floor.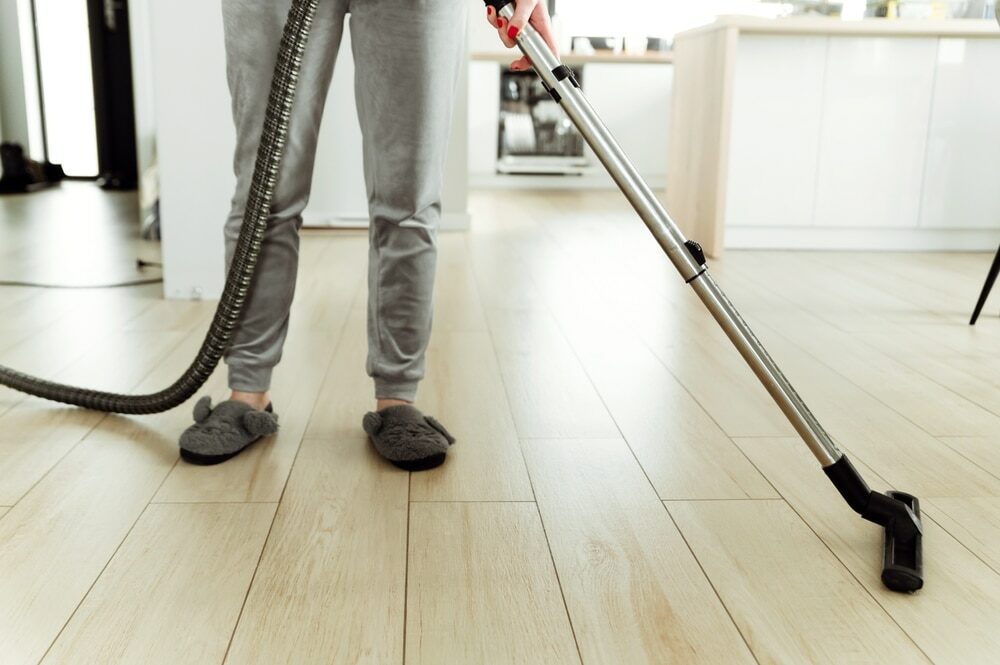
Some Useful Links:
Conclusion
By following this step-by-step guide to dustless wood floor sanding, you’ll be well-equipped to tackle your floor refinishing project with confidence. This cleaner, healthier, and more environmentally friendly method ensures a smooth, even finish that will bring out the true beauty of your wooden floors and restore their original charm.More from our Blog:
Discover the Advantages of Wooden Floors At Your Home Sanding Floorboards for a Stunning Home Transformation | A Comprehensive Guide Learn the Different Steps for Sanding Floorboards | The Best Guide How to Find Top London Wood Floor Sanding Service Providers?

Sanding
We provide virtually dust-free sanding with our continuous belt machinery with mobile extraction units, giving you a safer environment for your family.
Oiling
This organic finish not only adds beauty to your home but also has exceptional water-repellent characteristics, making it easier to clean and maintain.
Waxing
This natural floor finish offers the softest and most mellow appearance – and leaves your floor able to breath.
Buffing
Using soft buffing machines (and hand-polishing where required) will bring a wonderful sheen to your newly-finished floor.
Repairs
We offer a full assessment of your wooden floors to determine what repairs are needed to provide the perfect working surface for the later stages of sanding, staining and sealing.
Restoration
We offer a comprehensive restoration process designed to address floors that are improperly fitted or damaged over time through wear and tear.
Request a fixed price quote for your wood floor restoration now
Simply enter your postcode below to get started.
Services
Wood Floor Sanding Wood Floor Restoration Wood Floor Scratch Repair Squeaky Wood Floor Repair Parquet Floor Sanding Parquet Floor Restoration Commercial Floor Sanding Church Floor Sanding Community Centre Floor Sanding School Floor Sanding Gap Filling Gap Filling with ResinCopyright © Mr Sander®
Privacy & Cookies Terms & Conditions Complaints Procedure Cancellation Rights Sitemap

Get An Instant Price Estimate Before You Go…
Simply enter the rooms you need sanded and we’ll provide you with a price estimate instantly! Try our price calculator now.
Get a Price Estimate NowLocal Floor Sanding Experts
Over 500 5-Star Reviews
Safe, Dust Free Sanding
Operating Since 1994