London:
Nationwide:
25,000+
Floors Restored
27 Years Experience
Wood Flooring Association Certified
The Easy Process of Sanding a Floor: A Comprehensive Guide
Posted on April 17, 2023
Blog
Hardwood floors can be a beautiful and long-lasting feature in any home. Over time, however, they can become worn, scratched, or stained, which detracts from their beauty. One way to restore their original lustre is by sanding and refinishing the floor. Sanding a floor may seem like a daunting task, but with the right tools and techniques, it can be a relatively easy and straightforward process. In this comprehensive guide, we will walk you through the steps of sanding a floor, providing you with tips, tricks, and best practises to ensure a smooth and successful project.
I. Preparation
A. Assess the Floor
Before starting the sanding process, it’s essential to assess the condition of the floor. Look for signs of damage, such as deep scratches, gouges, or loose boards. If there is significant damage or if the floor has been sanded multiple times already, you may need to consult a professional to determine if refinishing is still possible.
B. Clear the Room
Remove all furniture, rugs, and other items from the room. Take down any curtains or drapes to prevent dust from getting trapped in the fabric. Cover light fixtures and vents with plastic sheeting to protect them from dust.

C. Prepare the Floor
- Sweep and vacuum the floor to remove any loose debris.
- Fill any large gaps or cracks with wood filler.
- Remove any protruding nails, staples, or other fasteners. If you cannot remove them, hammer them down and countersink them below the surface of the wood.
- Install a plastic vapour barrier along the baseboards to protect the walls from dust.
II. Choosing the Right Equipment
A. Types of Sanders
There are three main types of sanders used in floor refinishing:
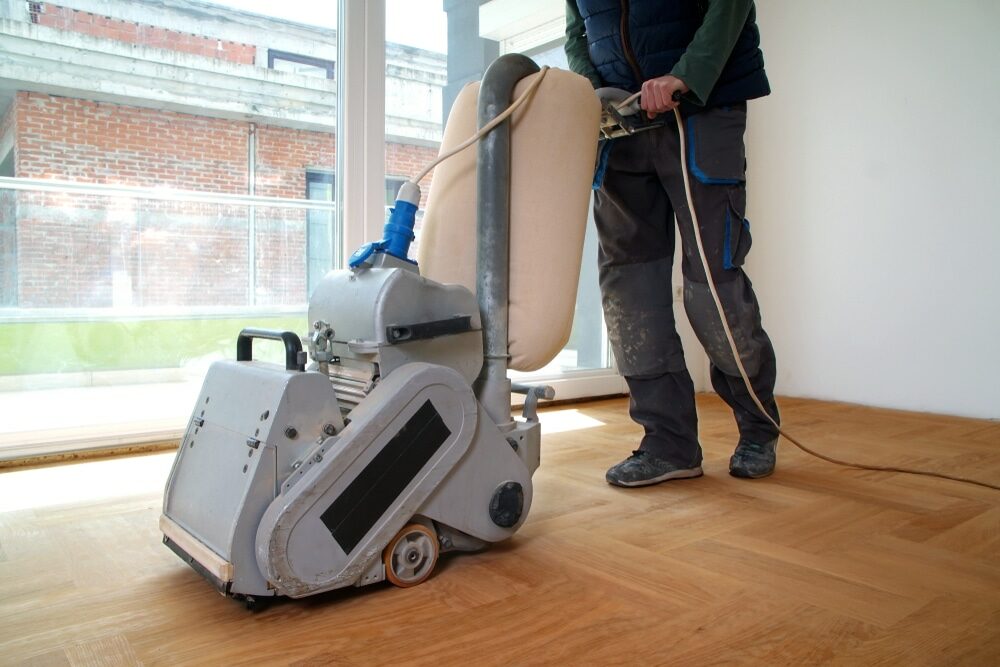
- Drum sander: a heavy-duty sander designed for large areas. It uses a continuous belt of sandpaper and can quickly remove material. However, it can be challenging to control and may cause damage if not used properly.
- Orbital sander: a more user-friendly option suitable for DIYers. It uses a square or rectangular sanding pad that moves in a circular motion, making it less likely to cause damage. It is slower at removing material than a drum sander.
- Edger: A smaller, handheld sander used for tight corners and edges. It typically uses a circular sanding disc and allows for more precise sanding.
B. Sandpaper Grits
Sandpaper is available in various grits, which refer to the coarseness of the abrasive particles. Lower grit numbers are coarser and better for removing material quickly, while higher grit numbers are finer and better for smoothing and finishing. For a typical hardwood floor refinishing project, you will need the following materials:
- 36-grit: for initial rough sanding
- 60-grit: for intermediate sanding
- 100-grit: for final smoothing before applying the finish.
C. Safety Equipment
Sanding a floor generates a significant amount of dust and noise. To protect yourself, wear a dust mask, safety goggles, ear protection, and work gloves. Additionally, wear comfortable clothing that you don’t mind getting dirty.

III. The Sanding Process
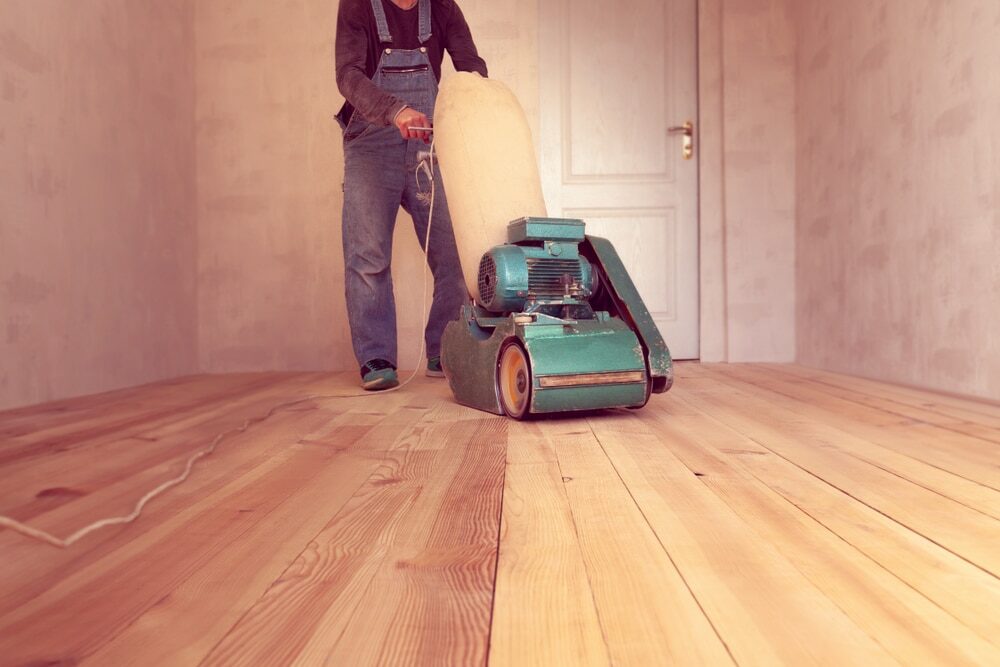
A. Drum Sanding
- Start with the drum sander and 36-grit sandpaper. Begin sanding at one end of the room, moving along the grain of the wood.
- Push the sander forward slowly and steadily, allowing it to do the work. Do not force the sander or move too quickly, as this can result in an uneven or damaged floor.
- 3. Overlap each pass by about 1/3 of the sander’s width to ensure even coverage.
- When you reach the end of a pass, lift the sander off the floor before turning around and starting the next pass.
- Once the entire floor has been sanded with the 36-grit sandpaper, vacuum up the dust.
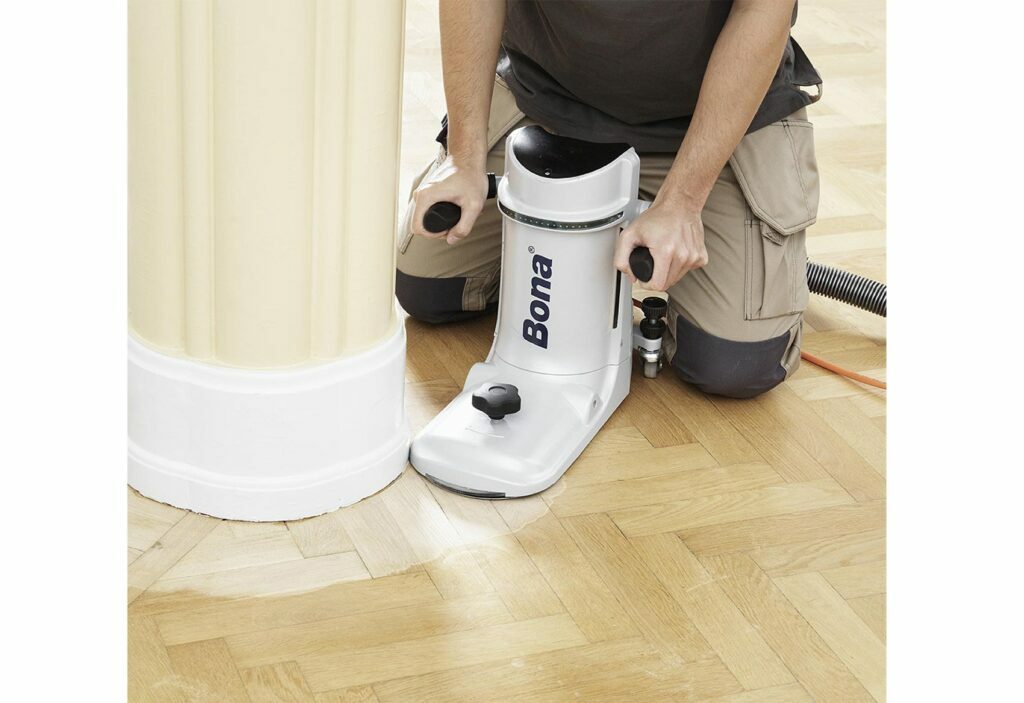

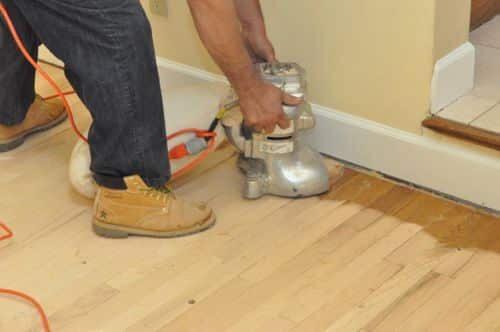
B. Edge Sanding
- Use the edger with 36-grit sandpaper to sand the edges and corners of the room that the drum sander could not reach.
- Move the edger in a smooth, circular motion, being careful not to apply too much pressure or stay in one spot for too long.
- Feather the edge of the sander into the previously sanded area to ensure a seamless transition.
- Vacuum up the dust after completing the edge sanding.
C. Intermediate Sanding
- Switch to the 60-grit sandpaper on both the drum sander and the edger.
- Repeat the same process as the initial sanding, working along the grain and overlapping each pass.
- Remember to lift the sander off the floor at the end of each pass.
- Use the edger to sand the edges and corners of the room with the 60-grit sandpaper.
- Vacuum up the dust once the entire floor has been sanded with the 60-grit sandpaper.
D. Final Sanding
- Install the 100-grit sandpaper on both the drum sander and the edger.
- Sand the entire floor again, following the same process as before.
- Vacuum up the dust and inspect the floor for any remaining scratches or uneven areas. If necessary, sand these areas again with the 100-grit sandpaper until the floor is smooth and even.
E. Clean-up
- Remove the plastic vapor barrier from the baseboards and dispose of it.
- Vacuum the entire room thoroughly, including the walls, baseboards, and any other surfaces that may have collected dust.
- Use a damp cloth to wipe down all surfaces, including the floor, to remove any remaining dust.
IV. Finishing Touches
A. Staining (Optional)
- If desired, apply a wood stain to the floor using a brush or a rag, following the manufacturer’s instructions.
- Allow the stain to dry for the recommended amount of time before proceeding with the sealing process.
B. Sealing
- Choose a floor finish, such as polyurethane or water-based sealer, and follow the manufacturer’s instructions for application.
- Apply the finish using a brush or a roller, working along the grain of the wood.
- Allow the finish to dry for the recommended amount of time before applying additional coats if necessary.
C. Reinstalling Furniture and Decor
- Allow the floor to fully cure according to the finish manufacturer’s recommendations before moving furniture back into the room.
- Use felt pads or furniture sliders to protect the newly refinished floor from scratches and dents.
Some Useful Links:
- Floor Sanding Services
- School Floor Sanding Contractors
- Stairs Sanding & Refinishing
- Hardwood Floor Polishing
Conclusion
Sanding and refinishing a hardwood floor can be an easy and rewarding DIY project with the proper tools, techniques, and patience. By following the steps outlined in this guide, you can transform your worn-out floor into a beautiful and durable surface that adds value and charm to your home. Remember to take your time, use the appropriate safety equipment, and consult a professional if you encounter any issues during the process. With a little hard work and determination, you’ll be able to enjoy your beautifully refinished hardwood floor for years to come.
More from our Blog:
Wood Floor Sanding & Maintenance Tips for the DIY lovers?
Getting Rid of the Possible Floor Sanding and Varnishing Troubles
The Ultimate Guide to Floor Sanding and Polishi


Sanding
We provide virtually dust-free sanding with our continuous belt machinery with mobile extraction units, giving you a safer environment for your family.
Oiling
This organic finish not only adds beauty to your home but also has exceptional water-repellent characteristics, making it easier to clean and maintain.
Waxing
This natural floor finish offers the softest and most mellow appearance – and leaves your floor able to breath.
Buffing
Using soft buffing machines (and hand-polishing where required) will bring a wonderful sheen to your newly-finished floor.
Repairs
We offer a full assessment of your wooden floors to determine what repairs are needed to provide the perfect working surface for the later stages of sanding, staining and sealing.
Restoration
We offer a comprehensive restoration process designed to address floors that are improperly fitted or damaged over time through wear and tear.
Request a fixed price quote for your wood floor restoration now
Simply enter your postcode below to get started.
Services
Wood Floor Sanding Wood Floor Restoration Wood Floor Scratch Repair Squeaky Wood Floor Repair Parquet Floor Sanding Parquet Floor Restoration Commercial Floor Sanding Church Floor Sanding Community Centre Floor Sanding School Floor Sanding Gap Filling Gap Filling with ResinCopyright © Mr Sander®
Privacy & Cookies Terms & Conditions Complaints Procedure Cancellation Rights Sitemap

Get An Instant Price Estimate Before You Go…
Simply enter the rooms you need sanded and we’ll provide you with a price estimate instantly! Try our price calculator now.
Get a Price Estimate NowLocal Floor Sanding Experts
Over 500 5-Star Reviews
Safe, Dust Free Sanding
Operating Since 1994