London:
Nationwide:
25,000+
Floors Restored
27 Years Experience
Wood Flooring Association Certified
How to Prevent Damage While Buffing Your Floors
Posted on November 8, 2023
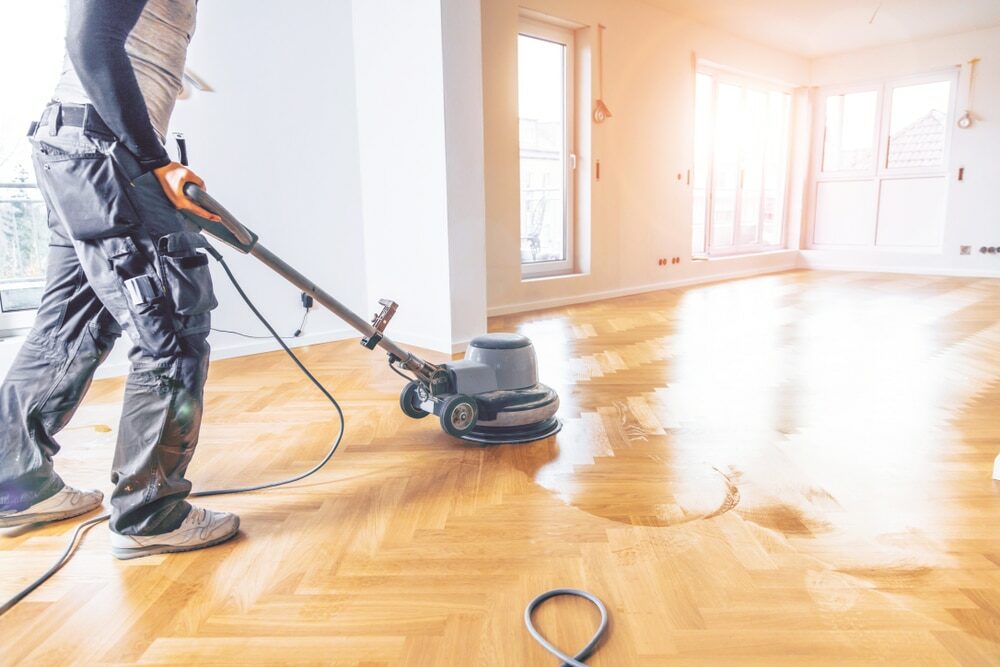
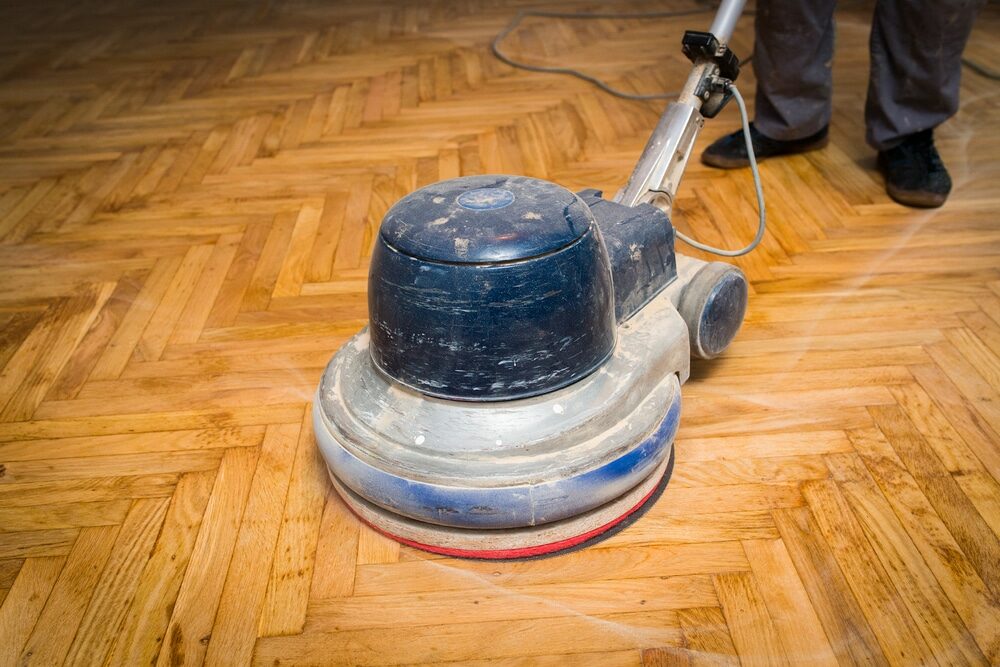
Buffing
Mastering the Art of Safe Wood Floor Buffing
Buffing your wood floors can rejuvenate their appearance, bringing out the beauty and warmth that may have dimmed over time. However, without the proper technique and precautions, this process can quickly go from revitalization to ruination. In this guide, we’ll explore the essential steps and insider tips to prevent damage while buffing your wood floors. Whether you’re dealing with century-old hardwood or a modern engineered surface, you’ll learn how to protect your investment and achieve that sought-after lustre without worry. Get ready to arm yourself with the knowledge to buff confidently and preserve the character of your floors for years to come.
Introduction to Wood Floor Buffing
Wood floors are a timeless and durable choice for any home, often serving as the centrepiece of a room and setting the tone for the decor. However, the charm and warmth of wood floors come with the responsibility of maintenance to keep them in their prime. One of the key maintenance techniques is buffing—a process that revives the floor’s finish, smooths out minor scratches, and restores the original shine without the need for a complete sanding and refinishing.
Buffing is not just about aesthetics; it’s also a protective measure. Over time, the protective layer that shields the wood from damage can wear down. By buffing and then reapplying a finish coat, you can protect the wood from moisture, dirt, and everyday wear and tear. However, while buffing can be immensely beneficial, it is a process that requires a careful approach to prevent damage.
In this guide, we will delve into the nuances of wood floor buffing, providing you with valuable insights and practical steps to enhance your floor’s durability and appearance. Whether you are a seasoned DIY enthusiast or considering buffing your floors for the first time, understanding the right techniques and precautions is crucial. By the end of this post, you will be equipped with the knowledge to buff your wood floors safely and ensure they remain a stunning feature of your home for many years to come.
Preparing Your Wood Floors for Buffing
Preparing your wood floors for buffing is an essential step in the maintenance process that can significantly influence the final outcome. Proper preparation ensures that the buffing process enhances the floor’s appearance without causing any unintended damage. Here’s a detailed approach to preparing your wood floors for buffing:
1. Cleaning the Surface: The first step is to thoroughly clean the floor. Remove all dust, dirt, and debris, as these can become abrasive under a buffer. Use a vacuum with a soft-bristle attachment to avoid scratching the wood. Follow this with a damp mop using a cleaner specifically designed for wood floors. Allow the floor to dry completely before proceeding to the next step.
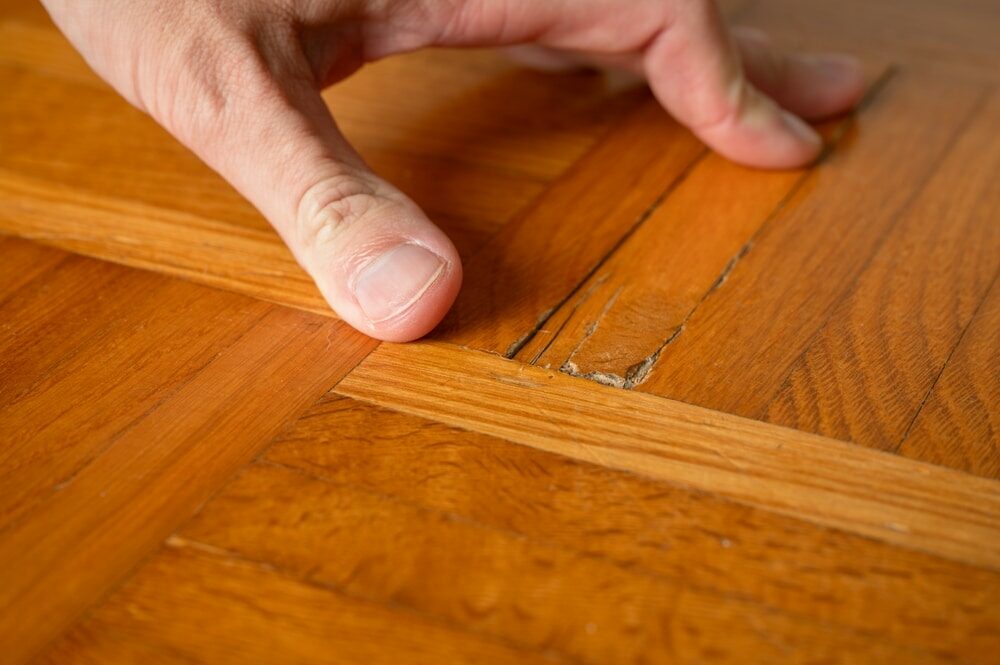
2. Checking for Damage: Before buffing, inspect the floor for any signs of significant damage, such as deep scratches, gouges, or warped planks. These issues may need to be addressed separately, either by replacing individual boards or by consulting with a professional. Buffing is not a solution for severe damage and can exacerbate these issues if not handled properly.
3. Clearing the Area: Remove all furniture, rugs, and movable items from the room. This not only provides you with an unobstructed area to work in but also prevents any damage to your furnishings. If furniture is too heavy to move, consider using furniture sliders to avoid scratching the floor.
4. Patch Testing Your Finish: If you’re planning to apply a new finish after buffing, it’s wise to do a patch test in an inconspicuous area. This ensures the new finish adheres properly and looks as expected when applied over the buffed wood.
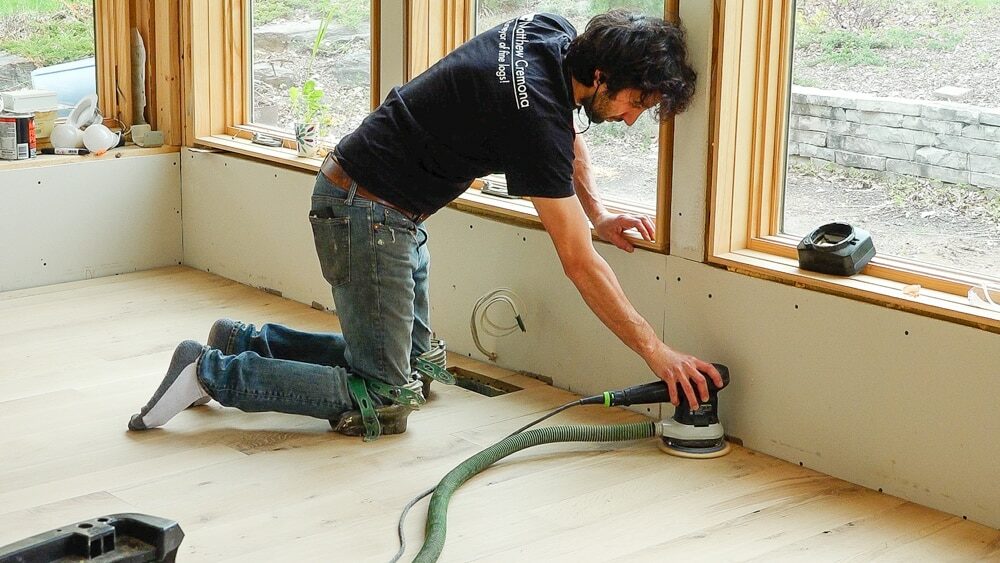
5. Preparing the Perimeter: Buffing machines can be difficult to manoeuvre along the edges of the room. Use a handheld orbital sander or a sanding block with fine-grit sandpaper to lightly scuff the perimeter where the buffer can’t reach. This will ensure an even, consistent finish throughout the entire floor.
6. Safety Measures: Buffing can generate a lot of dust and noise. Before starting, make sure you have the necessary safety gear, such as dust masks, ear protection, and safety glasses.
With your wood floors properly prepared, you’re now ready to move on to the buffing process. By taking the time to prepare thoroughly, you’re setting the stage for a successful buffing job that will leave your floors looking refreshed and rejuvenated.
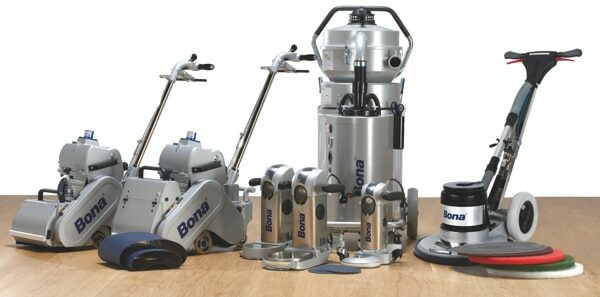
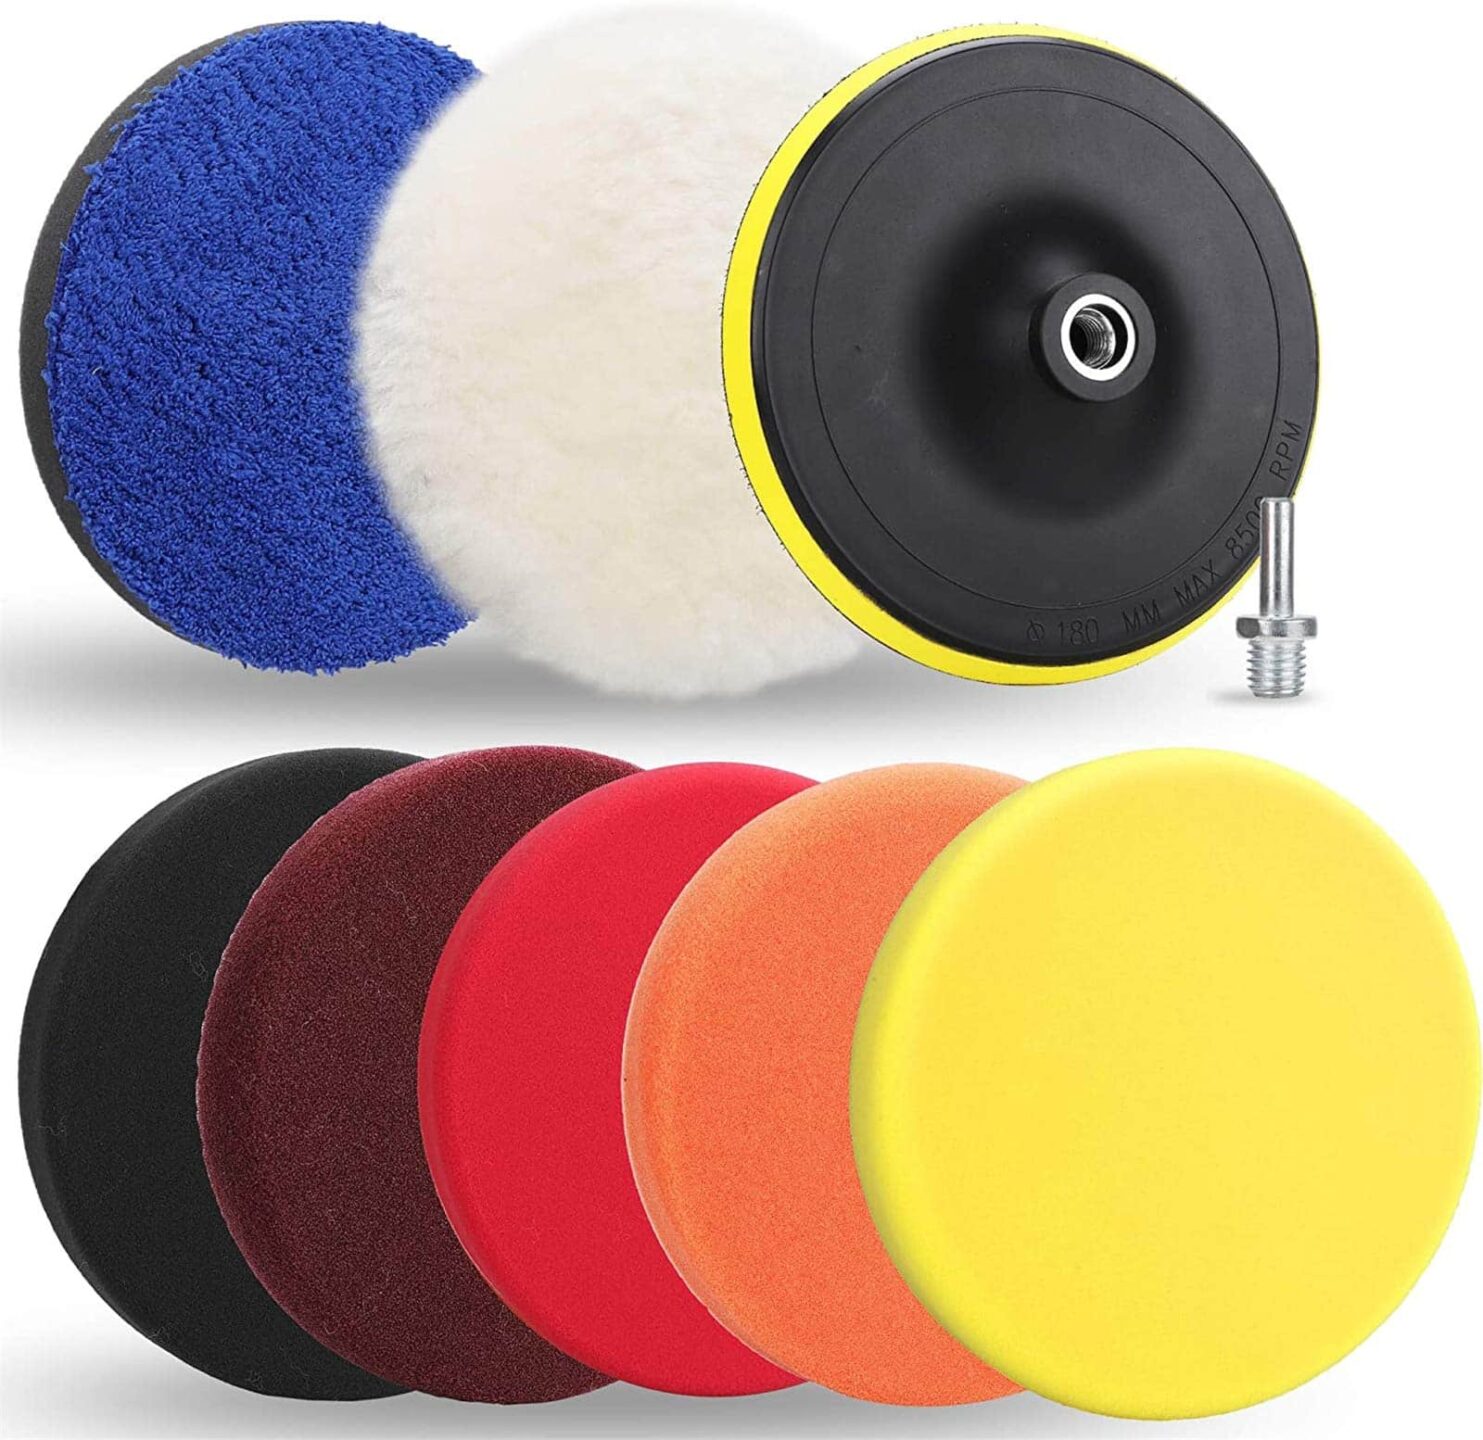
Choosing the Right Equipment
Selecting the right equipment for buffing your wood floors is critical to achieving a smooth, uniform finish without causing damage. The equipment and materials you choose will depend on the type of wood floor you have, its condition, and the desired outcome. Here’s a guide to help you make the right choices:
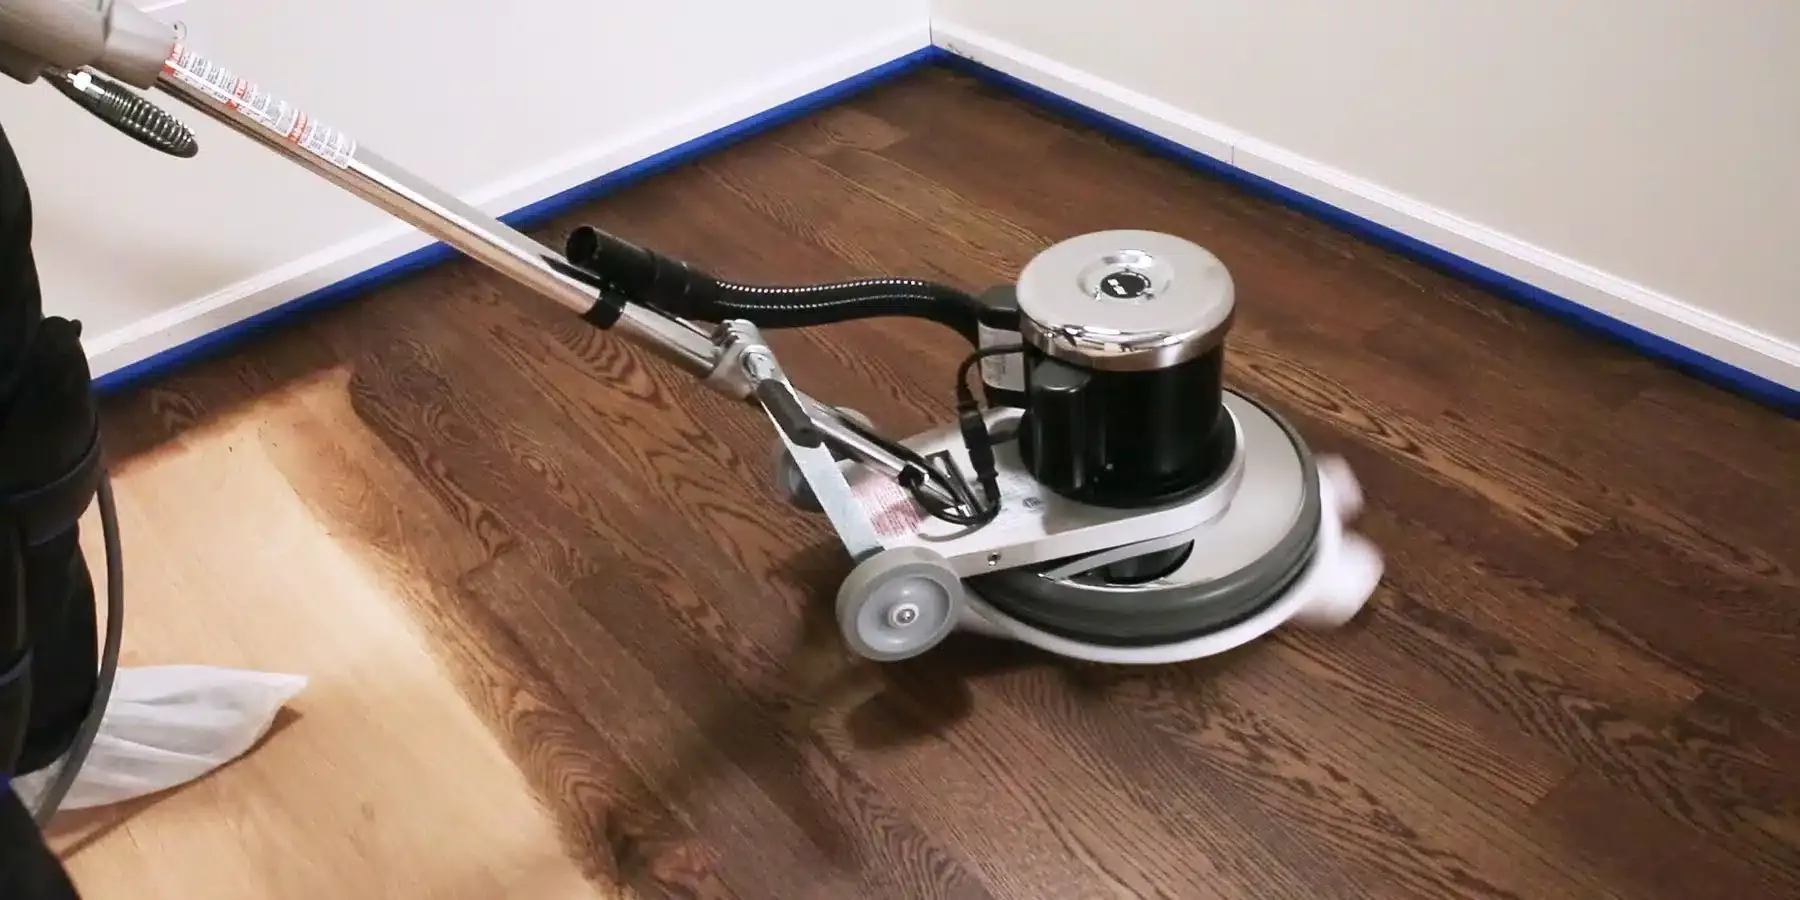
1. Buffing Machines: There are several types of buffing machines available, each designed for specific floor conditions and user experience levels:
- Standard Rotary Buffers: These are versatile and can be used with different pads and brushes. They require a bit of skill to operate smoothly to avoid swirl marks on the floor.
- Random Orbital Buffers: Less aggressive than rotary buffers, these are easier for beginners to use and reduce the risk of leaving swirls or cross-grain scratches.
- Square Buff Floor Sanders: These are also user-friendly and particularly effective for getting close to the edges and corners of the room.
Choose a buffer that you feel comfortable handling and that matches the sensitivity of your wood floors.
2. Pads and Abrasives: The pad or sanding screen you select will have a significant impact on the buffing process. Options include:
- Thick Pads: These are used for light buffing and polishing. They’re less abrasive and are typically used for applying waxes or finishes.
- Thin Pads: These are more abrasive and are used for smoothing out minor imperfections.
- Sanding Screens: These are available in various grits. Lower grit numbers are more abrasive and should be used for floors with more significant wear; higher grit numbers are less abrasive and are used for a lighter buff.
Always start with a less abrasive pad or screen to avoid damaging the floor, and only switch to a more abrasive option if necessary.
3. Safety Gear: Proper safety gear is non-negotiable when using buffing equipment.
- Eye Protection: To guard against dust and debris.
- Respiratory Mask: To prevent inhalation of fine dust particles.
- Ear Protection: To shield your ears from the prolonged noise of the machine.
- Gloves: To improve grip and protect your hands
4. Other Supplies: In addition to the primary equipment, consider these supplies:
- Dust masks or a dust collection system: to keep the work environment clean and reduce cleanup
- Cleaning Supplies: such as a vacuum and tack cloth to clean the floor before and after buffing.
- Finishing Products: If you plan to reseal the floor post-buffing, have your chosen sealant or wax at hand.
Before you begin, make sure to read the user manual of your buffing machine thoroughly and understand its functions and safety features. If you’re renting equipment, don’t hesitate to ask the rental company for a demonstration or tips on using the machine effectively.
By carefully choosing the right equipment and preparing accordingly, you’ll be well on your way to achieving beautifully buffed wood floors without the risk of damage.
The Correct Buffing Technique
Employing the correct buffing technique is paramount to achieving a beautifully polished wood floor without incurring any damage. Here’s how to execute the buffing process correctly:
1. Step-by-Step Buffing Process:
- Start with the right pad: Attach a fine-grit sanding screen or buffing pad to the bottom of the buffer. For most buffing jobs, starting with a 100- to 120-grit screen is advisable.
- Begin at the Edges: Start buffing along the edges of the room, moving towards the center. This helps to avoid missing any spots. For areas the buffer can’t reach, use a handheld orbital sander or a sanding block.
- Buff in a Pattern: Work in a side-to-side pattern across the floor, slightly overlapping each pass to ensure full coverage. Keep the buffer moving at all times to prevent it from sanding down too deeply in one spot.
- Maintain a Steady Pace: Move the buffer at a consistent, moderate pace—neither too fast nor too slow. A steady pace helps to apply even abrasion across the floor.
- Monitor the pad: Check the pad or screen periodically for clogging or wear. Replace it when necessary to maintain an efficient buffing process.
2. Maintaining the Right Speed and Pressure:
- Speed: The machine should be kept at a low to moderate speed, allowing you to control it better and avoid aggressive abrasion.
- Pressure: Apply light to moderate pressure—enough to engage the pad with the floor but not so much that it hinders the movement of the machine or digs into the wood.
3. Directional Techniques to Avoid Uneven Wear:
- Go with the grain: Whenever possible, move the buffer in the direction of the wood grain. This minimises scratches and keeps the floor looking uniform.
- Cross-Grain Technique: If you must move across the grain (in rooms with varying plank directions), do so with a very fine pad and gentle pressure to avoid noticeable scratches.
4. Keep dust to a minimum.
- Dust Control: Regularly vacuum or sweep up the dust created during buffing. Excessive dust can settle back on the floor and get caught in the finish if not removed.
5. Inspect as You Go:
- Frequent Inspection: Stop occasionally to inspect the floor from different angles. Look for any uneven areas or spots that may need more attention.
By adhering to these techniques, you’ll ensure a more effective buffing session, leading to floors that look professionally maintained. Remember, the goal of buffing is not to remove all imperfections but to smooth out the finish and prepare the floor for a new coat of sealant or wax, which will enhance the wood’s natural beauty and provide protection. If you’re unsure or uncomfortable at any point, consider hiring a professional to ensure the best results.
Aftercare: Protecting Your Floors Post-Buffing
Proper aftercare following a buffing session is crucial to maintaining the beauty and extending the life of your wood floors. Here’s what you should do after buffing to protect your floors:
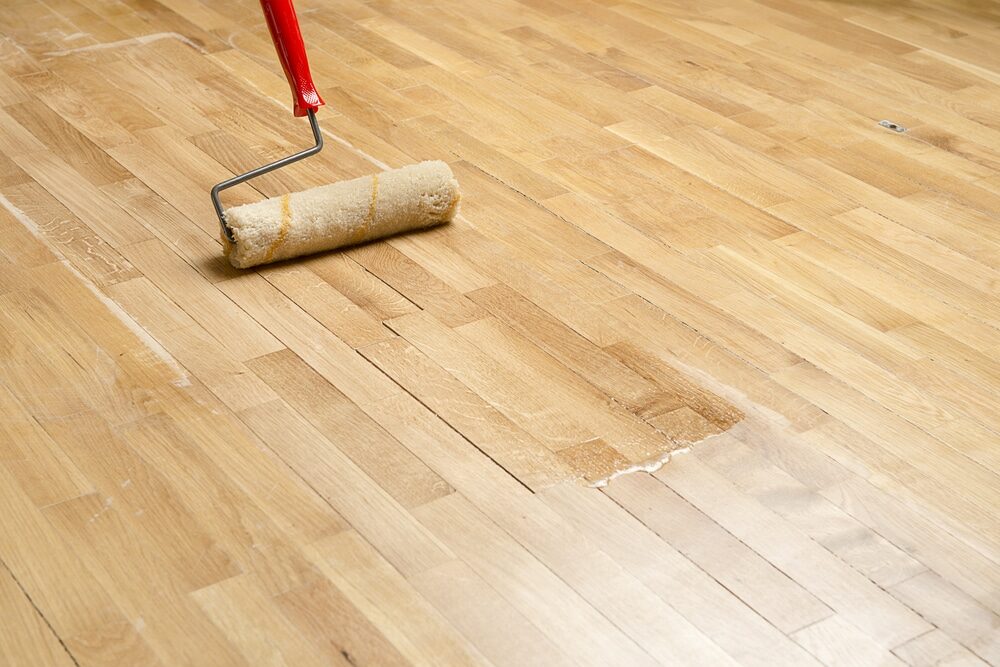
1. Applying Finish or Sealant: Once you’ve completed buffing and have a clean, smooth surface, it’s time to seal the deal. Choose a finish or sealant that matches your floor type and desired sheen level. Polyurethane is a popular choice for its durability, while others may prefer wax for its natural glow.
- Applying the Finish: Follow the manufacturer’s instructions carefully when applying the finish. Use a high-quality applicator and work in small sections, maintaining a wet edge to avoid lap marks.
- Drying Time: Allow the finish to dry as recommended before applying additional coats. This may take anywhere from a few hours to overnight, depending on the product.
2. Regular Maintenance Tips: After the finish has dried, regular maintenance will help preserve your floors.
- Daily Dusting: Use a microfiber mop or cloth to pick up daily dust and debris.
- Weekly Cleaning: Clean the floors weekly with a wood floor cleaner and a damp mop. Avoid using water or steam cleaners, which can damage the wood.
- Felt Pads: Attach felt pads to the legs of furniture to prevent scratches when moving objects around.
- Rugs and Mats: Use rugs and mats in high-traffic areas to minimise wear.
3. When to Call in Professionals: If you’re unsure about any part of the buffing or finishing process or if your floors have significant damage, it’s best to call in professional floor refinishers. They can assess your floors and perform the necessary tasks to restore them effectively.
4. Avoiding Common Mistakes: Post-buffing, it’s essential to avoid certain activities that can damage the fresh finish:
- Foot Traffic: Keep foot traffic to a minimum until the finish is fully cured, which can take up to a week.
- Heavy Furniture: Avoid placing heavy furniture on the floors for at least 48 hours after the final coat.
- Rugs: Wait at least two weeks before laying rugs back down to allow the finish to cure completely.
5. Long-Term Care: Think of your wood floors as a living investment.
- Re-coating: Depending on traffic and wear, re-coat your floors every few years to refresh the finish.
- Sunlight Exposure: Protect your floors from prolonged sunlight exposure with curtains or UV-protective window films to prevent fading.
- Humidity Control: Maintain a stable indoor humidity level to prevent the wood from expanding or contracting excessively.
By following these aftercare steps, you’ll not only protect your wood floors post-buffing but also preserve their quality and appearance for future years. Remember, consistent care is the key to long-lasting beauty in wood flooring.
Common Mistakes to Avoid During Buffing
Buffing your wood floors can rejuvenate their appearance, but several common mistakes can lead to damage rather than improvement. To ensure a successful buffing process, be mindful to avoid these pitfalls:
- Skipping Proper Floor Preparation: Failing to thoroughly clean and check for damage before buffing can result in scratches and ineffective buffing. Make sure the floor is free of debris and repair any significant damage first.
- Using Incorrect Equipment: Selecting the wrong type of buffer or using the incorrect pad or abrasive can cause scratches and uneven wear. Use equipment that is appropriate for the type of wood and the condition of your floor.
- Over-buffing: Moving too slowly or buffing one area for too long can wear down the finish excessively and damage the wood. Keep the buffer moving at a steady pace.
- Applying Too Much Pressure: Excessive pressure can lead to uneven results and potentially gouge the wood. Let the weight of the machine do most of the work.
- Ignoring the Grain of the Wood: Buffing against the grain can leave visible scratches and ruin the aesthetic of the floor. Always buff in the direction of the wood grain.
- Not Testing the New Finish: It’s important to test the new finish in an inconspicuous area before applying it to the entire floor to ensure compatibility and the desired appearance.
- Forgetting Safety Gear: Neglecting to wear safety glasses, a dust mask, and ear protection can lead to personal injury. Always prioritise your safety during DIY projects.
- Neglecting Edges and Corners: Failing to properly address the edges and corners of the room can result in a patchy finish. Handheld sanders can help reach these areas.
- Not Checking the Abrasive for Wear: Using worn-out abrasives can reduce efficiency and effectiveness. Check and replace them as needed during the buffing process.
- Buffing Floors That Need Refinishing: Attempting to buff floors that are severely damaged or worn down can cause more harm. Sometimes a full refinish is necessary for the best results.
By steering clear of these common errors, you can ensure a smoother, safer, and more satisfying buffing experience that leaves your wood floors shining and well-protected.
Conclusion
The longevity of your wood floors is largely contingent upon the care and maintenance practices you employ. Buffing is an integral part of preserving the life and beauty of your floors, providing a way to refresh the finish and minimise imperfections without the rigours of a complete refinishing job. To conclude, let’s recap the key points to ensuring the longevity of your buffed wood floors:
- Routine Care: Regular cleaning with appropriate products will keep your floors looking their best and prevent the build-up of dirt and grime that can wear down the finish over time.
- Preventative Measures: Use rugs, mats, and furniture pads to protect your floors from scratches and dents. Be mindful of humidity levels in your home to prevent warping or splitting.
- Periodic Buffing: Incorporate buffing into your maintenance schedule every few years to renew the protective layer of your floors and address minor cosmetic issues.
- Proper Technique: Always use the correct buffing technique and equipment. Work gently and with the grain of the wood to avoid damage.
- Professional Insight: If you are uncertain about any aspect of the buffing process or if the floor has significant damage, consult with a professional to prevent potential harm to your floors.
- Aftercare: Following a buffing process, apply a suitable finish and allow it to cure completely. This will protect your floors from moisture, dirt, and wear, prolonging their lifespan.
- Ongoing Inspection: Regularly inspect your floors for signs of wear or damage. Early detection can mean simpler, less costly repairs.
By adhering to these practices, you can enjoy the natural elegance and warmth of your wood floors for many years. Remember that the key to longevity is a combination of regular maintenance, prompt attention to any issues, and the use of correct techniques and materials. Your wood floors are not only a functional aspect of your home but also an investment—taking the time to care for them properly will ensure that they remain a valuable and beautiful part of your living space.

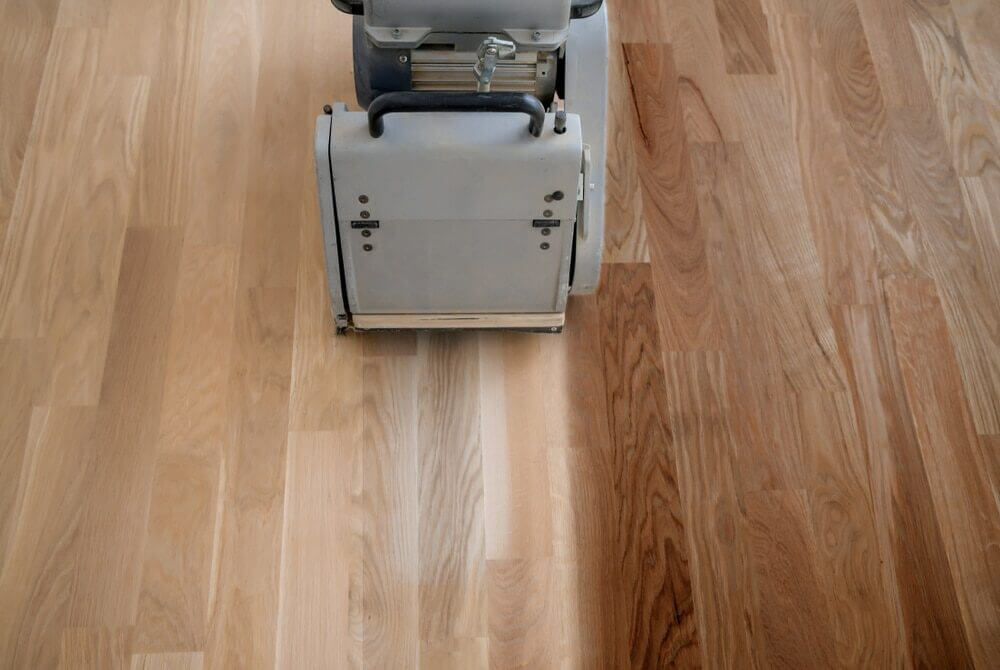
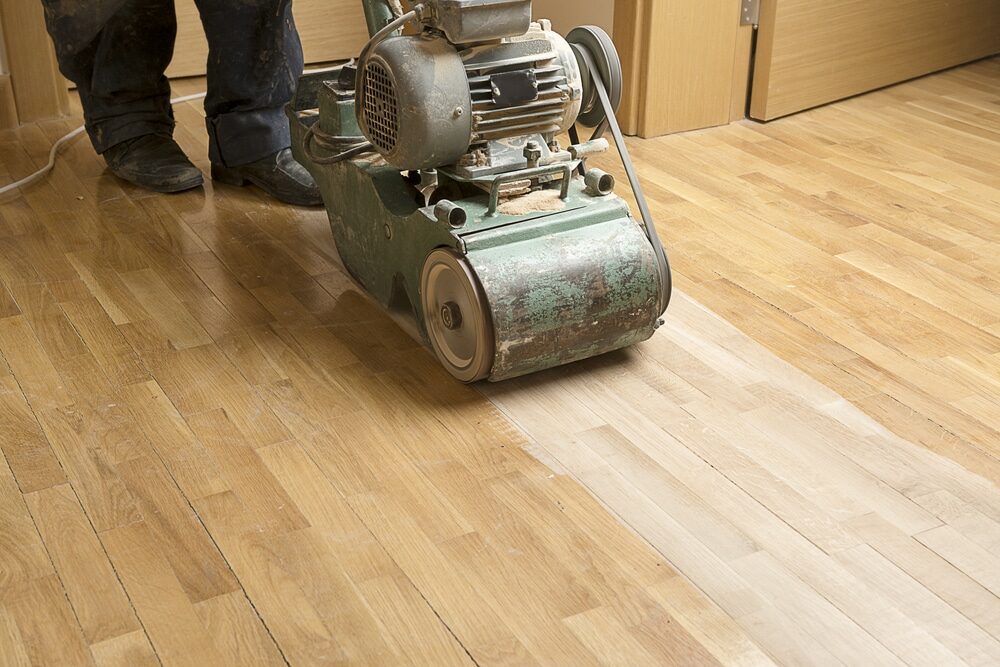
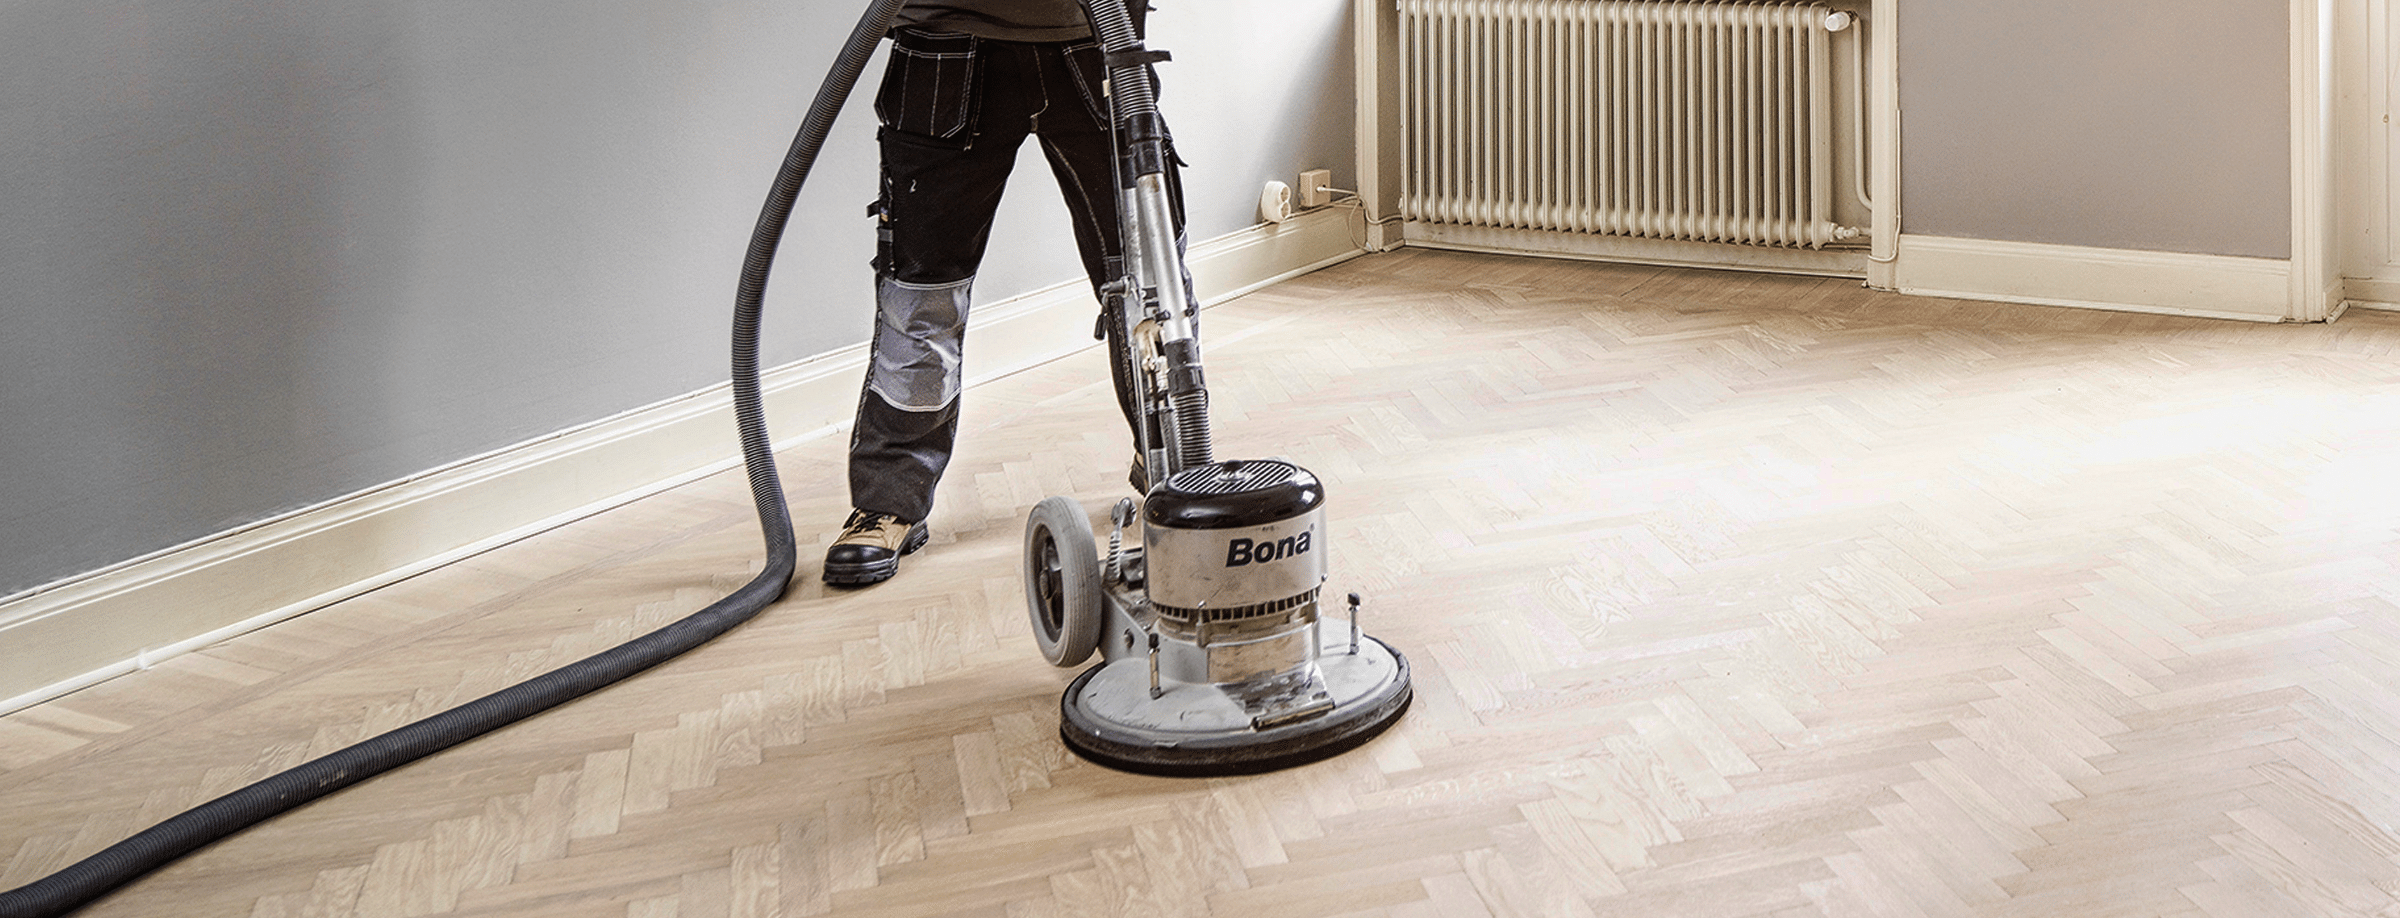
Sanding
We provide virtually dust-free sanding with our continuous belt machinery with mobile extraction units, giving you a safer environment for your family.
Oiling
This organic finish not only adds beauty to your home but also has exceptional water-repellent characteristics, making it easier to clean and maintain.
Waxing
This natural floor finish offers the softest and most mellow appearance – and leaves your floor able to breath.
Buffing
Using soft buffing machines (and hand-polishing where required) will bring a wonderful sheen to your newly-finished floor.
Repairs
We offer a full assessment of your wooden floors to determine what repairs are needed to provide the perfect working surface for the later stages of sanding, staining and sealing.
Restoration
We offer a comprehensive restoration process designed to address floors that are improperly fitted or damaged over time through wear and tear.
Request a fixed price quote for your wood floor restoration now
Simply enter your postcode below to get started.
Services
Wood Floor Sanding Wood Floor Restoration Wood Floor Scratch Repair Squeaky Wood Floor Repair Parquet Floor Sanding Parquet Floor Restoration Commercial Floor Sanding Church Floor Sanding Community Centre Floor Sanding School Floor Sanding Gap Filling Gap Filling with ResinCopyright © Mr Sander®
Privacy & Cookies Terms & Conditions Complaints Procedure Cancellation Rights Sitemap

Get An Instant Price Estimate Before You Go…
Simply enter the rooms you need sanded and we’ll provide you with a price estimate instantly! Try our price calculator now.
Get a Price Estimate NowLocal Floor Sanding Experts
Over 500 5-Star Reviews
Safe, Dust Free Sanding
Operating Since 1994