London:
Nationwide:
25,000+
Floors Restored
27 Years Experience
Wood Flooring Association Certified
The Importance of Proper Buffing Speed for Floor Sanding
Posted on October 22, 2023
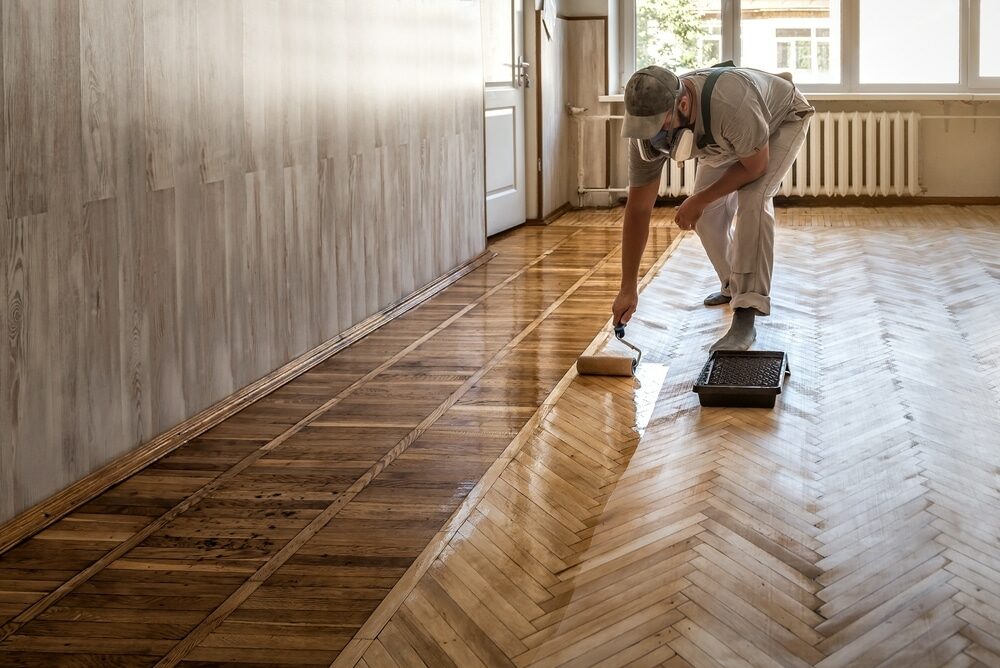
Buffing
Unveiling the Secrets: Mastering Buffing Speed for Flawless Wood Floor Sanding
Sanding wood floors is a critical step in the refinishing process, determining the final quality and longevity of the flooring. One aspect that plays a pivotal role in achieving a flawless finish is the buffing speed during the sanding process. This document delves into the significance of maintaining the proper buffing speed, examining how it influences the outcome of the sanding job and the overall aesthetics of the wood floor. From ensuring an even surface to enhancing the wood grain’s visibility, the buffing speed holds the key to a superior finish, making it imperative for professionals and DIY enthusiasts alike to understand and master this aspect of wood floor sanding.
Achieving a smooth, blemish-free finish on wood floors is no small feat, and it requires attention to detail and the right techniques. Among the various factors that contribute to a successful wood floor sanding project, the buffing speed stands out as a crucial element. This introduction serves as a guide to understanding the importance of proper buffing speed, providing insights into how it affects the sanding process and the quality of the final result. Whether you are a seasoned professional or a homeowner looking to refurbish your floors, grasping the significance of buffing speed is essential for ensuring a durable and visually appealing wood floor.
The art of wood floor sanding demands precision, patience, and a deep understanding of the materials and tools involved. Among the myriad of factors that dictate the success of a sanding project, buffing speed emerges as a critical component that cannot be overlooked. In this comprehensive exploration, we will delve into the nuances of buffing speed, elucidating its pivotal role in achieving a seamless and lustrous finish on wood floors. From removing old finishes and scratches to preparing the surface for staining and sealing, the buffing speed plays an integral role, making it a topic of paramount importance for anyone engaged in wood floor restoration and maintenance.
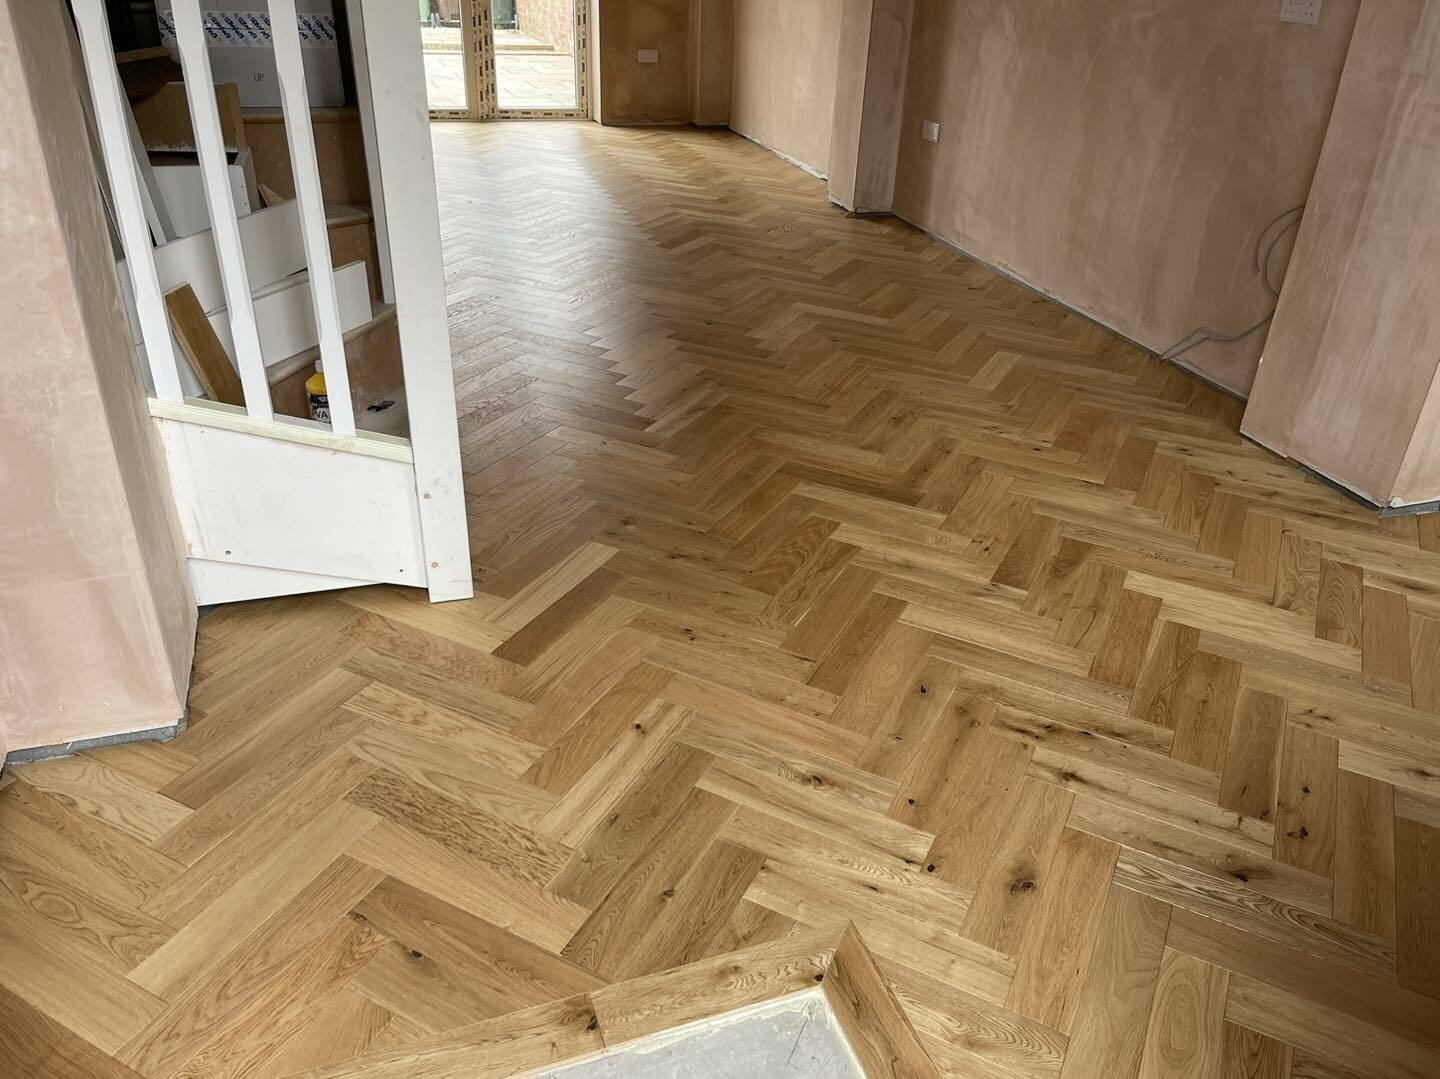
Understanding Wood Floors
Understanding wood floors encompasses a range of topics including the types of wood used, the construction of the flooring, the finishes available, and proper maintenance practices. Here’s a detailed exploration:
Types of Wood
Wood floors can be made from a variety of hardwood and softwood species, each providing a unique appearance and set of characteristics. Common hardwoods used include oak, maple, and cherry, known for their durability and attractive grain patterns. Softwoods such as pine and fir are also options, though they tend to be softer and more prone to scratches.
Construction
Wood flooring typically comes in three main types: solid, engineered, and laminate.
- Solid Wood Floors are made from single pieces of hardwood and have the advantage of being able to be sanded and refinished multiple times. However, they can be susceptible to changes in humidity and temperature, leading to expansion and contraction.
- Engineered Wood Floors consist of a top layer of hardwood bonded to multiple layers of plywood. This construction provides stability, reducing the risk of warping and making them suitable for a wider range of environments, including over radiant heating systems or concrete slabs.
- Laminate Wood Floors are not made of real wood but have a photographic layer that mimics wood’s appearance, placed over a core board. They are usually more affordable but can’t be refinished like real wood.
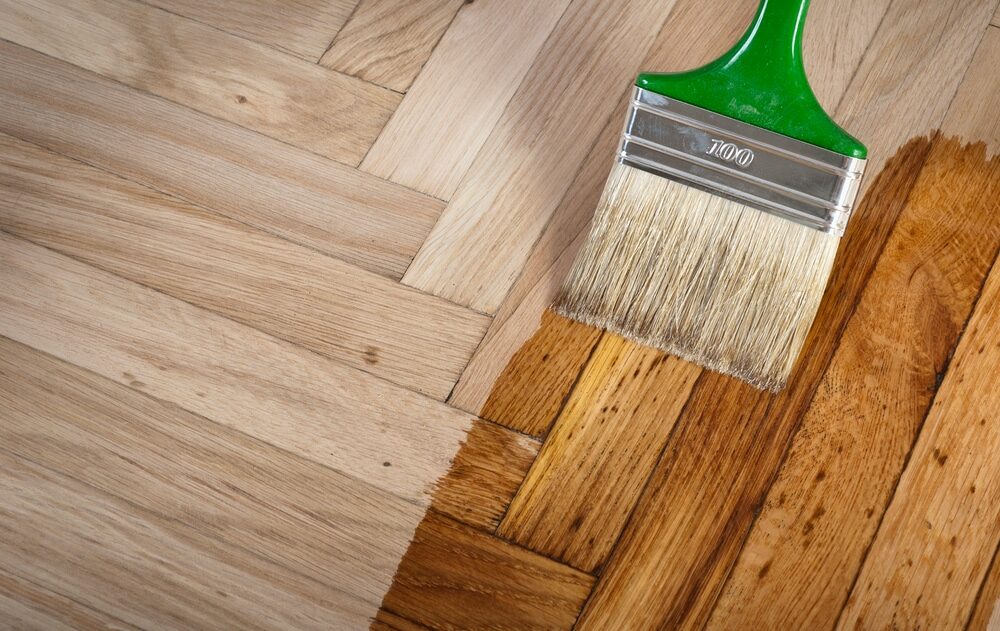
Finishes
Wood floors can be finished in a number of ways, each providing a different level of protection and aesthetic:
- Oil-Based Polyurethane provides a durable, glossy finish but can yellow over time.
- Water-Based Polyurethane dries quickly and retains the wood’s natural color but may not be as durable as oil-based.
- Wax provides a natural finish but requires more maintenance and is less resistant to spills.
- Hardwax Oil penetrates the wood and hardens, providing a protective surface that is also easy to repair.
Maintenance
Proper care is essential to maintain the beauty and longevity of wood floors. Regular sweeping and occasional mopping with a wood floor cleaner will keep the surface clean. Avoiding excessive water and sharp objects can prevent damage. Additionally, using furniture pads can help prevent scratches.
Installation and Sanding
Proper installation is crucial for the longevity of wood floors, ensuring they are laid flat and securely. Sanding is often a necessary step in both installation and refinishing, requiring attention to detail and the right tools to achieve a smooth surface. Understanding the importance of factors such as buffing speed, as mentioned earlier, is vital in this process.
Understanding wood floors involves recognizing the various types of wood and construction options, knowing the different finishes available, and maintaining proper care and maintenance practices. Whether you are a homeowner or a professional in the flooring industry, this knowledge is essential for ensuring that wood floors remain a durable and attractive option for flooring.
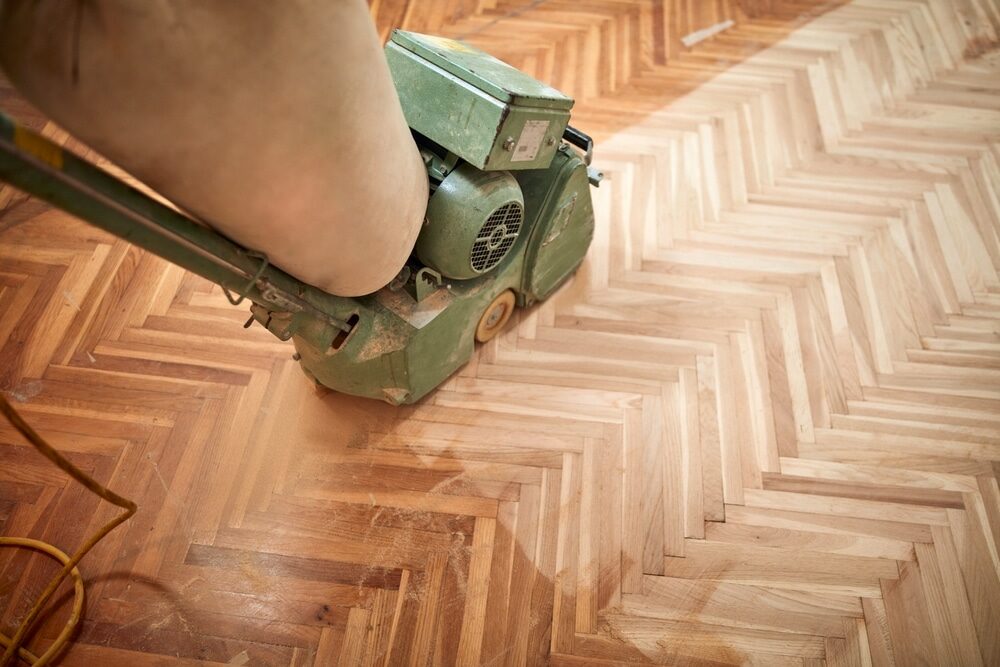
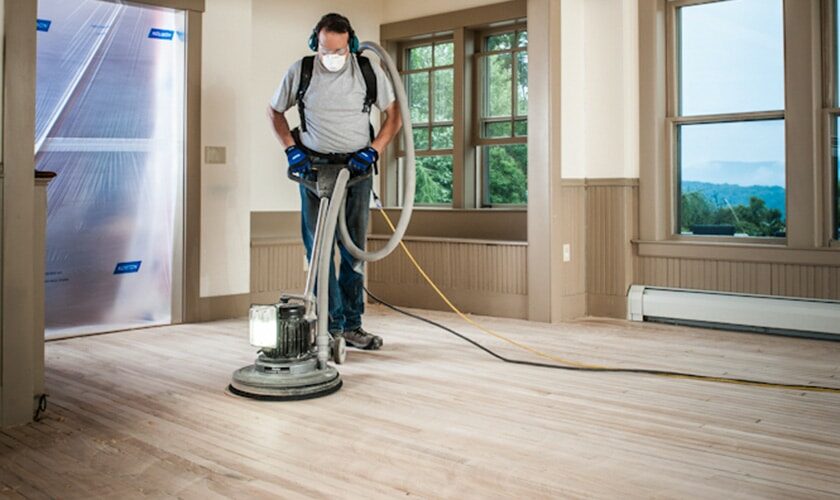
Basics of Floor Sanding
Floor sanding is a multi-step process that involves the removal of the old finish, smoothing the wood, and preparing it for a new finish. It’s an essential task for restoring old wood floors or prepping new ones. Here’s a guide to understanding the basics of floor sanding:
Equipment Needed
- Drum Sander: A large, powerful sander used for the initial sanding to remove old finishes and level the floor.
- Edger: A smaller, handheld sander used to sand the edges of the room where the drum sander can’t reach.
- Buffer: Used for the final sanding to smooth the floor before finishing.
- Vacuum: To clean up dust between sanding stages and before applying the finish.
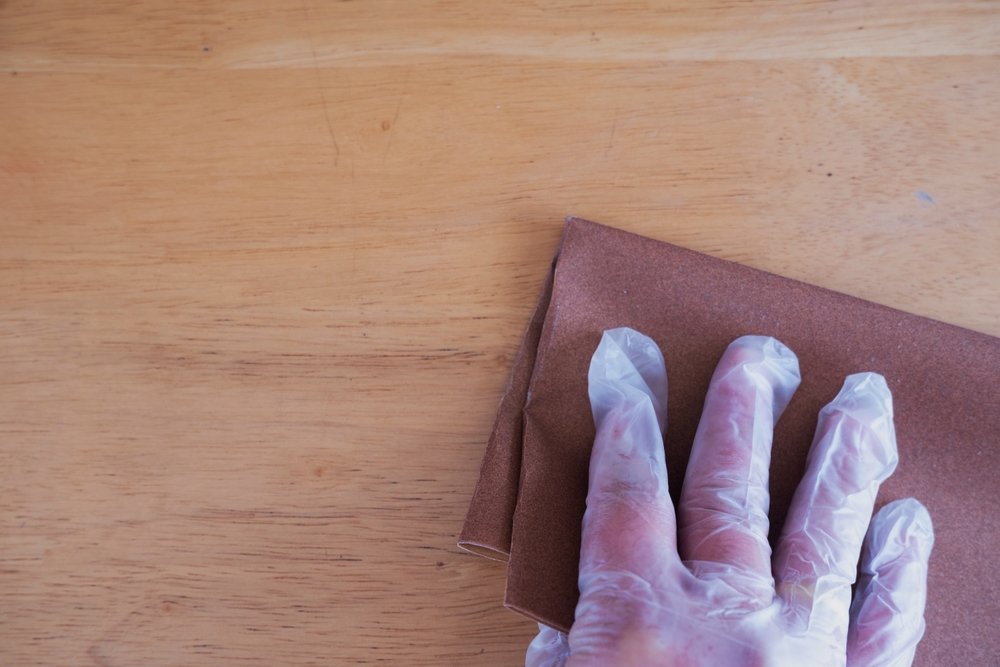
- Sandpaper: Various grits, from coarse to fine, are used throughout the process.
Safety Precautions
- Wear a dust mask or respirator to avoid inhaling dust.
- Use ear protection to guard against the loud noise of the machinery.
- Ensure the room is well-ventilated to help clear dust.
Sanding Process
- Preparation: Remove all furniture, nails, and anything else on the floor. Ensure the floor is clean and ready for sanding.
- Coarse Sanding: Start with a coarse-grit sandpaper (e.g., 36 or 40 grit) to remove the old finish and level the floor. Move the drum sander along the grain of the wood, overlapping each pass.
- Edge Sanding: Use the edger to sand the perimeter of the room and any other areas the drum sander couldn’t reach.
- Medium Sanding: Switch to a medium-grit sandpaper (e.g., 60 grit) and repeat the process to smooth out any rough areas.
- Fine Sanding: Use a fine-grit sandpaper (e.g., 80 or 100 grit) for the final sanding. This is also when the buffer is typically used to ensure a very smooth surface.
- Vacuum: Thoroughly clean the floor of all dust before applying the finish.
Tips for Successful Sanding
- Always sand along the grain of the wood to avoid scratches.
- Change sandpaper regularly, as dull paper can damage the wood.
- Keep the sander moving to avoid creating dips or gouges in the floor.
- Pay attention to the buffing speed, especially during the final sanding stages, to ensure a uniform finish.
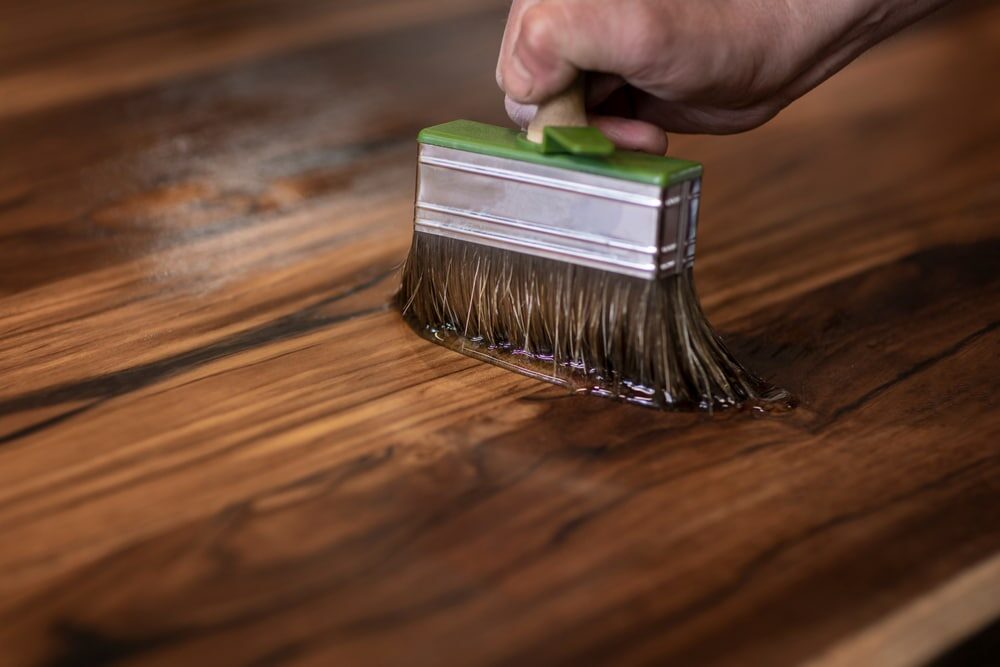
Applying the Finish
Once the floor is sanded and clean, you can apply your chosen finish. This could be a stain, oil, or polyurethane, depending on the desired look and level of protection required.
Floor sanding can be a time-consuming and labor-intensive process, but the results can be well worth the effort, revealing the natural beauty of the wood and providing a durable surface that can last for many years. Whether you’re a DIY enthusiast or a professional, understanding the basics of floor sanding is crucial for achieving the best results.
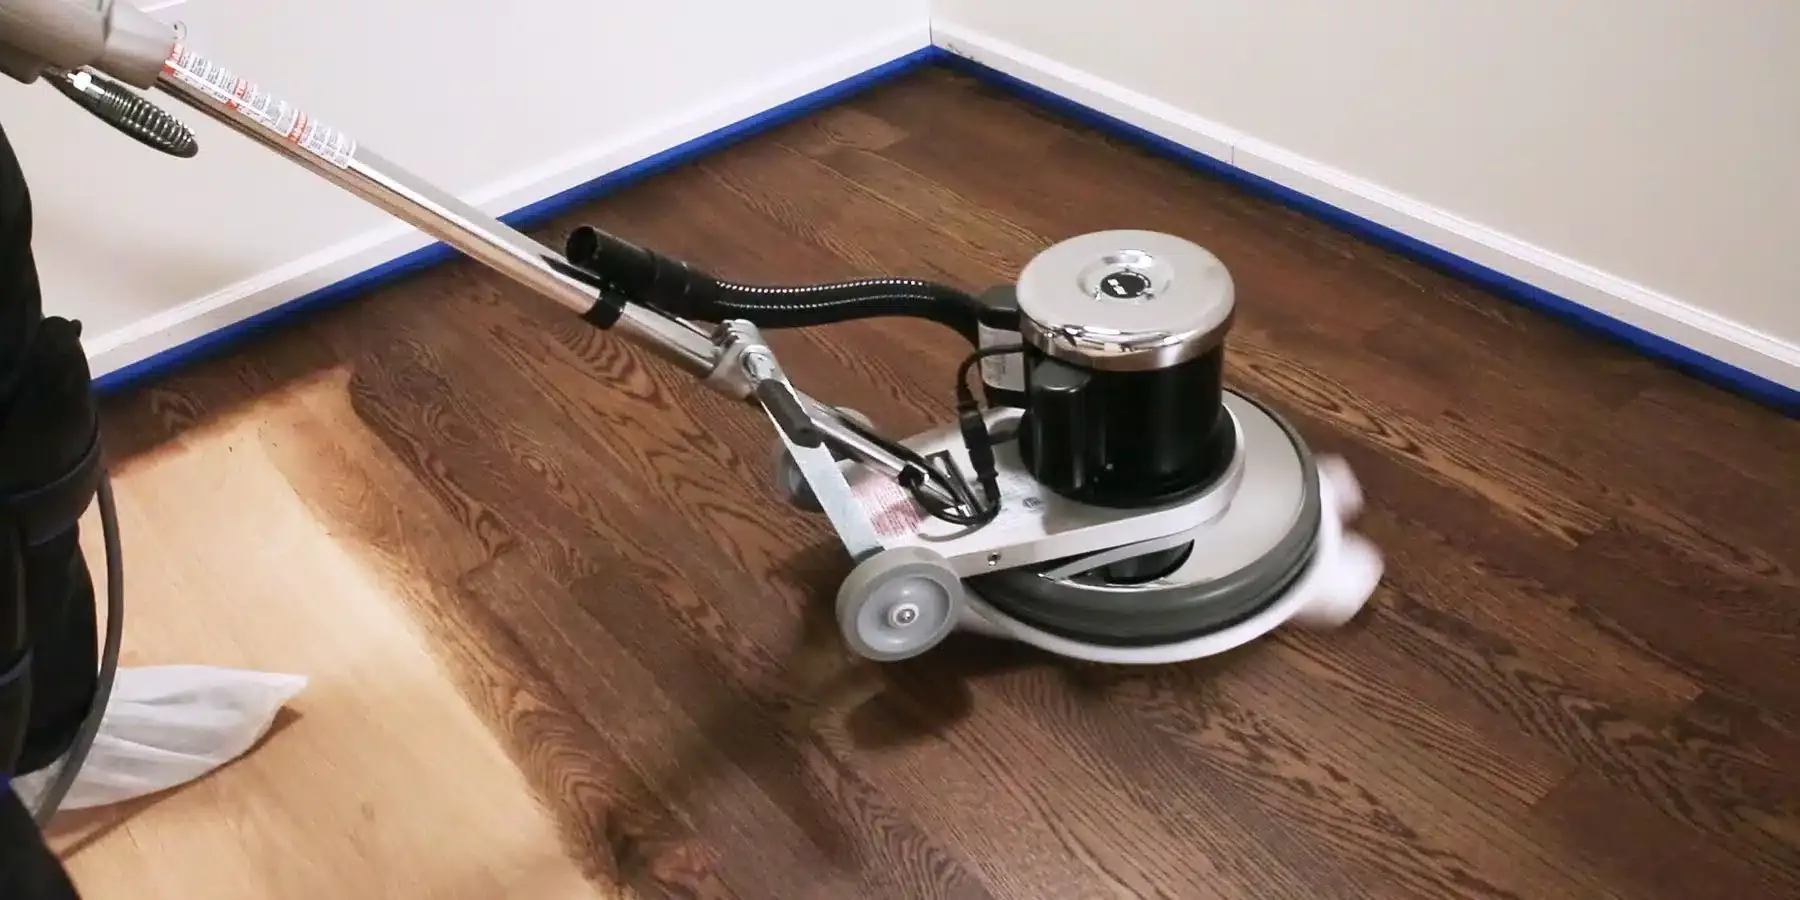
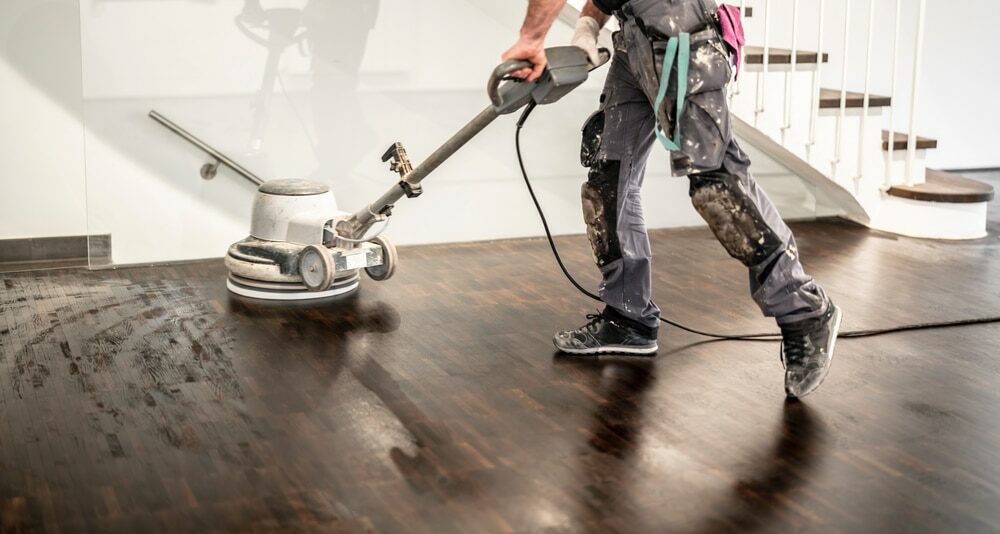
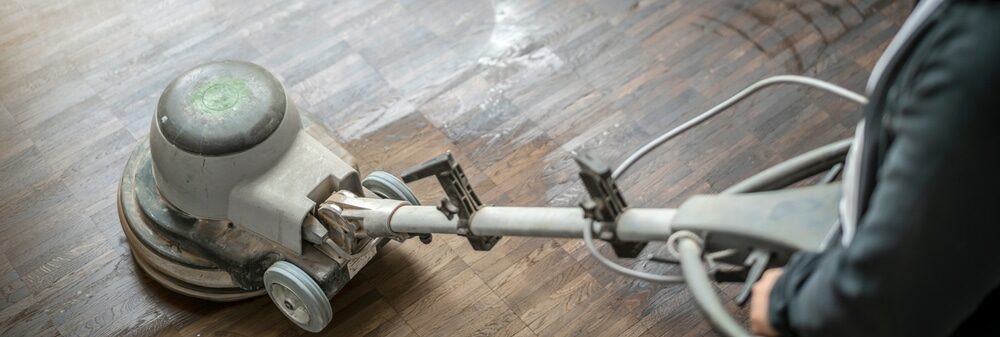
The Role of Buffing in Floor Sanding
Buffing plays a crucial role in the floor sanding process, bridging the gap between the initial, coarse sanding stages and the final application of the finish. It is a critical step to ensure the floor’s surface is perfectly smooth and free from any imperfections that could affect the final appearance and longevity of the finish. Here’s an in-depth look at the role of buffing in floor sanding:
Smoothing the Surface
After the initial sanding stages, the wood floor may still have some rough areas, minor imperfections, or residual scratches. Buffing helps to smooth out these imperfections, creating an even surface that is ready for the finish. It typically involves the use of a floor buffer and finer grit sandpaper or buffing pads.
Removing Sanding Marks
The coarse and medium-grit sandpapers used in the initial sanding stages can leave behind noticeable sanding marks or swirls. Buffing helps to remove these marks, ensuring that they won’t be visible through the final finish.
Preparing for the Finish
A smooth, well-buffed floor ensures that the finish will adhere properly and result in an even sheen. Any residual dust or imperfections on the floor can lead to a finish that is blotchy, uneven, or prone to peeling. Buffing helps to clean and prepare the floor, providing a pristine surface for the finish.
Enhancing Wood Grain
Buffing also plays a role in enhancing the natural beauty of the wood grain. By creating a smooth surface, the buffing process allows the wood’s natural patterns and colors to shine through, ensuring they are displayed to their best advantage once the finish is applied.
Ensuring Longevity
A properly buffed floor is more likely to result in a durable and long-lasting finish. Imperfections in the wood can lead to weak spots in the finish, where it may wear away more quickly or be more prone to damage. By ensuring the wood is perfectly smooth and prepared, buffing helps to extend the life of the finish and, by extension, the floor itself.
Tips for Effective Buffing
- Use the correct grit: Start with a coarser grit and move to a finer grit to ensure all imperfections are removed.
- Keep the buffer moving: To avoid creating dips or gouges in the floor, never let the buffer sit in one spot for too long.
- Check the floor thoroughly: After buffing, inspect the floor closely to ensure all sanding marks and imperfections have been removed.
- Clean thoroughly: Ensure all dust is removed from the floor after buffing, before applying the finish.
Wood Floor Buffing is a vital step in the floor sanding process, essential for creating a smooth, even surface, removing any final imperfections, and ensuring the final finish is flawless and durable. It requires attention to detail and the right technique, but the result is a beautifully finished floor that showcases the wood’s natural beauty and stands up to the rigors of daily life.
Determining the Proper Buffing Speed
Determining the proper buffing speed is a critical aspect of the floor sanding process, as it directly influences the quality of the finish and the longevity of the floor. The buffing speed refers to both the speed at which the buffer machine operates and the rate at which the operator moves the machine across the floor. Here are key factors and guidelines to help determine the optimal buffing speed:
Different wood species have varying levels of hardness, which can affect how quickly or slowly you should buff the floor. Softer woods may require a slower buffing speed to prevent damage, while harder woods may be able to withstand a faster speed.
Grit of Sandpaper or Buffing Pad
- Coarser Grit: If you’re starting with a coarser grit for initial buffing, a slower speed helps ensure that you don’t remove too much material or create scratches that are difficult to remove later.
- Finer Grit: As you progress to finer grits, you can increase the speed slightly, but maintaining control is crucial to ensure a uniform finish.
Condition of the Floor
If the floor is in poor condition with many imperfections, starting with a slower buffing speed can help address these issues without causing additional damage. For floors in better condition, a standard speed can be more efficient.
Desired Finish
The buffing speed can also influence the level of sheen in the final finish. A slower buffing speed can result in a smoother surface, which may produce a glossier finish, while a faster speed may leave a more matte finish.
Experience and Control
An experienced operator may be able to effectively control the buffer at a slightly higher speed, while beginners should start at a slower speed to ensure they maintain control and achieve a uniform finish.
Machine Specifications
Refer to the manufacturer’s guidelines for the buffer machine, as different models may have optimal speed settings for different types of sanding and buffing tasks.
Practical Guidelines
- Test in an Inconspicuous Area: Before buffing the entire floor, test the buffer at your chosen speed in a small, inconspicuous area to ensure it produces the desired results.
- Consistent Movement: Keep the buffer moving consistently across the floor, and avoid lingering in one spot to prevent creating dips or uneven areas.
- Gradual Adjustments: If you need to adjust the speed, do so gradually and test the results to ensure you’re moving in the right direction.
By carefully considering these factors and following these guidelines, you can determine the proper buffing speed for your specific floor sanding project, ensuring a smooth, uniform finish and a beautifully restored floor.
Practical Tips for Optimal Buffing
Achieving a flawless finish on a wood floor requires attention to detail and proper technique during the buffing process. Here are some practical tips to ensure optimal buffing and a superb final result:
1. Choose the Right Equipment
Select a high-quality buffer and the appropriate pads or sandpaper for your specific floor type and condition. Ensure that the equipment is in good working order and that pads or sandpaper are replaced as needed to maintain efficiency.
2. Prep the Floor Thoroughly
Before buffing, ensure that the floor is clean and free from any debris, nails, or other objects that could damage the buffer or the floor. Any previous finish should be completely removed, and the floor should be smooth and even.
3. Start with the Correct Grit
Begin buffing with the correct grit level for your floor’s condition. If there are significant scratches or imperfections, start with a coarser grit and gradually work your way to a finer grit to smooth out the surface.
4. Maintain Consistent Movement
Keep the buffer moving consistently across the floor, overlapping each pass to ensure full coverage. Avoid lingering in one spot, as this can create dips or uneven areas in the floor.
5. Follow the Grain of the Wood
Whenever possible, move the buffer in the direction of the wood grain. This helps to reduce the visibility of any potential scratches or imperfections and enhances the natural beauty of the wood.
6. Use the Right Speed
Determine the optimal buffing speed based on the type of wood, the condition of the floor, and the desired finish. Maintain a consistent speed throughout the process to ensure an even finish.
7. Check Your Progress
Regularly check your progress to ensure that all scratches and imperfections are being removed and that the floor is developing a smooth, even finish. Adjust your technique or equipment as needed.
8. Keep the Buffer Clean
Regularly check the buffer and pads or sandpaper for any build-up of dust or debris, which can cause scratches or uneven buffing. Clean or replace pads and sandpaper as needed.
9. Be Mindful of Corners and Edges
Pay special attention to corners and edges, as these areas can be more challenging to buff evenly. Use the appropriate tools and techniques to ensure these areas are properly addressed.
10. Vacuum Thoroughly After Buffing
Once buffing is complete, thoroughly vacuum the floor to remove all dust and debris. This ensures that the final finish can be applied to a clean, smooth surface, resulting in a superior final appearance.
By following these practical tips, you can ensure optimal buffing and a beautiful, durable finish on your wood floor. The buffing process requires patience and attention to detail, but the end result is well worth the effort, resulting in a floor that looks as good as new.
Common Mistakes and How to Avoid Them
Buffing is a crucial step in the floor refinishing process, and while it can yield beautiful results, there are common mistakes that can lead to less than satisfactory outcomes. Here’s a guide on some of these potential pitfalls and how to avoid them:
1. Using the Wrong Grit Sandpaper
- Mistake: Starting with too fine or too coarse a grit can either be ineffective or cause damage to the floor.
- Solution: Always start with the appropriate grit level for your specific floor condition and progressively move to finer grits.
2. Not Changing Sandpaper or Buffing Pads Regularly
- Mistake: Using worn-out sandpaper or buffing pads can lead to uneven buffing and damage to the floor.
- Solution: Regularly check and replace sandpaper or buffing pads to ensure they are in good condition.
3. Buffing Too Quickly or Too Slowly
- Mistake: Moving the buffer too quickly can result in an uneven finish, while too slow can cause damage to the floor.
- Solution: Maintain a consistent, moderate speed, and pay attention to the floor’s response to find the optimal pace.
4. Not Overlapping Passes
- Mistake: Failing to overlap passes can leave unbuffed areas, resulting in an uneven finish.
- Solution: Ensure each pass of the buffer slightly overlaps the previous one to cover the entire floor evenly.
5. Ignoring the Corners and Edges
- Mistake: Neglecting to properly buff the corners and edges of the room can leave noticeable imperfections.
- Solution: Use hand tools or a smaller buffer to ensure these areas are as smooth and well-finished as the rest of the floor.
6. Failing to Remove All Residual Dust
- Mistake: Leaving dust on the floor before applying the finish can result in a rough surface.
- Solution: Thoroughly vacuum and wipe down the floor after buffing to ensure all dust is removed.
7. Buffing Against the Grain
- Mistake: Buffing against the grain of the wood can result in scratches that are difficult to remove.
- Solution: Always buff in the direction of the wood grain whenever possible.
8. Not Testing the Buffer and Speed
- Mistake: Starting to buff without testing the equipment and speed settings can lead to errors.
- Solution: Test the buffer in an inconspicuous area to ensure it’s working properly and the speed is appropriate.
9. Applying Uneven Pressure
- Mistake: Applying uneven pressure can result in dips or waves in the floor.
- Solution: Use even pressure throughout the buffing process and pay attention to maintaining consistent contact with the floor.
10. Rushing the Process
- Mistake: Trying to complete the buffing too quickly can lead to mistakes and an uneven finish.
- Solution: Take your time and focus on achieving a smooth, even surface, even if it requires additional passes.
Avoiding these common mistakes requires patience, attention to detail, and the right tools and materials. By taking the time to buff the floor properly, you can ensure a beautiful, long-lasting finish that highlights the natural beauty of the wood.
Conclusion
In conclusion, the process of buffing during wood floor sanding is an indispensable step that significantly contributes to the overall quality and longevity of the floor’s finish. It necessitates a meticulous approach, including the selection of the appropriate equipment, maintaining a consistent buffing speed, and following the grain of the wood. Understanding the nuances of different wood types and conditions is crucial, as it informs the choice of buffing pads or sandpaper grit, ensuring that the floor is smoothed without causing any damage.
Common mistakes during buffing, such as using worn-out pads, neglecting edges and corners, or failing to remove all residual dust, can lead to suboptimal results. However, these pitfalls can be effectively avoided through vigilance, proper technique, and a thorough understanding of the buffing process.
The effort and attention to detail invested in the buffing process pay off in the form of a floor that not only shines aesthetically but also stands up to the rigors of daily use, retaining its integrity and appearance over time. The final result is a testament to the skill and care applied during the buffing stage, underscoring its pivotal role in the broader floor sanding and refinishing process.


Sanding
We provide virtually dust-free sanding with our continuous belt machinery with mobile extraction units, giving you a safer environment for your family.
Oiling
This organic finish not only adds beauty to your home but also has exceptional water-repellent characteristics, making it easier to clean and maintain.
Waxing
This natural floor finish offers the softest and most mellow appearance – and leaves your floor able to breath.
Buffing
Using soft buffing machines (and hand-polishing where required) will bring a wonderful sheen to your newly-finished floor.
Repairs
We offer a full assessment of your wooden floors to determine what repairs are needed to provide the perfect working surface for the later stages of sanding, staining and sealing.
Restoration
We offer a comprehensive restoration process designed to address floors that are improperly fitted or damaged over time through wear and tear.
Request a fixed price quote for your wood floor restoration now
Simply enter your postcode below to get started.
Services
Wood Floor Sanding Wood Floor Restoration Wood Floor Scratch Repair Squeaky Wood Floor Repair Parquet Floor Sanding Parquet Floor Restoration Commercial Floor Sanding Church Floor Sanding Community Centre Floor Sanding School Floor Sanding Gap Filling Gap Filling with ResinCopyright © Mr Sander®
Privacy & Cookies Terms & Conditions Complaints Procedure Cancellation Rights Sitemap

Get An Instant Price Estimate Before You Go…
Simply enter the rooms you need sanded and we’ll provide you with a price estimate instantly! Try our price calculator now.
Get a Price Estimate NowLocal Floor Sanding Experts
Over 500 5-Star Reviews
Safe, Dust Free Sanding
Operating Since 1994